 Something that has become very important to me is developing a sense of community for me and my kids. Community has sort of always taken a back burner to our other pursuits, namely building, nurturing and growing a career.
We've moved many many many times in order for The Chef to be able to take the jobs we felt were critical in the early days of his career. In fact, M1 went to a different school every year of his life until he was in fifth grade. At that point we felt he'd been uprooted enough and we promised that this would be the last move we would make until he graduated high school.
He's a sophomore now, and what I realize is that I've set down roots. My own family has moved 1500 miles away and suddenly they're no longer the magnet that draws me back home. I have to make my own home, and in a lot of ways, my own family.
I'm so lucky that I've found a group of friends that are so much more than friends to me. They're truly the family I would choose if I got to go out and hand-pick them, and I guess, that's exactly what I did. They care about me and they're concerned about my kids and they go above and beyond to be supportive in ways that I don't even think they understand are so important to me and The Chef. For instance, we're in Chicago, an area jam packed with restaurants of every type, and yet when it's a special occasion (or even if they're just going out to dinner) they make a point of going to The Chef's restaurant.
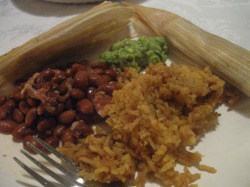
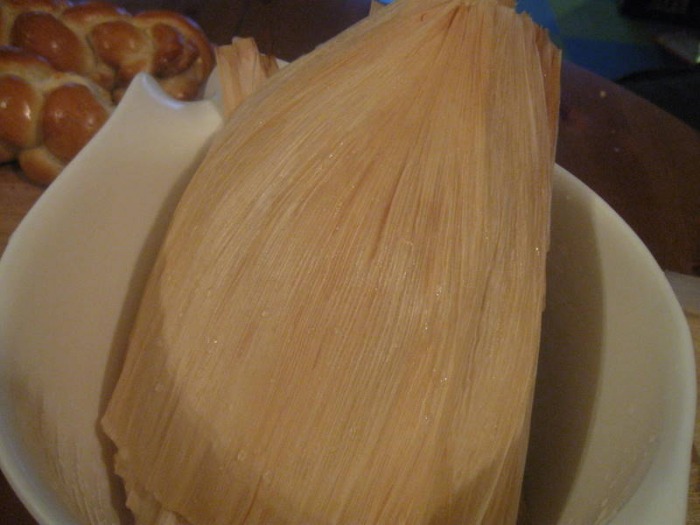
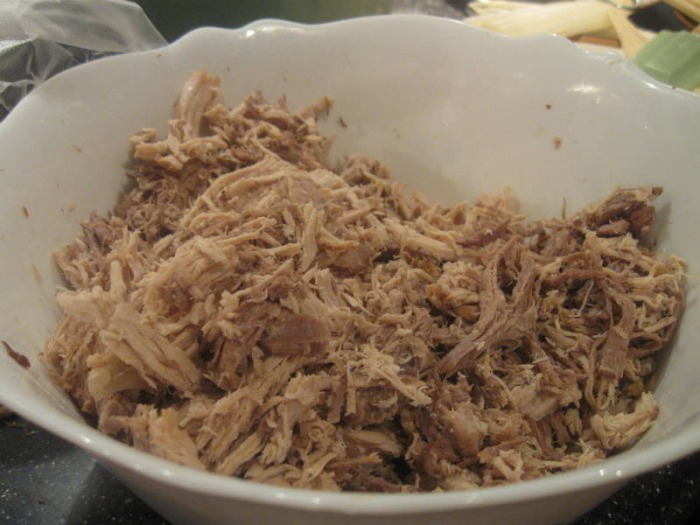
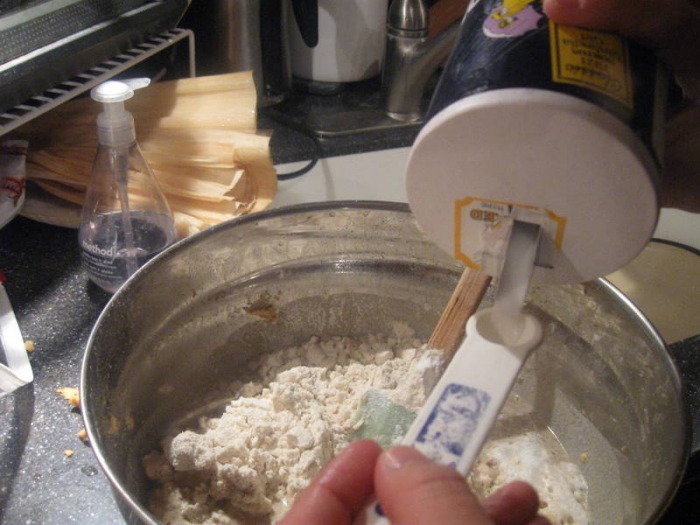
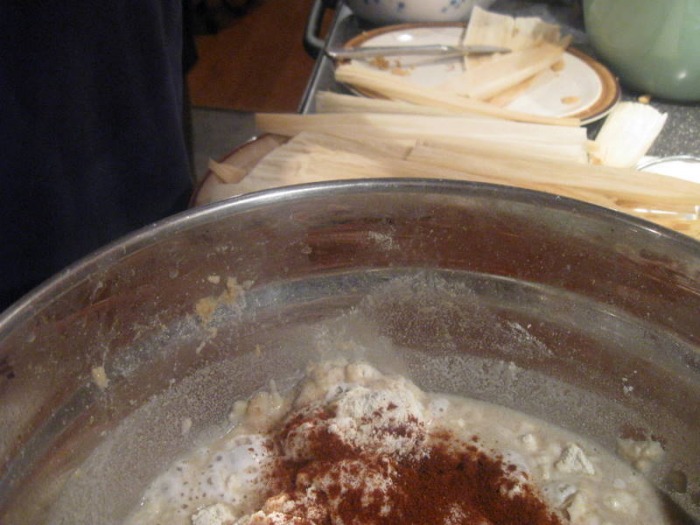
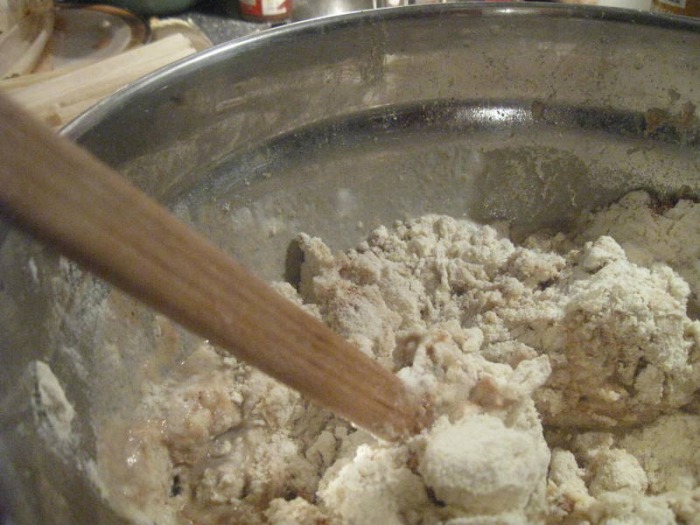
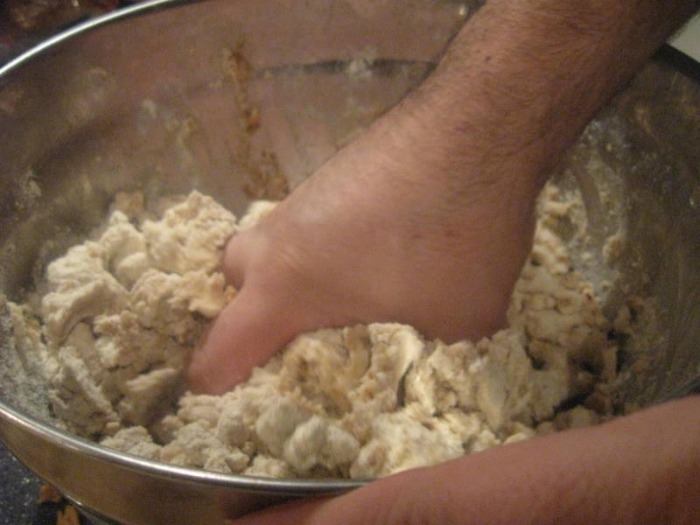
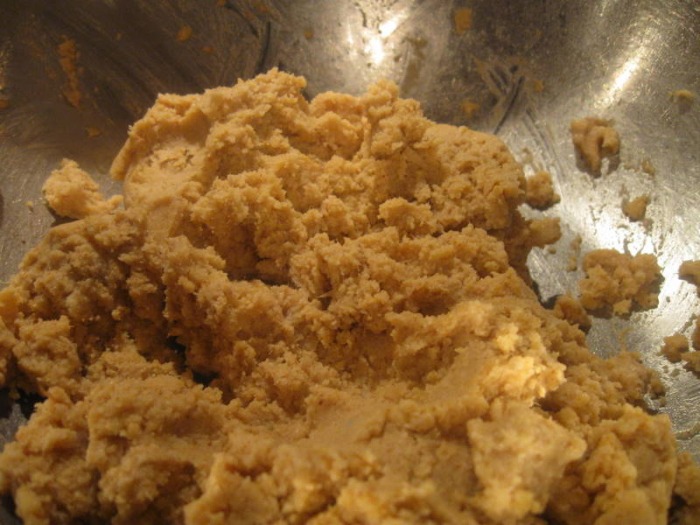
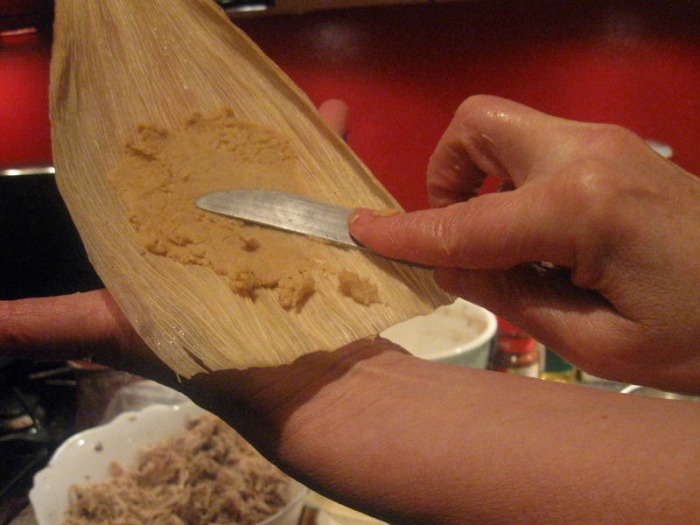
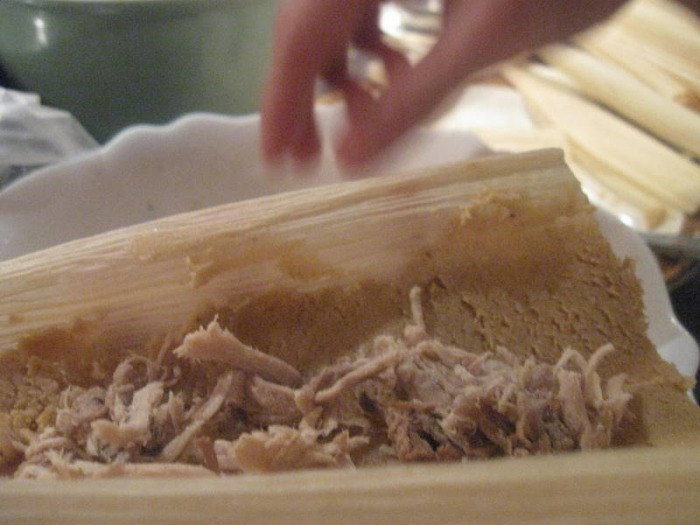
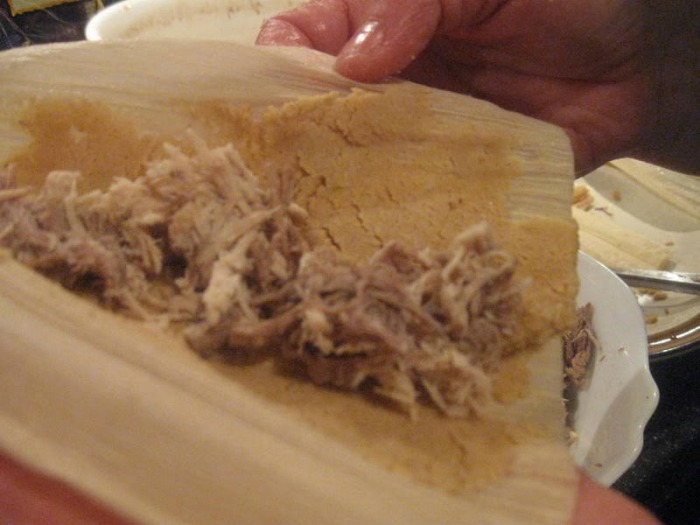
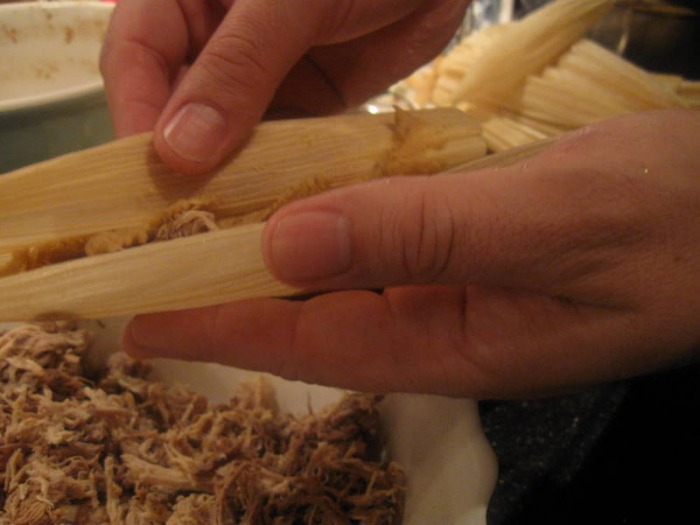
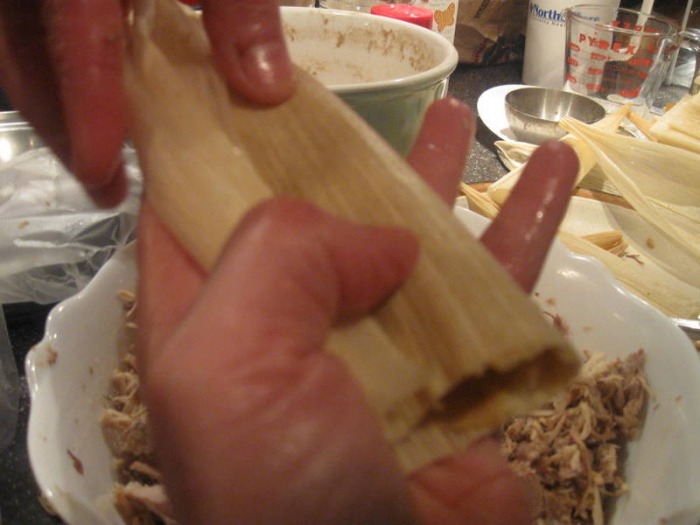
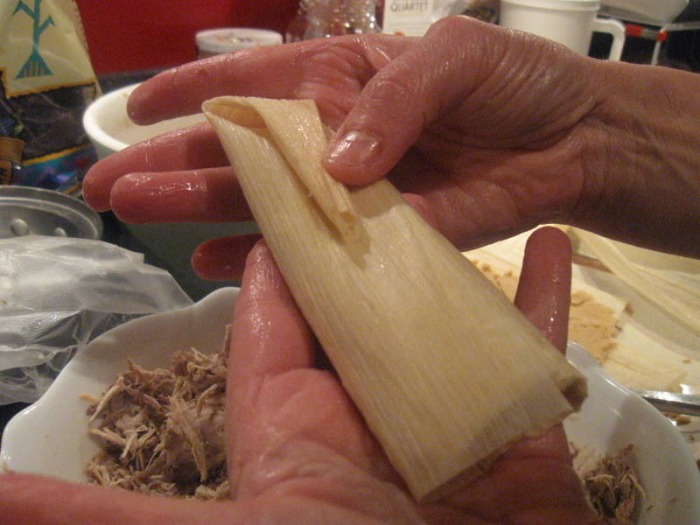
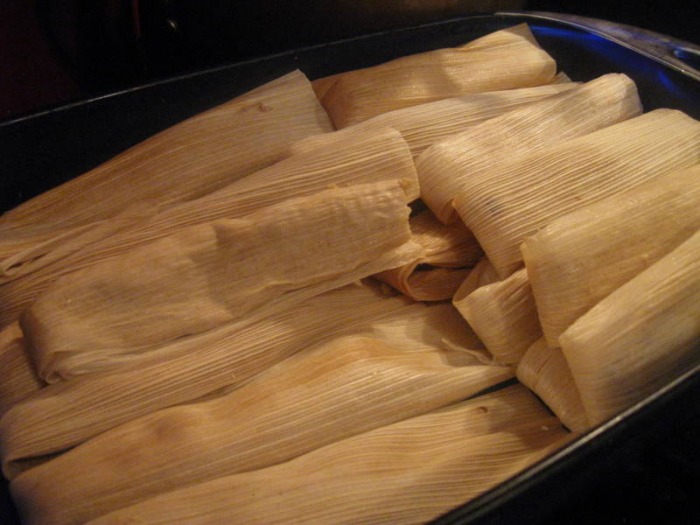
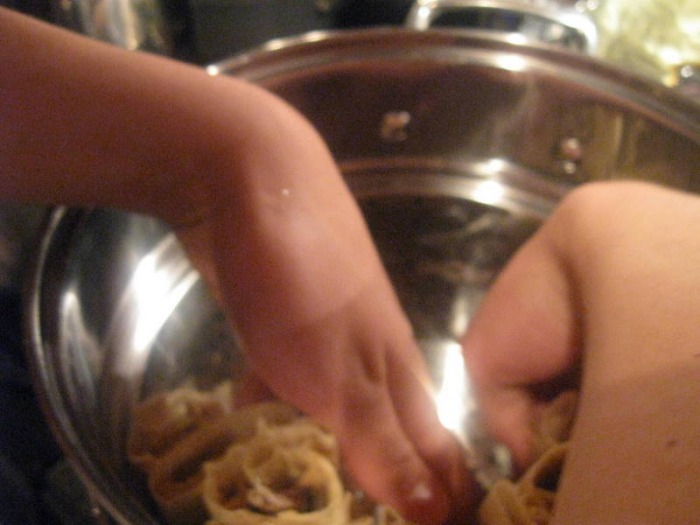
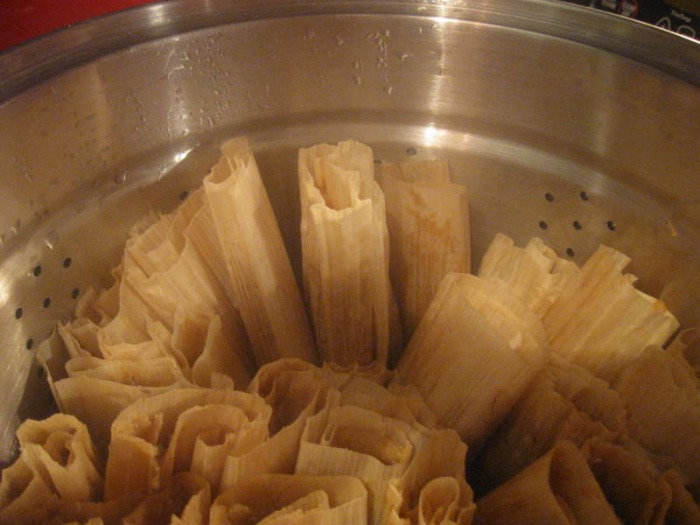
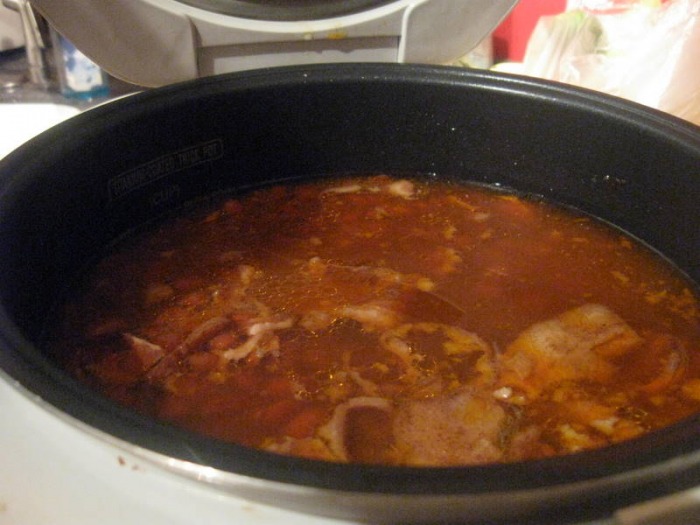
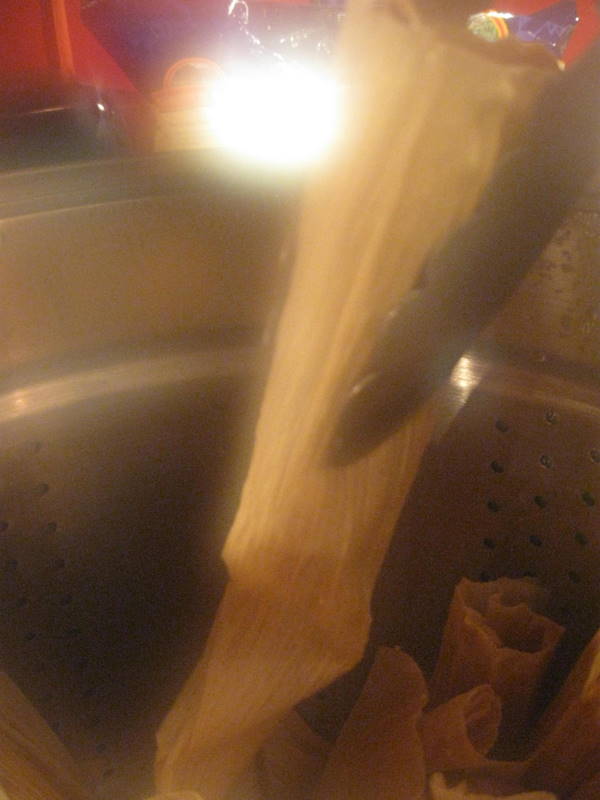
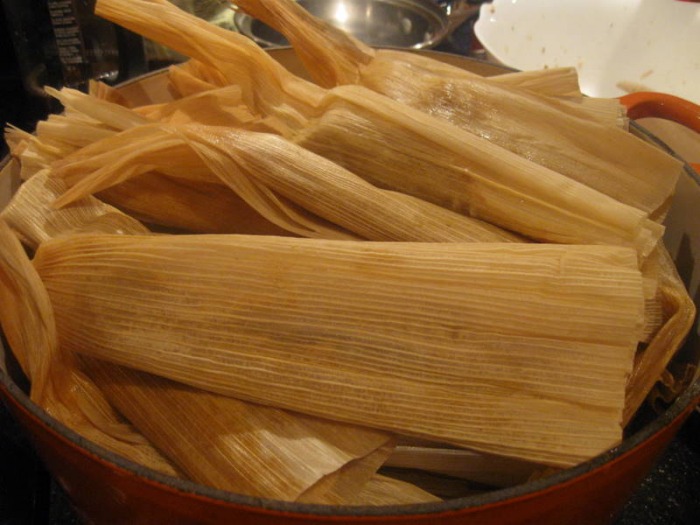
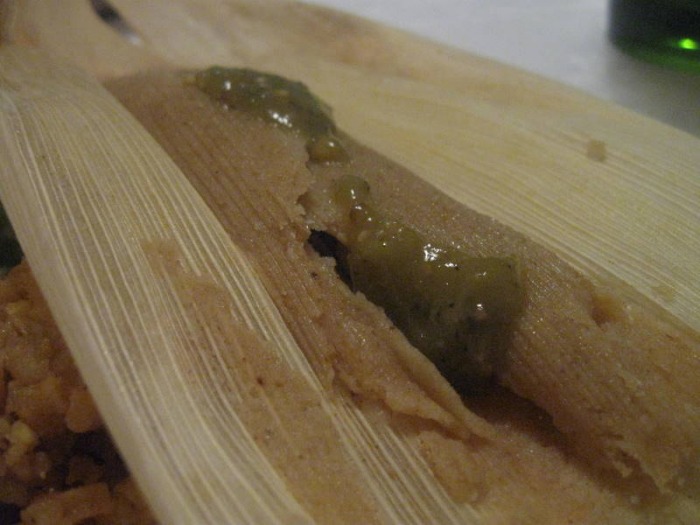
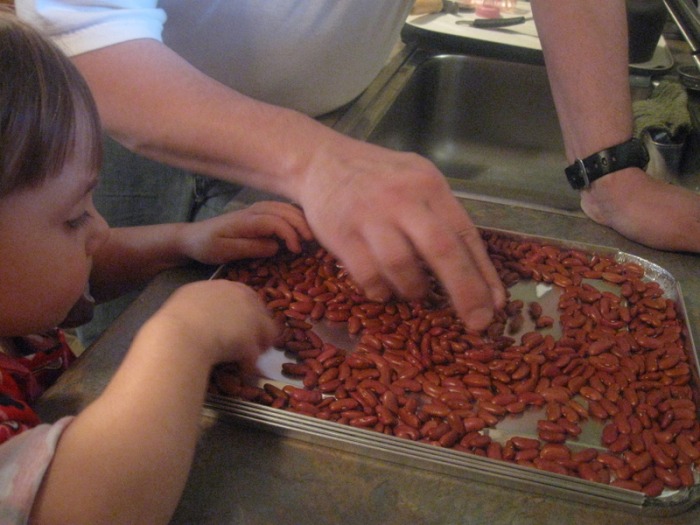
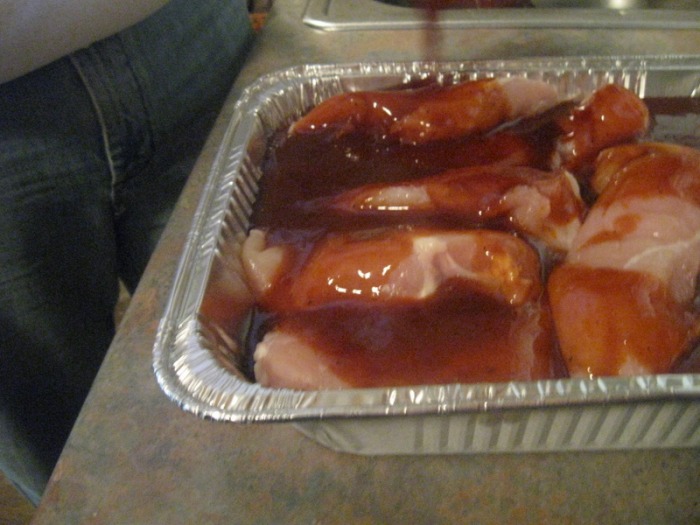
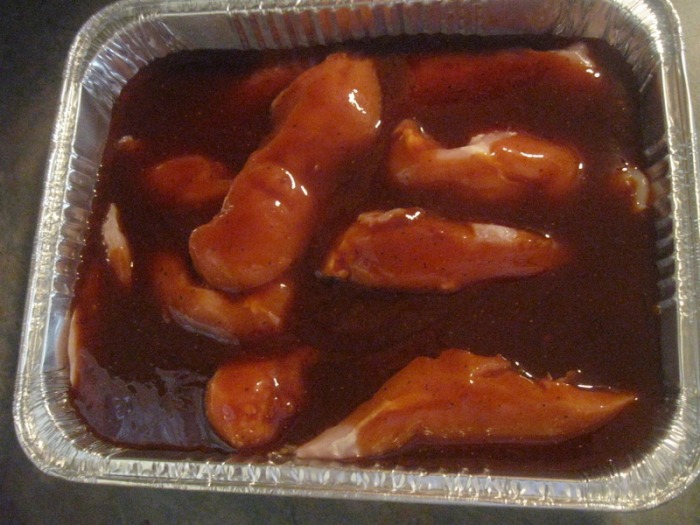
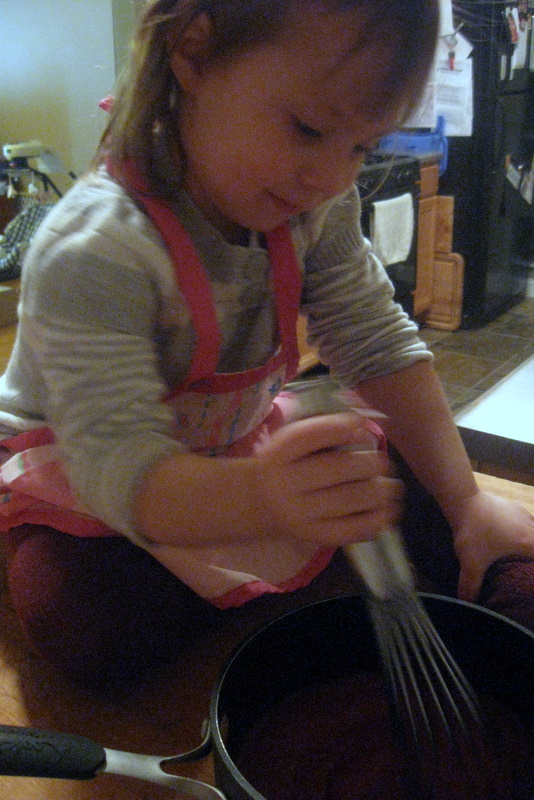
So, in that spirit, the kids and I were invited to our friends home to make tamales with their family and several of their friends. There was such a sense of community and family that when we discovered that M1 hadn't memorized the poem that he needed to recite as part of his English final exam (THE NEXT DAY) that we all worked with him to memorize it while we made the tamales. Sounds exactly like family.
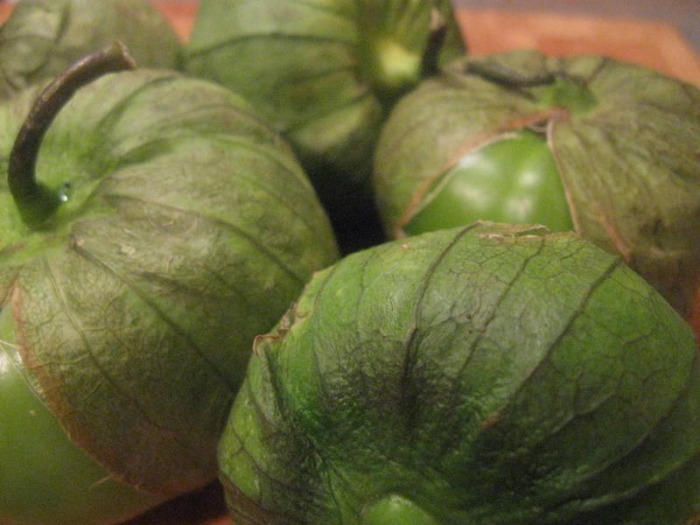
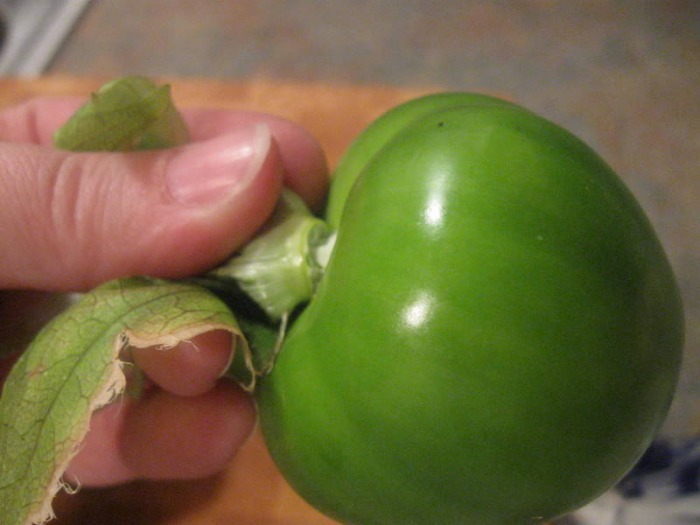
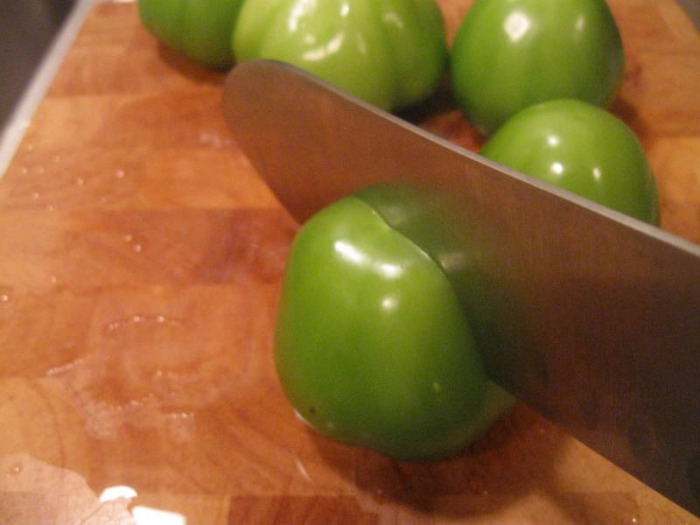
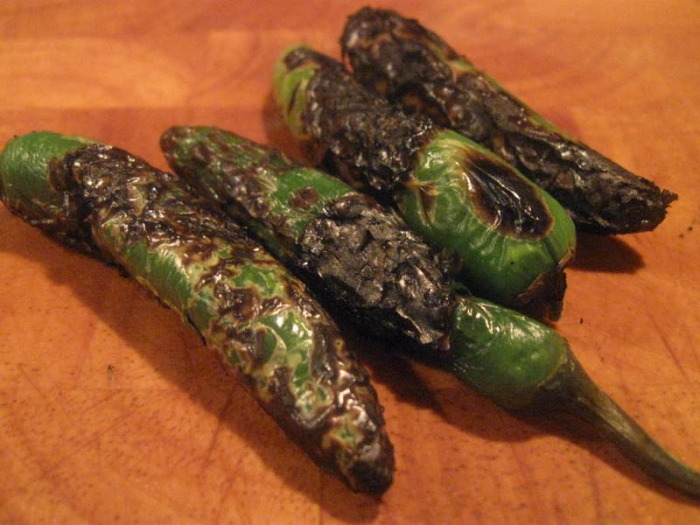
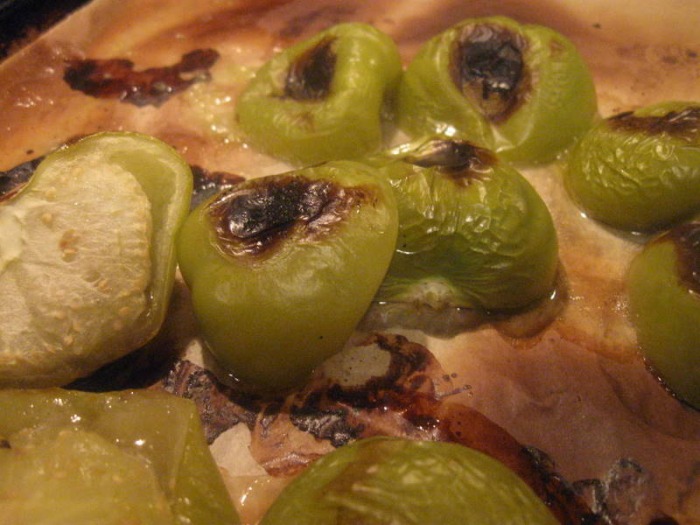
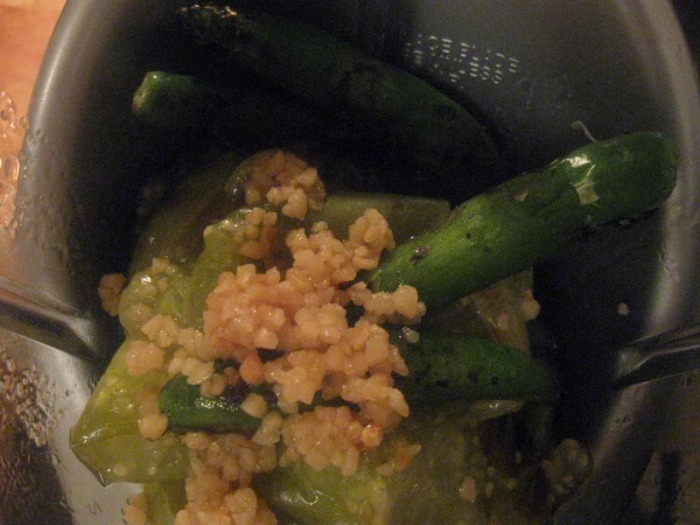
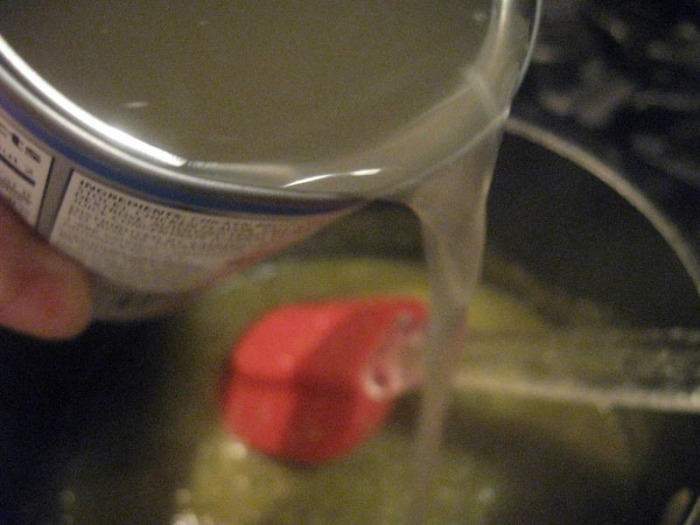
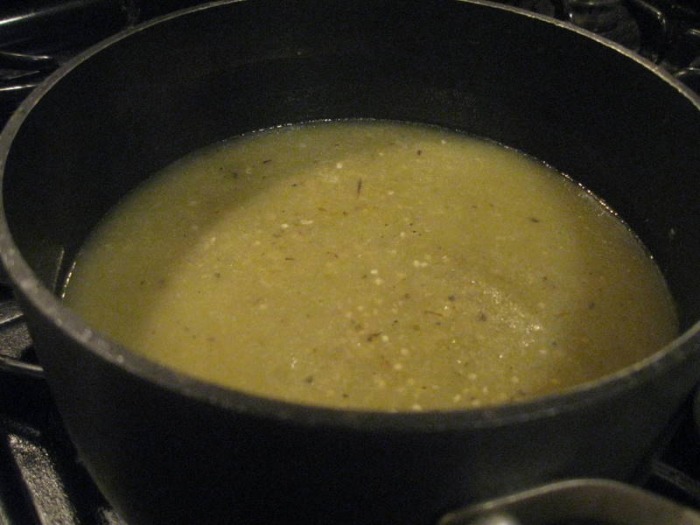
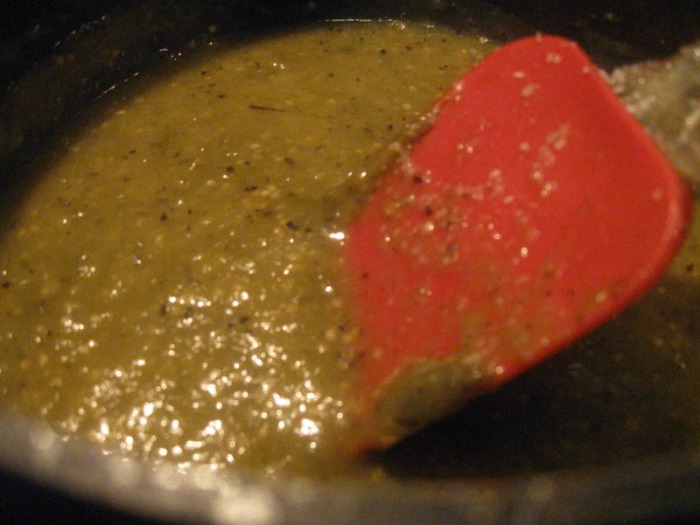
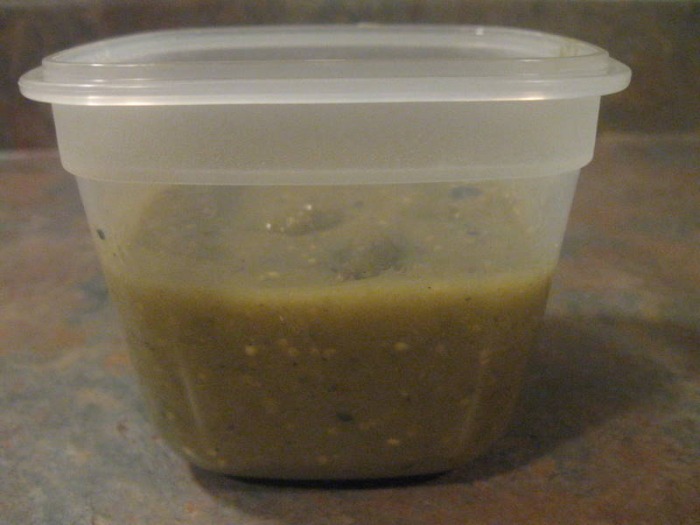
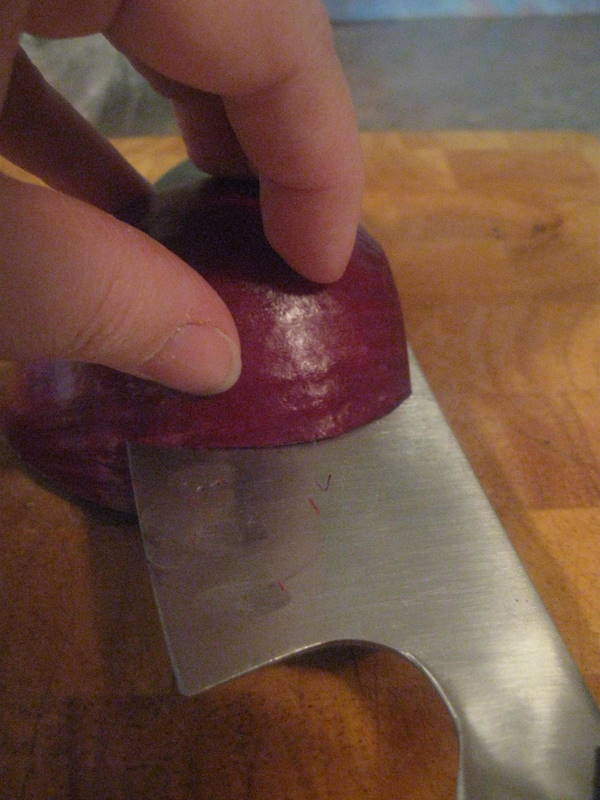
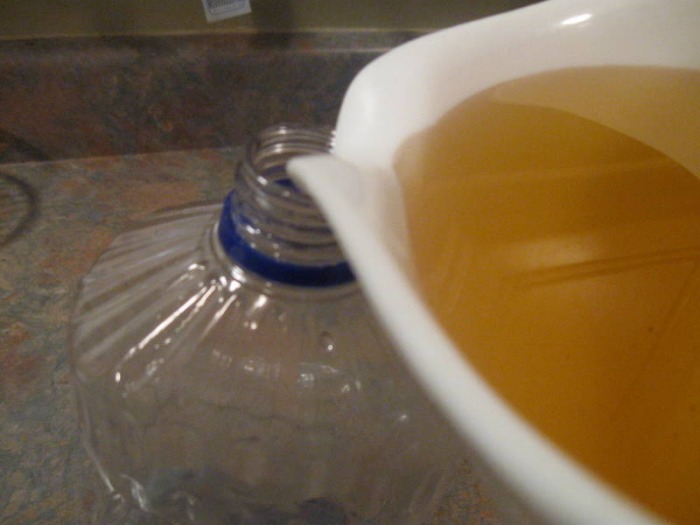
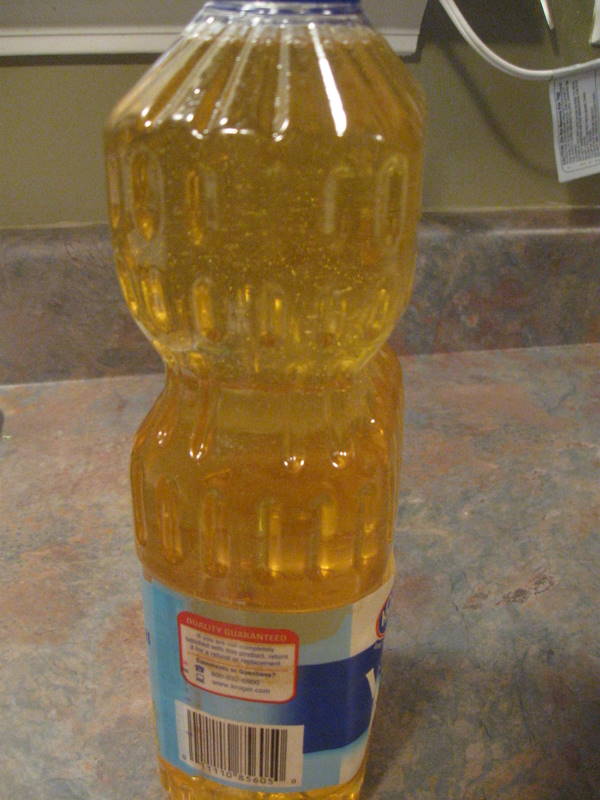
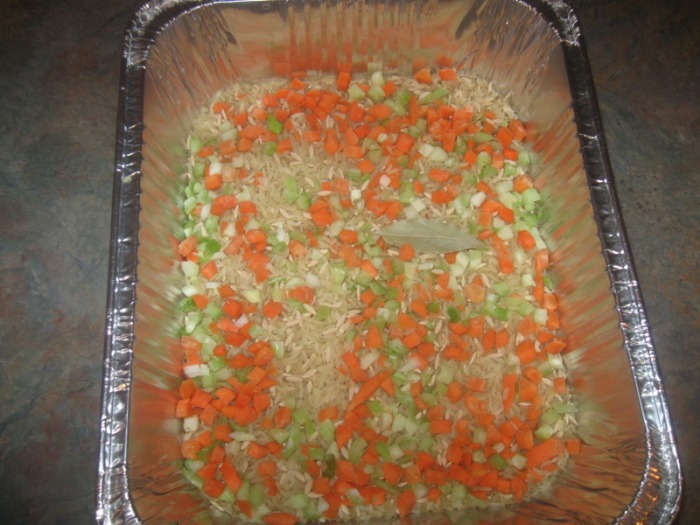
My assignment was to bring the green chile sauce to go with the tamales. I've never made green chile sauce, so I turned to good old google and found a recipe that sounded like it would work. Let me tell you, it did more than work! It was dee-yish-iss, as M2 would say! My entire house smelled like a Mexican restaurant while it was cooking, and unfortunately because I was making it the day before and had nothing to put it on I had to wait an entire day before I got to truly enjoy it... but it was worth the wait!
I mostly chatted and didn't really take part in the tamale making so I can't really tell you exactly how to do it, but I did take pictures and there are a million places online that can tell you how to do it. What I will say is that you should gather your group of special people and try it out. It doesn't have to be tamales, it can be anything that requires a bunch of hands to make it and mouths to eat it. It's a great way to spend the day!
-The Baker
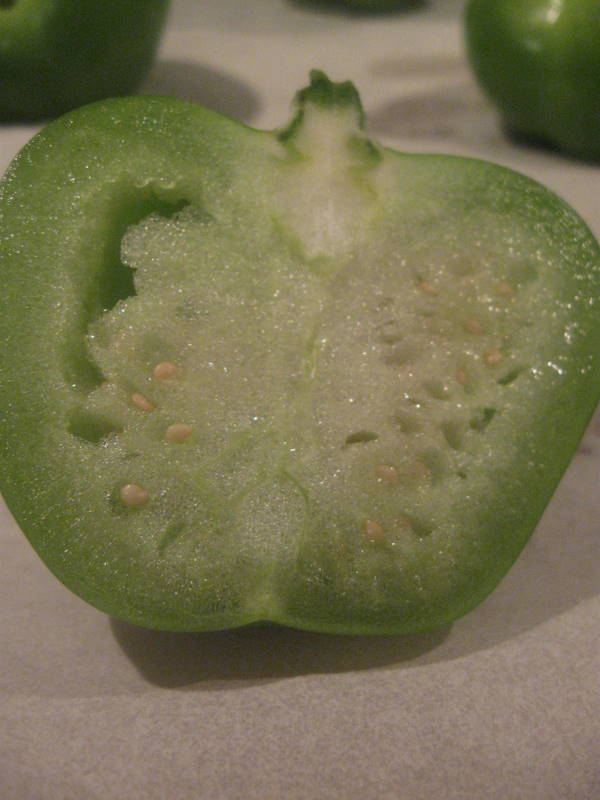
Recipe from Epicurious.com(my changes are in italics)- 1 pound tomatillos, husked, rinsed
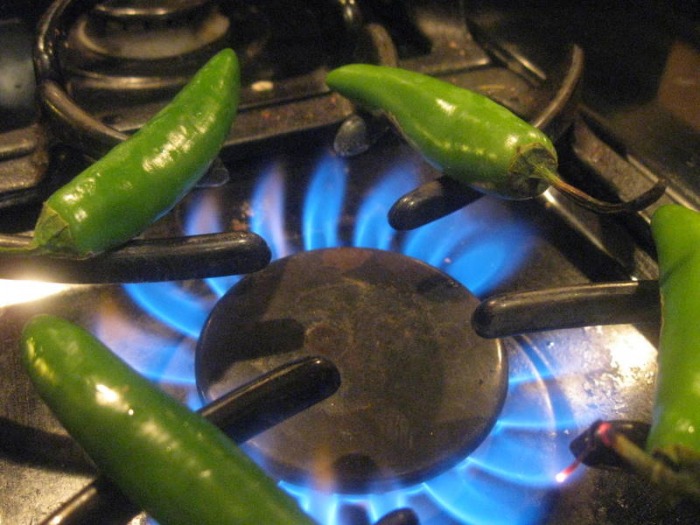
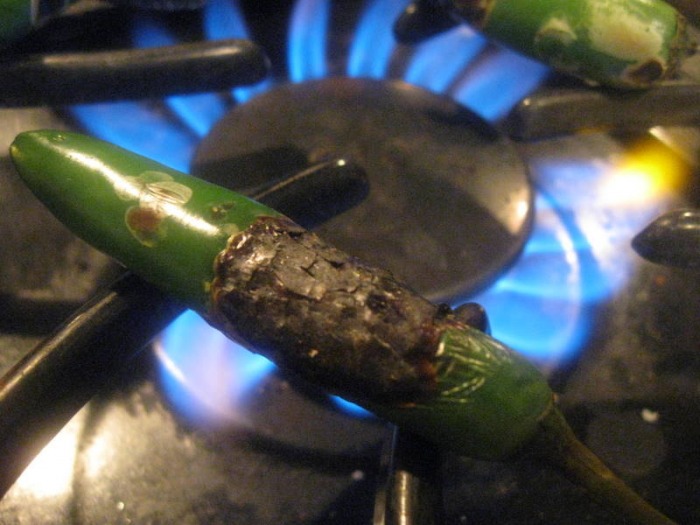
- 4 - 3" long serrano chiles, stemmed, chopped (I roasted mine over an open flame to develop a little more flavor)
- 4 large garlic cloves, chopped
- 1 1/2 T olive oil
- 2 cups low-salt chicken broth
- 2/3 cup chopped fresh cilantro
- preheat broiler
- line heavy baking sheet with foil (I lined my pan with parchment paper); arrange tomatillos on prepared sheet
- broil until tomatillos blacken in spots, turning once, about 5 minutes per side
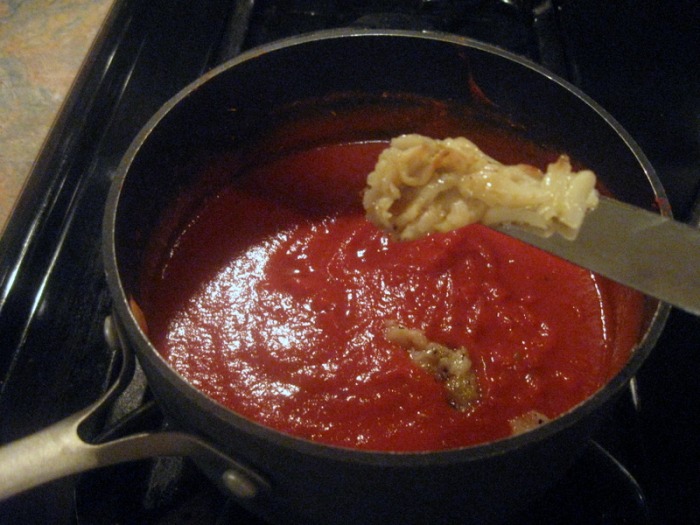
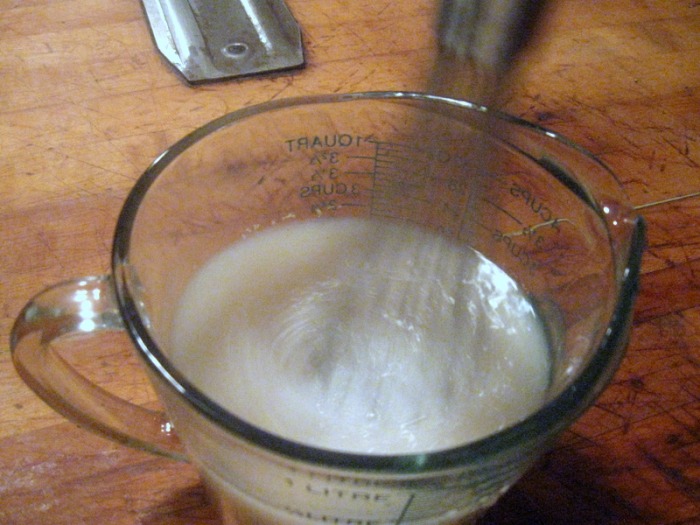
- transfer tomatillos and any juices on sheet to a food processor and cool (I used a blender)
- add chiles and garlic to processor and blend until smooth puree forms
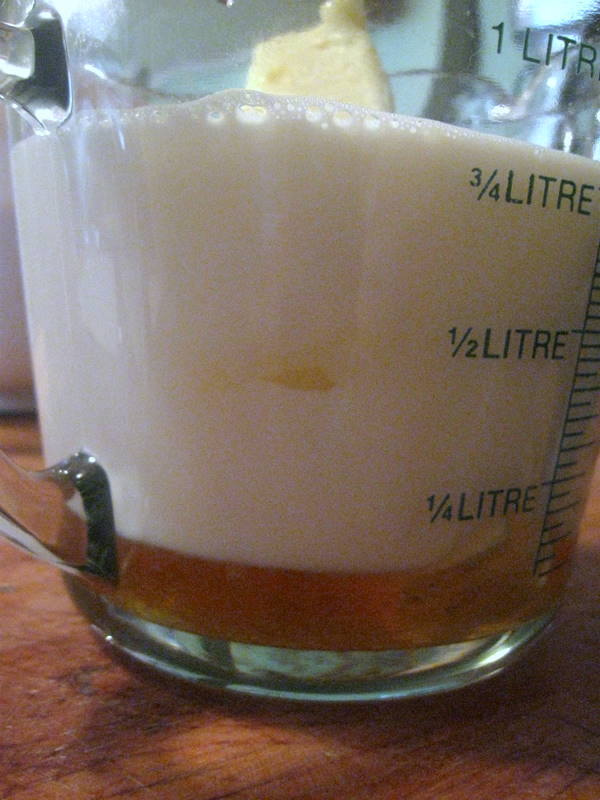
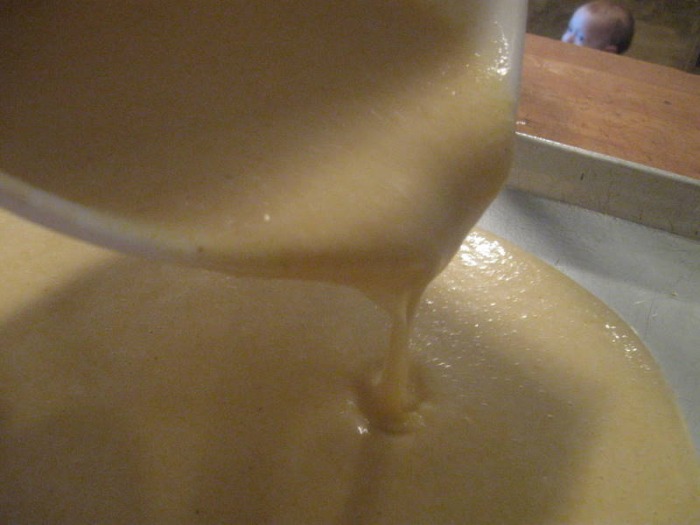
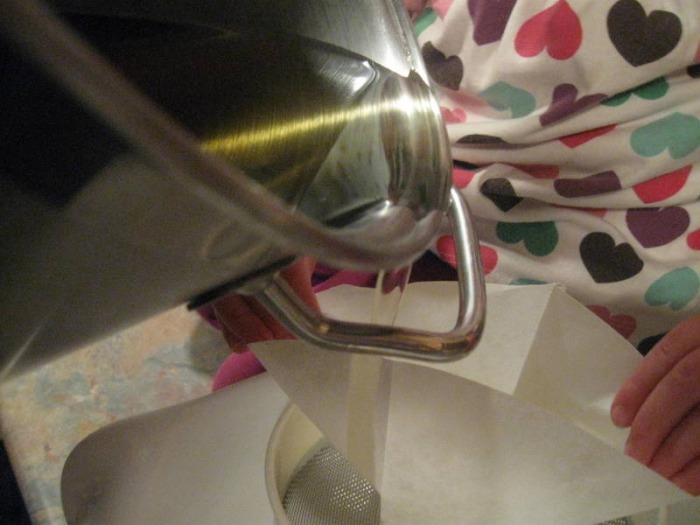
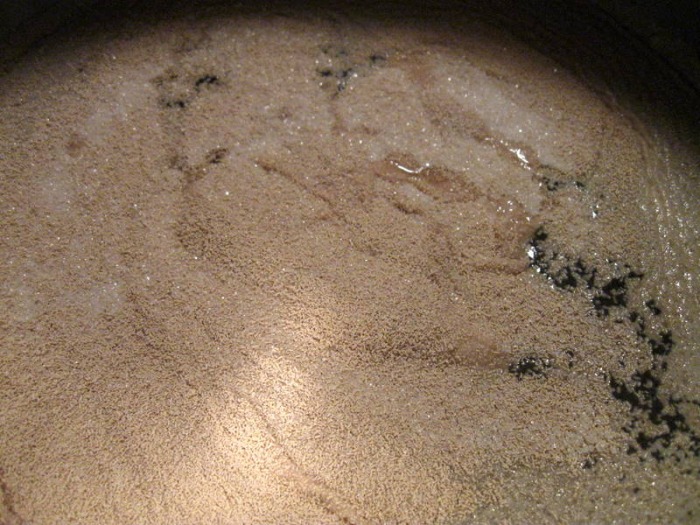
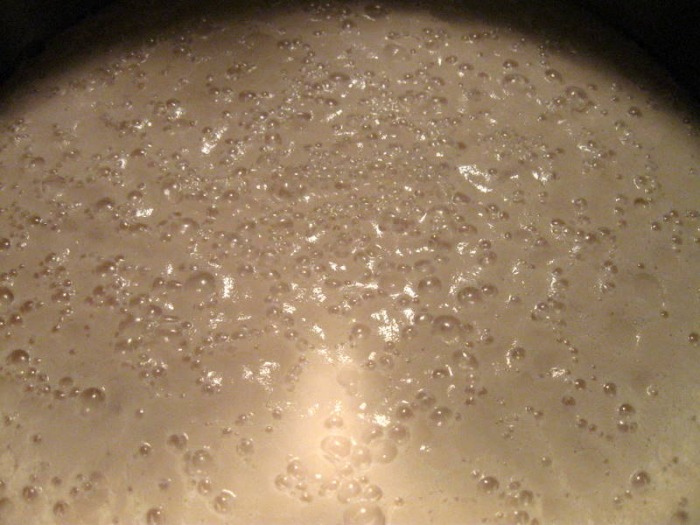
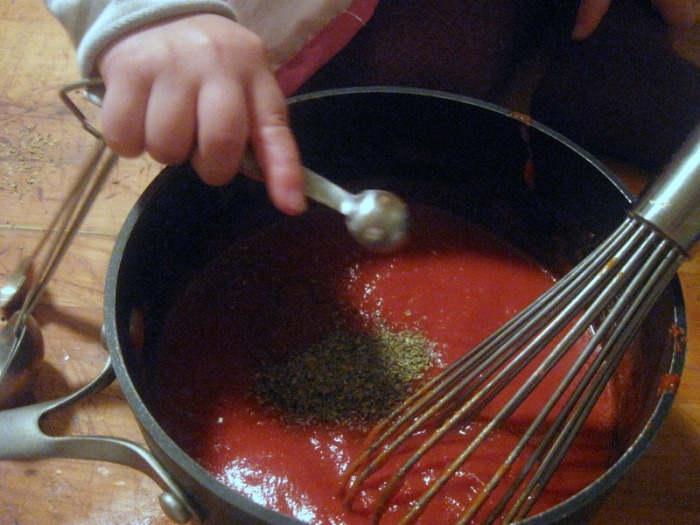
- heat oil in medium saucepan over medium-high heat; add tomatillo puree and boil 5 minutes, stirring often; add broth (the broth must be unsalted or low salt because you're going to let the sauce reduce, if you start with salted broth the sauce will be too salty to eat by the time it reduces); reduce heat to medium; simmer until sauce coats spoon thickly and is reduced to 1 cup, stirring occasionally, about 40 minutes
- season with salt
- can be made 1 day ahead; cover and chill
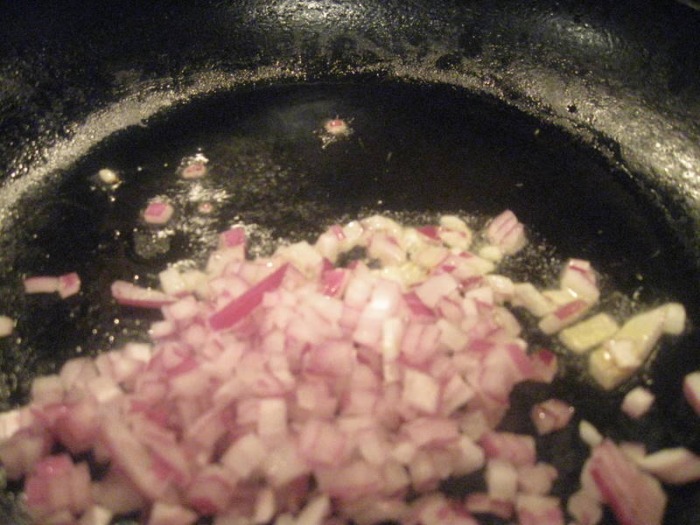
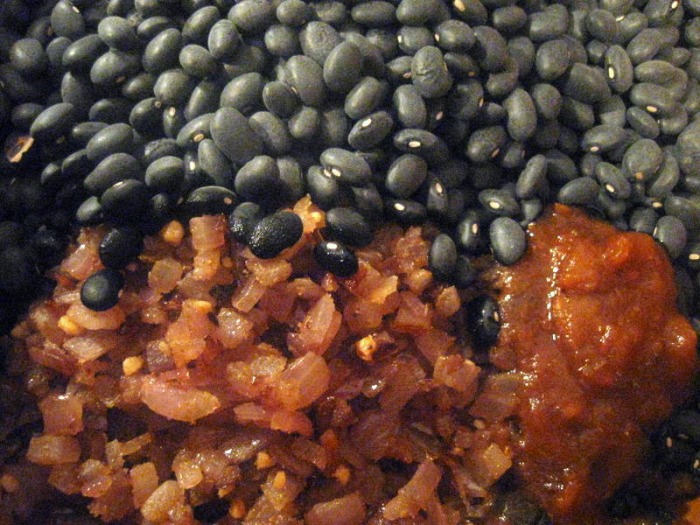
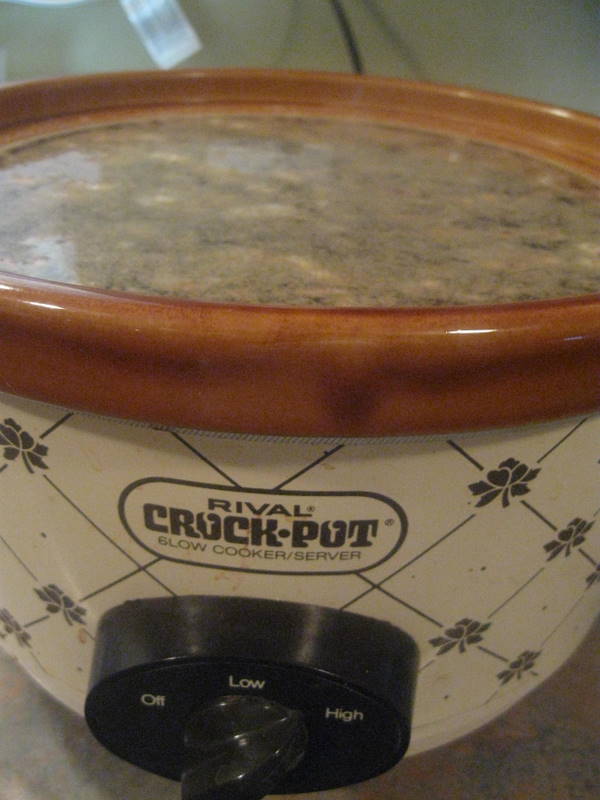
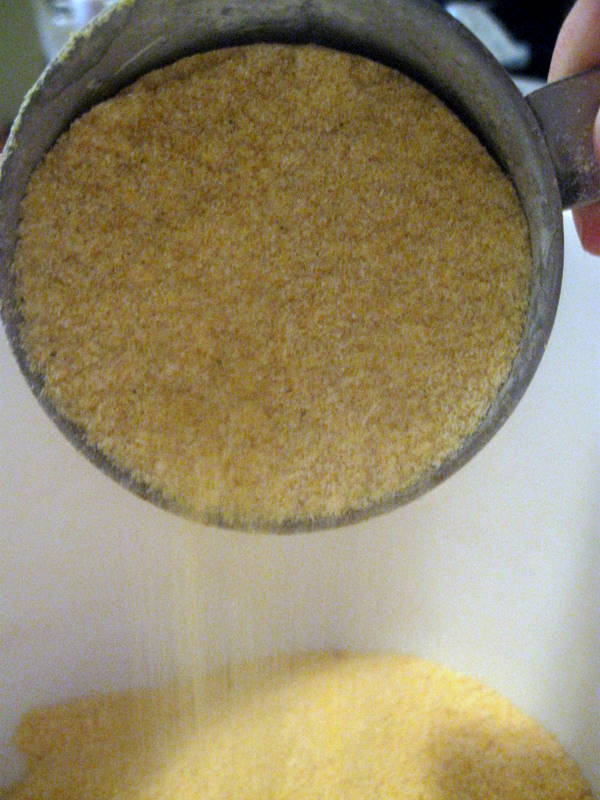
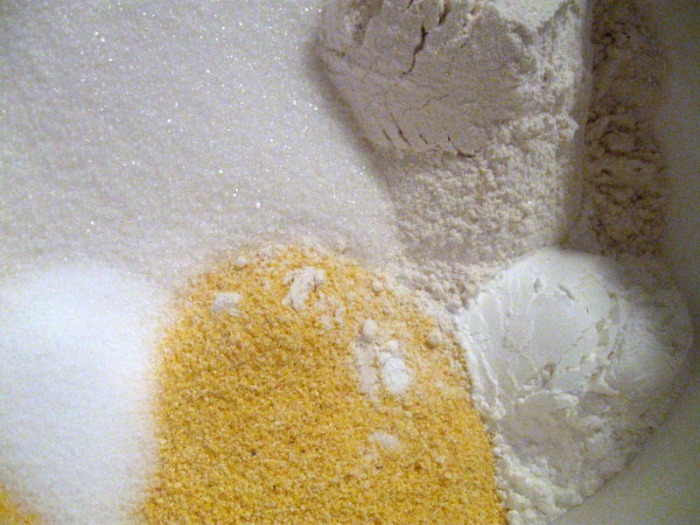
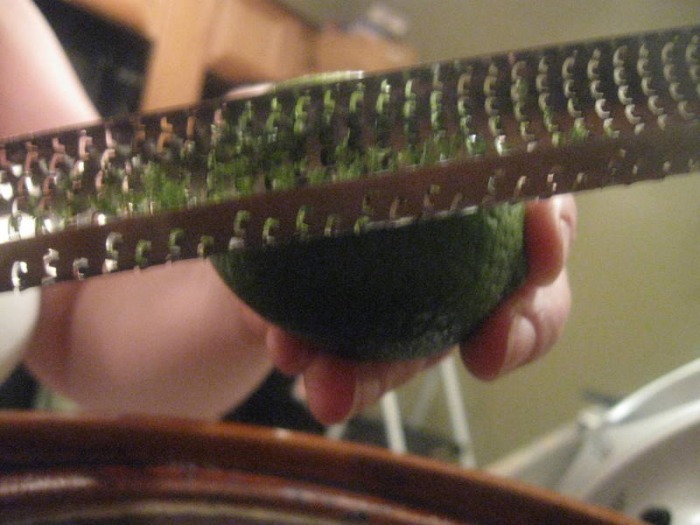
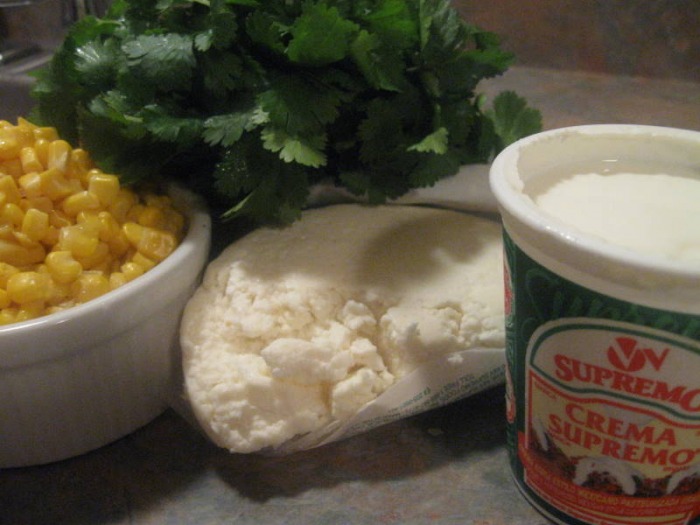
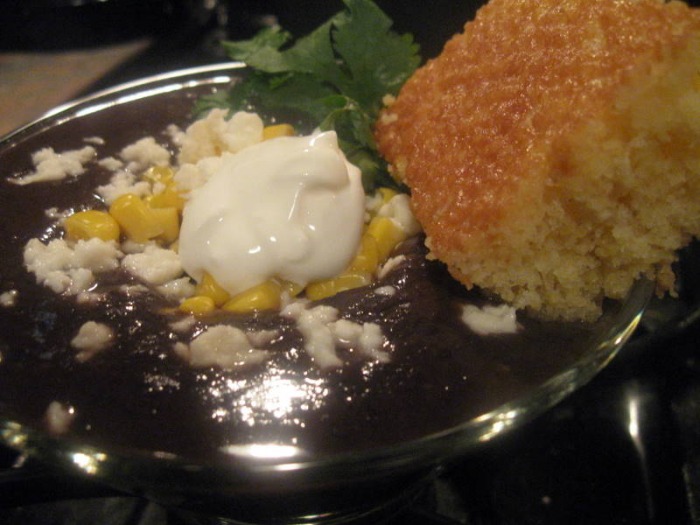
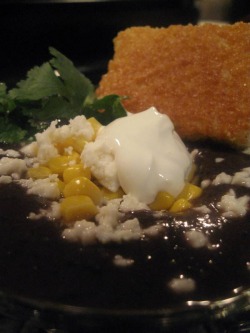 I love cornbread. My dad used to make it all the time when we were kids, and eventually I took over and made it. We would have a big pan of it sitting around to snack on. We always used the standard recipe on the back of the corn meal container, which at the time seemed plenty good. Then I met The Chef, who insisted he didn't like corn bread. To me, that was a challenge. I quizzed him about what he didn't like about it. I figured out that he preferred his cornbread to be sweet and not dry and crumbly. So I began trying out different recipes I would find in cookbooks and on the internet. He didn't like any of them. I realized I would have to create my own recipe. So began my cornbread odyssey. It took a lot of trial and error, but I finally came up with a recipe that he liked! It's a sweet and tender cornbread that is simply delicious. I'm really proud of this recipe because I created it entirely myself, so it's a Baker Original! We've taken to calling it "Cornbread For People Who Claim Not To Like Cornbread". Yesterday I wanted to make cornbread but I was undecided what to make with it. I needed to drop M1 off at a guitar lesson. While I was waiting for him to get ready I was perusing blogs. Smitten Kitchen had just made some black bean soup and I was mentally slapping myself in the forehead... I LOVE black bean soup! It's probably my favorite soup. And, it would go so great with cornbread. While M1 was at his lesson I ran over to the store and picked up the ingredients. Then we picked up M1 and went back home to make the soup and cornbread. I love the recipe she uses because you can cook the beans in a slow cooker, which is so convenient. There's no need to soak the beans overnight. I tend not to make black bean soup because I don't plan far enough in advance and by the time the craving hits I don't want to wait 24 hours. So I do without or I buy a container of pre-made soup at the store. I did a couple of things differently than Smitten Kitchen. I don't like red and green peppers so I left them out. Knowing that by not having the peppers the soup would probably be flat tasting I chose to use chipotle sauce, which contains tomato puree, to round out the flavor. Because I used the sauce, and not just the chipotle pepper that she used, I used more than what she called for in her recipe. I also garnished mine with some corn, queso fresco, mexican crema and cilantro... and a huge hunk of cornbread! It's delicious and hearty. A perfect meal to have on a cold day. And, oh by the way, it gets even better then next day! -The Baker
SWEET CORN BREAD: yield: 8" x 8" pan - 1 C All-purpose Flour
- 1 C Cornmeal
- 2/3 C Sugar
- 1 t Salt
- 3 1/2 t Baking Powder
- 1 Egg
- 1 C Milk
- 4 oz Butter
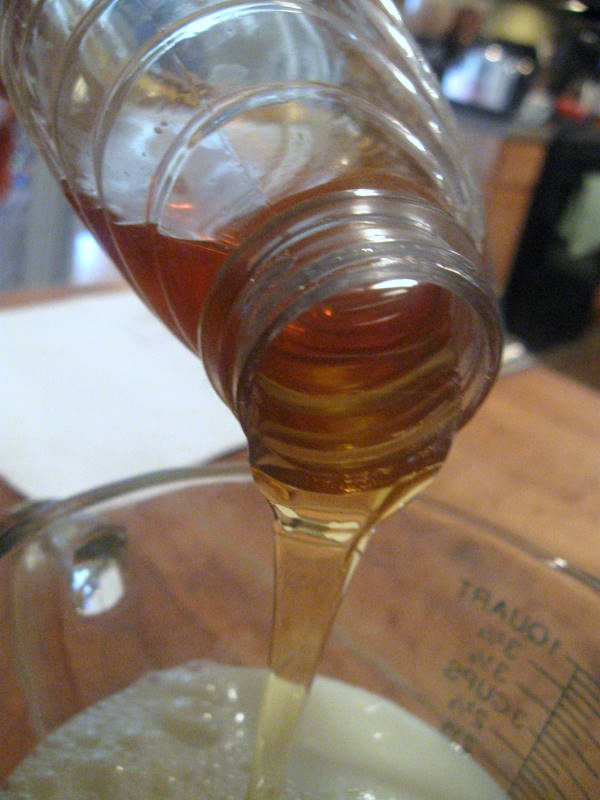
- 1/4 C Honey
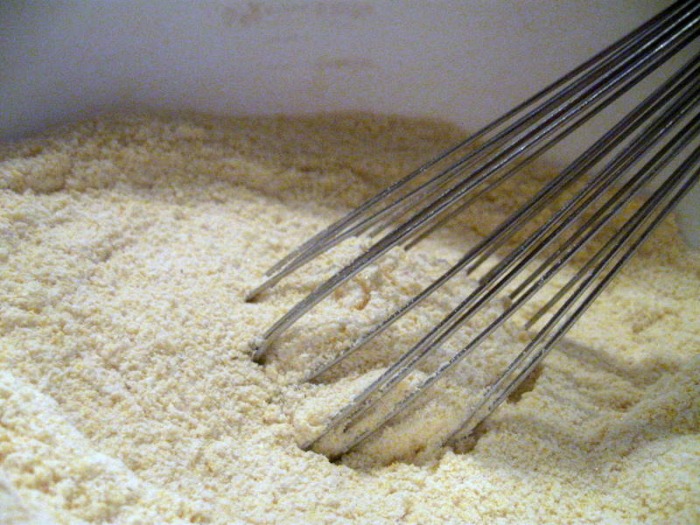
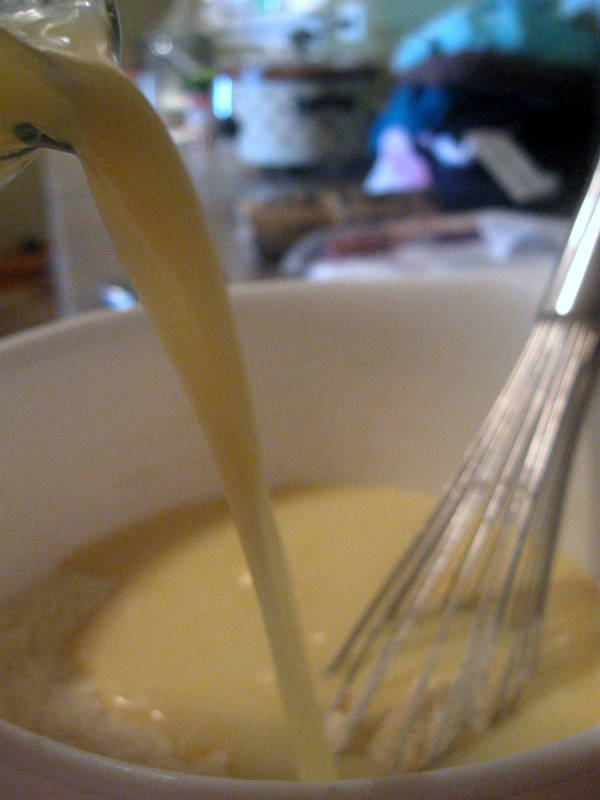
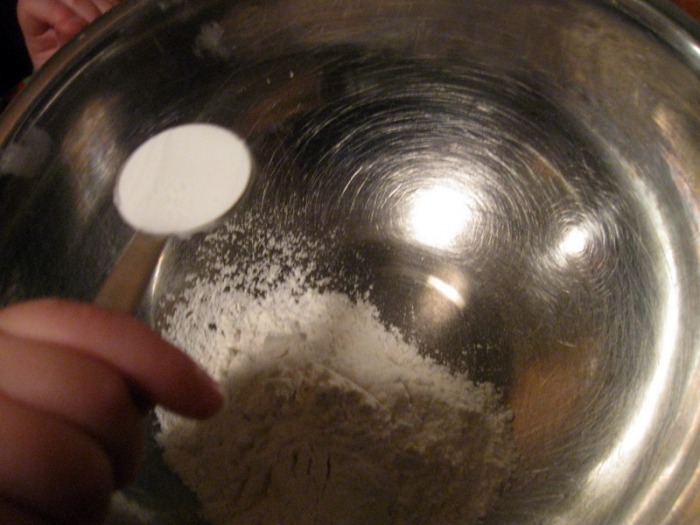
- combine all of the dry ingredients; whisk together
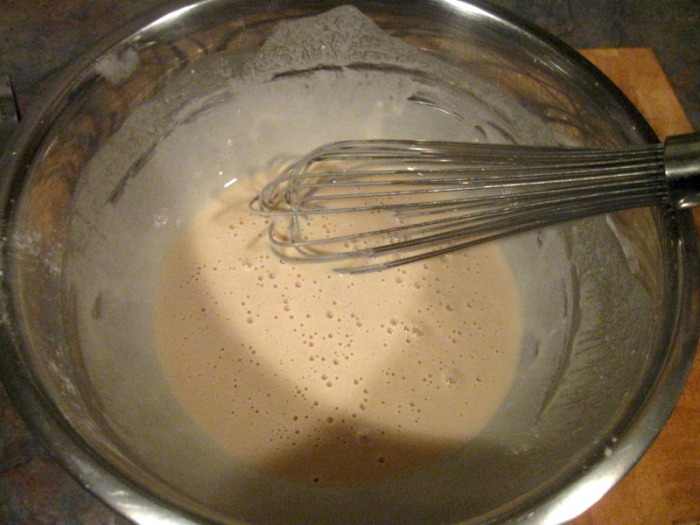
- combine milk, honey and butter; microwave until the butter has melted; remove from microwave and whisk in the egg
- add the milk mixture to the flour mixture; whisk together, just until combined
- pour into a buttered pan; bake at 400 F for 15 - 20 mins
BLACK BEAN SOUP: (inspired by Smitten Kitchen) - 1 tablespoon olive oil
- 1 large red onion
- 4 garlic cloves, minced
- 4 teaspoons ground cumin
- 1 16-ounce package dried black beans
- small can of chipotle sauce (i used half of the can, which gives just a little after burn, but use more or less depending on how spicy or mild you like it)
- 7 cups hot water
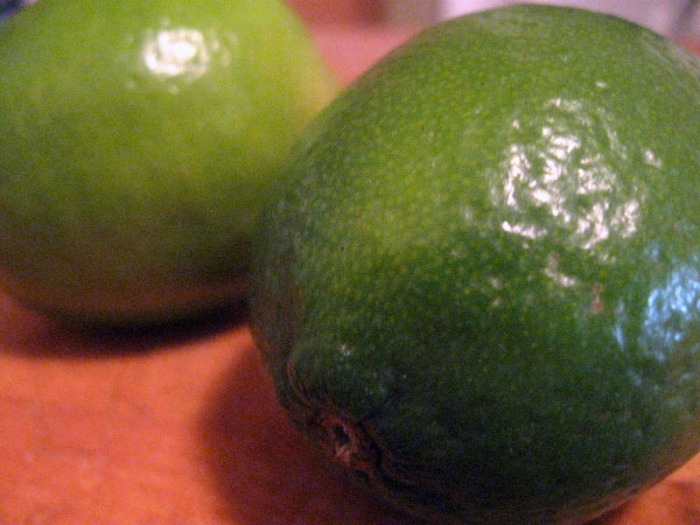
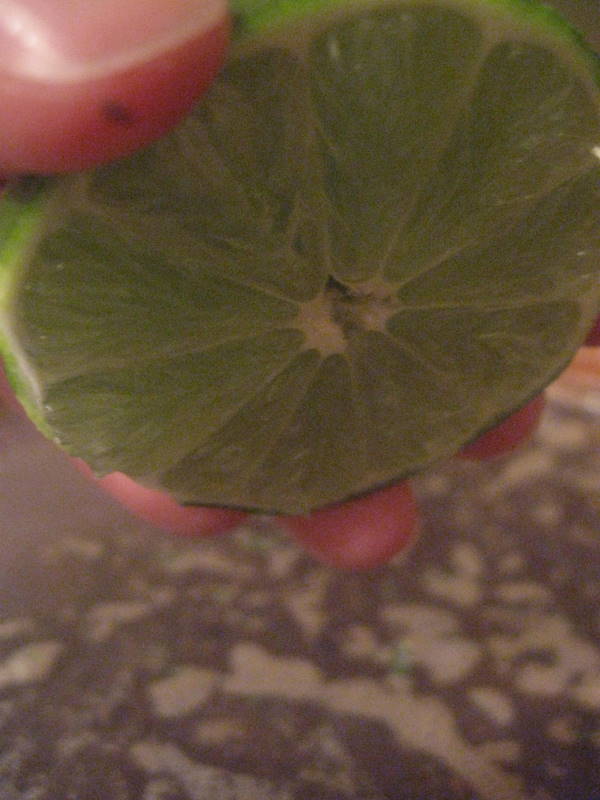
- zest from 1 lime
- juice from 1 fresh lime (use the lime you zested)
- 2 teaspoons coarse kosher salt
- 1/4 teaspoon ground black pepper
- heat oil in saute pan
- add onions saute until they just start to brown; add garlic and cumin; stir
- transfer to 6-quart slow cooker; add beans and chipotle sauce, and hot water; over and cook on high until beans are very tender; it took my beans about four hours to get soft, but Smitten Kitchen's beans took just under three hours, so test them every hour after the first two hours of cooking
- when the beans are tender, scoop a couple of ladles into a blender; puree until smooth; puree as much of the beans as you like; the pureed beans will act as a thickener for the soup; i prefer a more pureed soup so i pureed most of the beans;
- add the pureed beans back to the beans in the slow cooker; add the lime zest, lime juice, and season with salt, and pepper to taste; because you didn't season the beans in the beginning you will probably find you need a lot more salt than you thought
- to serve, garnish each bowl with some fresh corn, queso fresco, mexican crema and fresh cilantro and a big hunk of cornbread
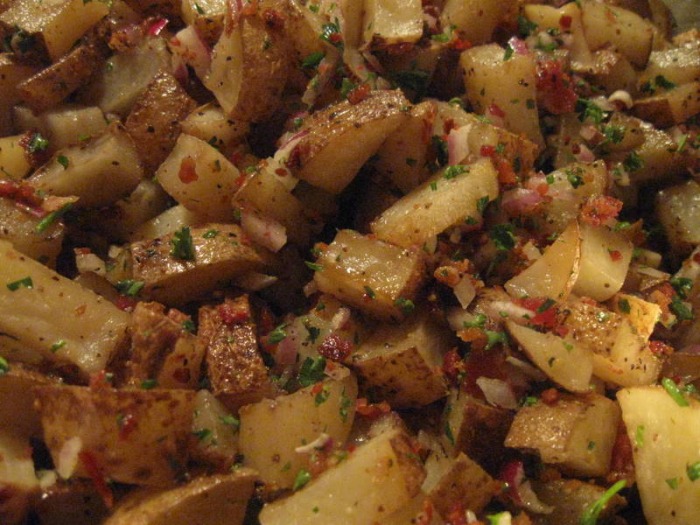
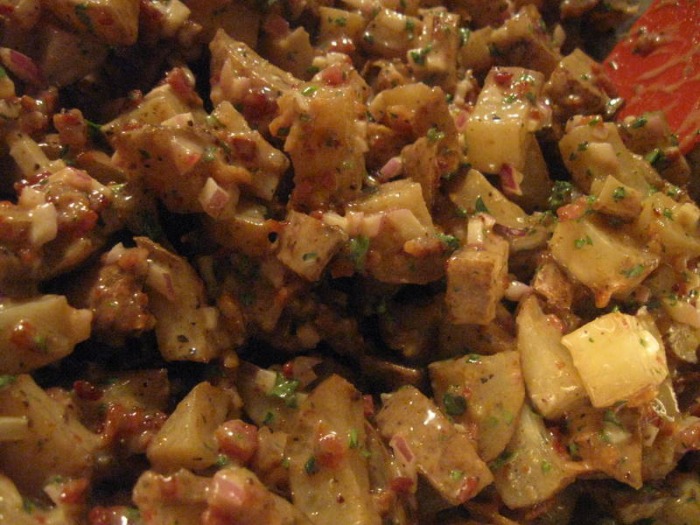
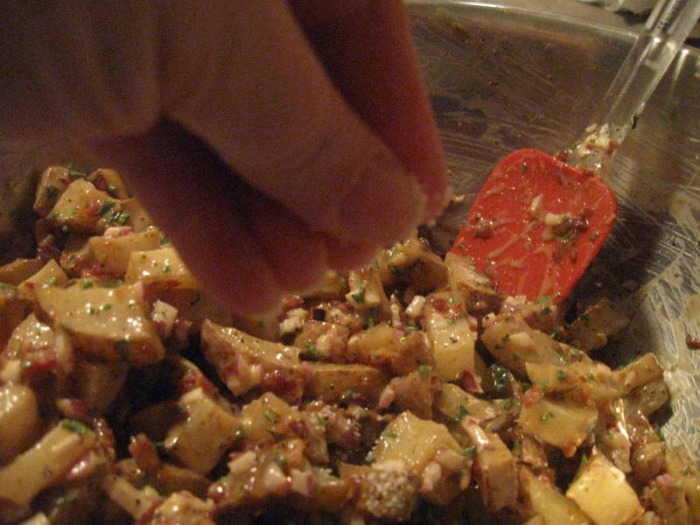
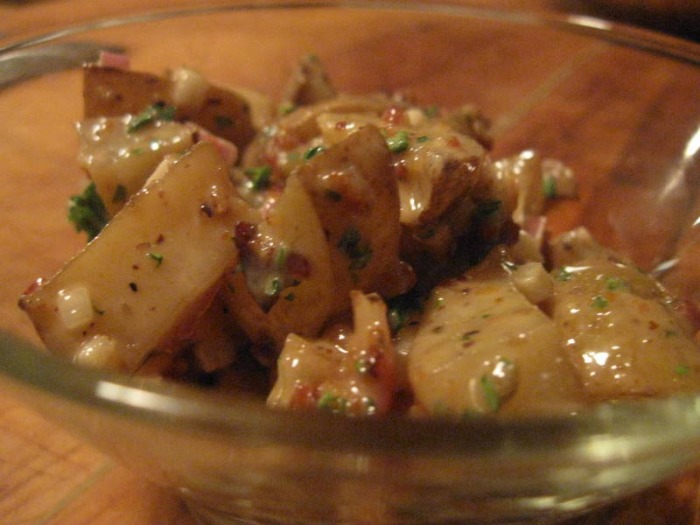
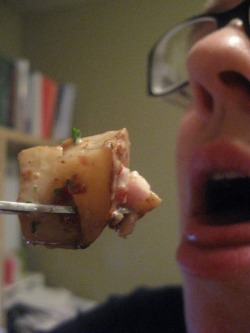 It is with much trepidation that I'm posting this recipe. It happens to be one of my favorite potato salads but it's a little expensive and time consuming to make, so I don't make it a lot. I try to save it for special occasions. We used to make this recipe for our Garde Manger class in culinary school when we would have to set up buffets.
So, why am I nervous to give you this recipe? Well, read on... We spend Christmas Eve with my family. This year we decided to have a very casual dinner since we were all going to have a traditional Christmas dinner on Christmas day. We thought this would be more relaxing and fun. We decided to make big sandwiches and all the sides that come with them. I offered to make potato salad, thinking that I would wow everyone with this delicious twist on an old classic. Then as I was writing out my shopping list The Chef saw what I was making and dropped the bombshell that HE DOESN'T LIKE ROASTED POTATO SALAD!!! I was seriously shocked. What's not to like?
I decided to make it anyway figuring he's just weird and everyone else would love it. So I made it and brought it and everyone HATED it. I couldn't believe it. So why am I posting it here? Well, as it's several weeks after Christmas you can see that I wrestled with whether or not to post it. I finally decided to put it up because IT'S DELICIOUS AND THEY'RE ALL CRAZY. And I thought one of you might really like it. I mean, just look at the ingredients... that's all good stuff! My aunt said she didn't like the potatoes being roasted and it was throwing her off. I certainly understand when you expect one thing and get another you won't be satisfied until you get what you want. But, I'm telling you, this is too good to pass up. Try it, and if you hate it I'll accept that I am, in fact, the weird one, but if you love it as much as I do then my suspicions that they're all weird will be confirmed!
So, um, enjoy?!?
-The Baker
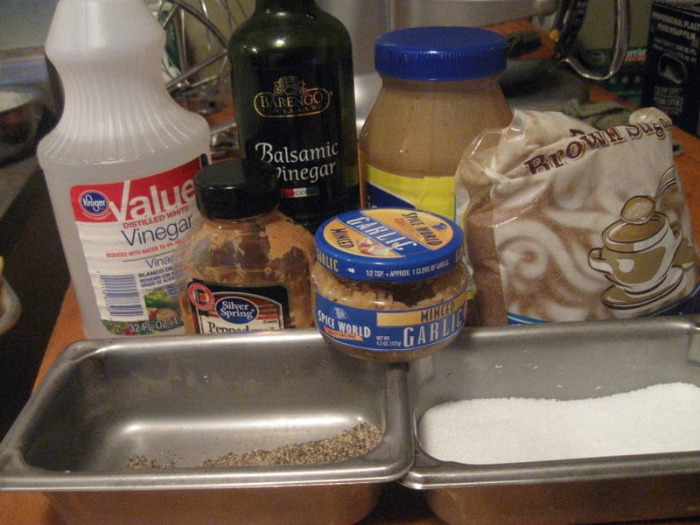
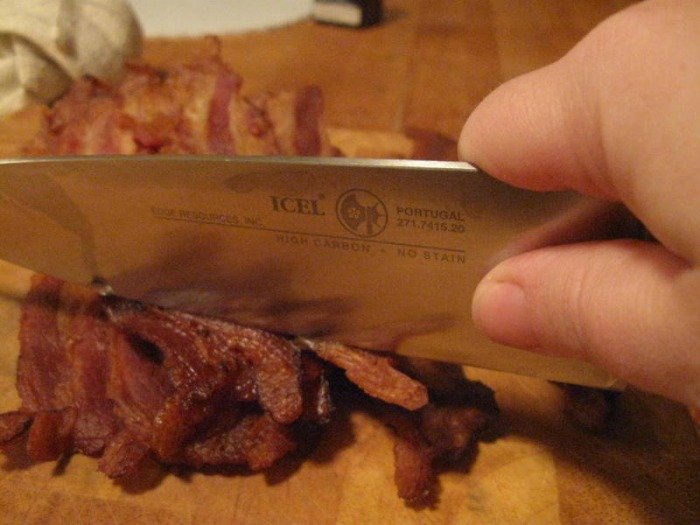
ROASTED POTATO SALAD - 6 large Baking potatoes
- 1 small Red onion
- 1 lb Bacon
- 1 small bunch Parsley, stemmed and finely chopped
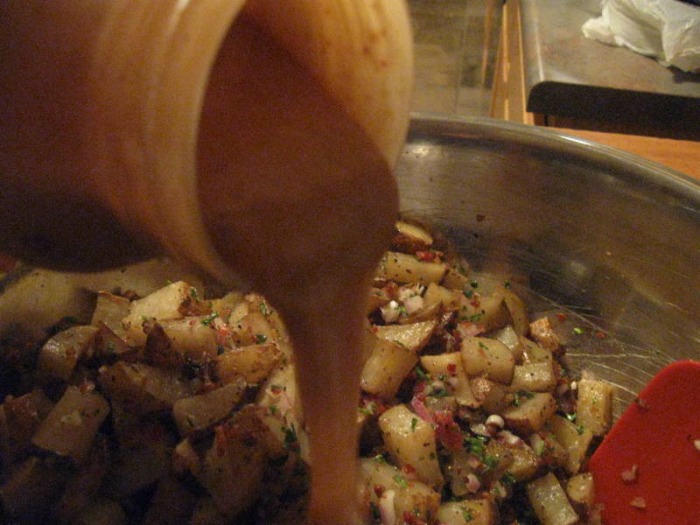
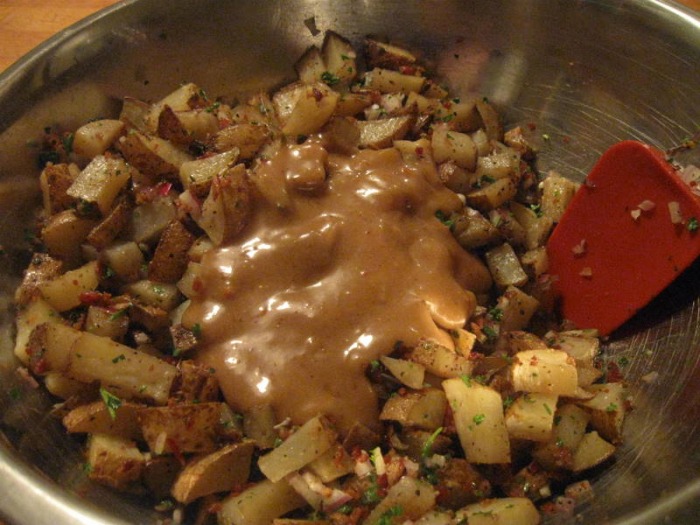
- 2 C Mayonnaise
- 1/2 C Dijon Mustard
- 1/2 C Brown Sugar, sifted
- 1 t Vinegar
- 1 T Balsamic Vinegar
- 1 T Garlic, minced
- Salt and Pepper to taste
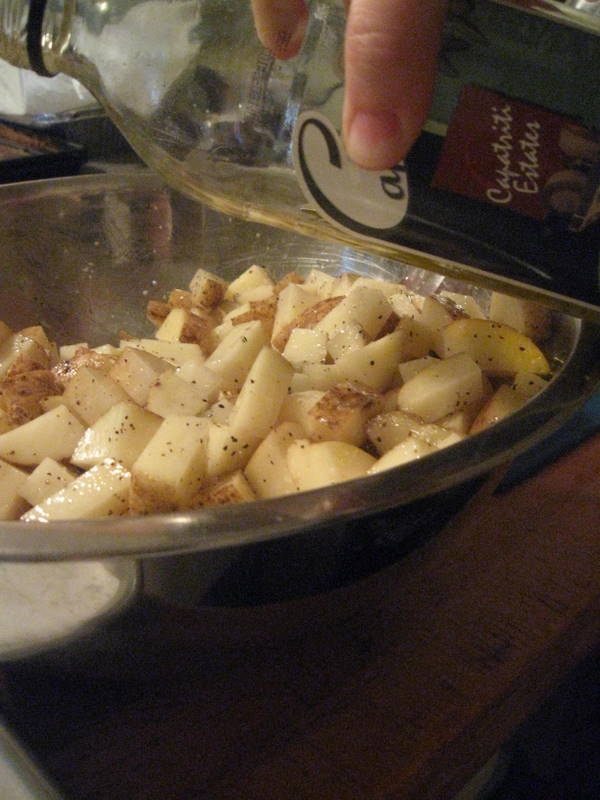
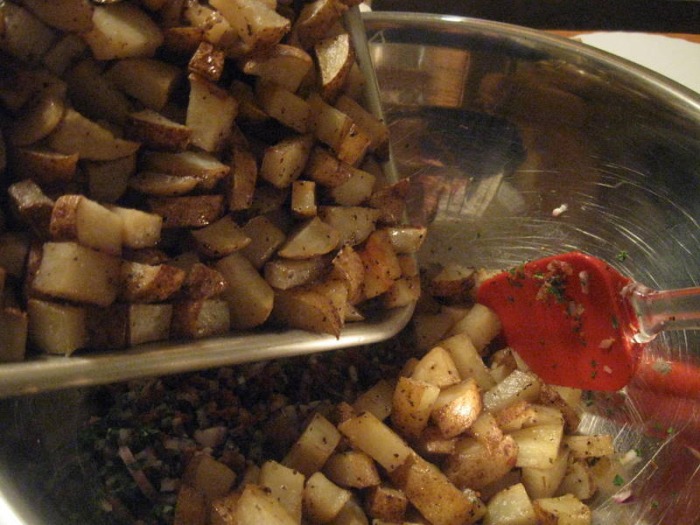
- dice potatoes into bite sized pieces; season with salt and pepper and coat in olive oil
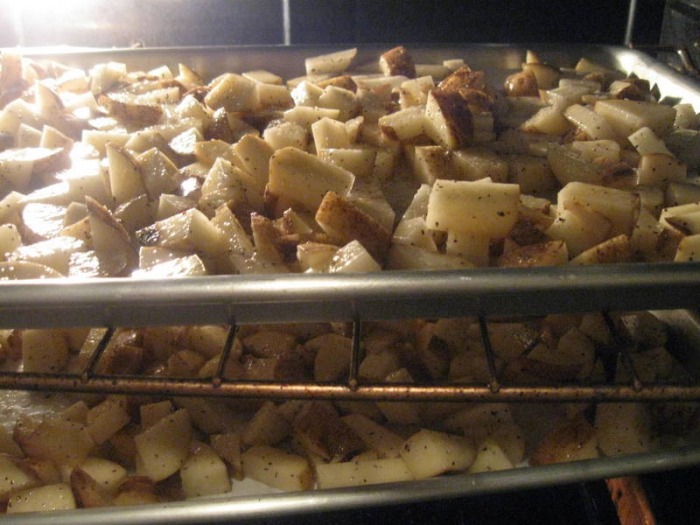
- roast at 350 F on a parchment lined sheet pan or a non-stick pan until the edges are golden brown and crispy and the insides are fork tender; cool completely
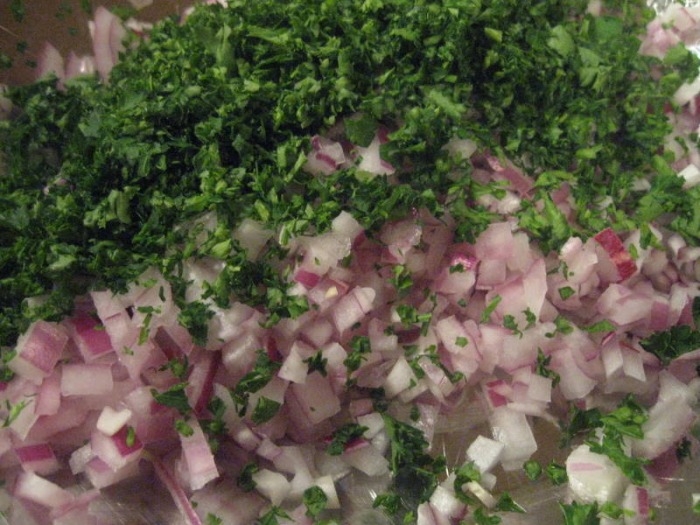
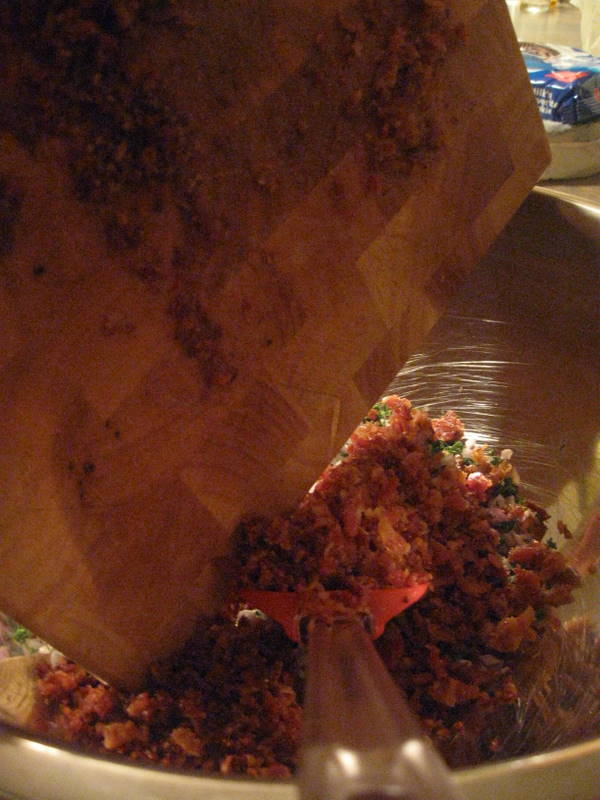
- while the potatoes roast, finely dice the red onion and the parsley
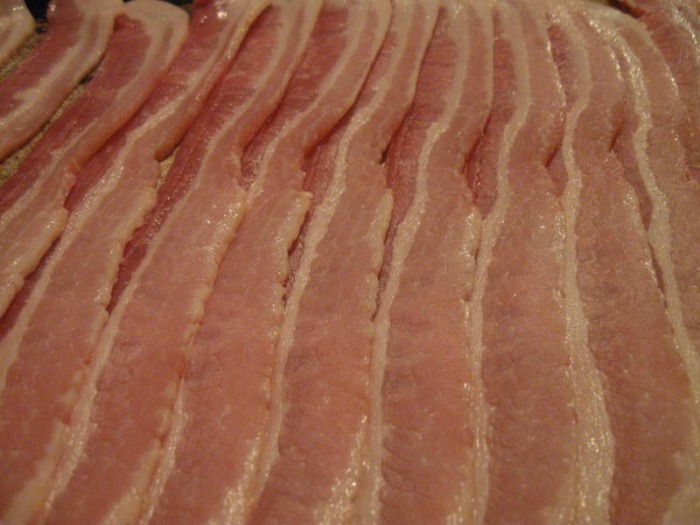
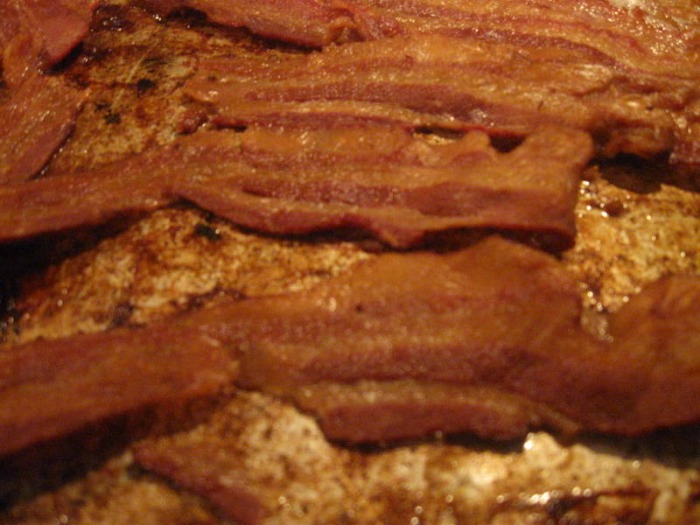
- cook the bacon until very crisp; dab off excess grease with paper towels and finely chop
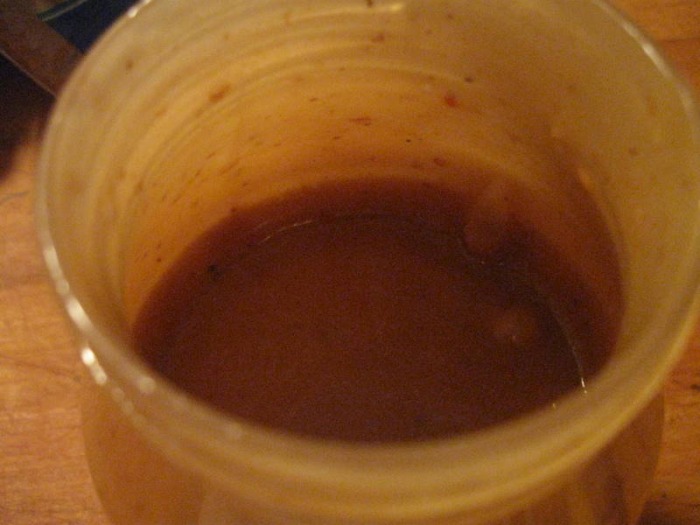
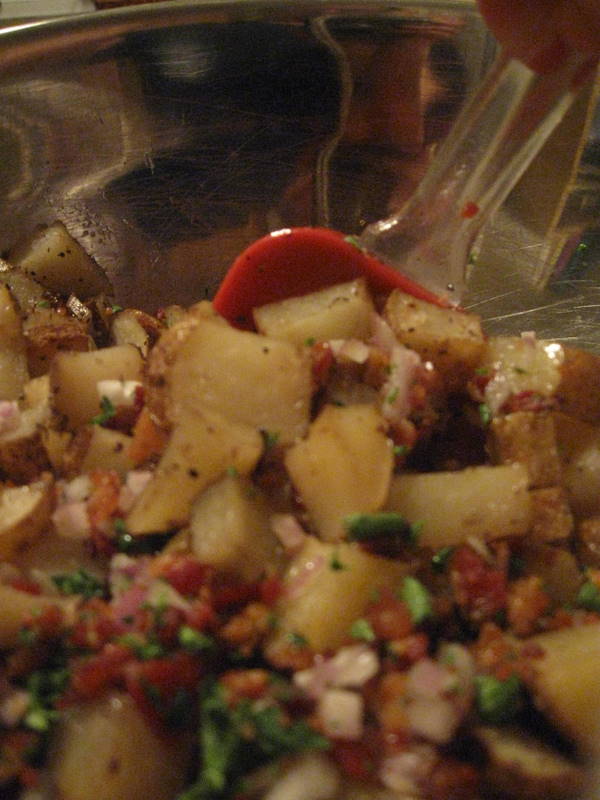
- while the bacon cooks, mix together mayo, mustard, brown sugar, vinegar, balsamic vinegar, garlic and salt and pepper; set aside
- toss together the onion, parsley, potatoes and bacon; then toss with the dressing; season as needed
This is your new blog post. Click here and start typing, or drag in elements from the top bar.
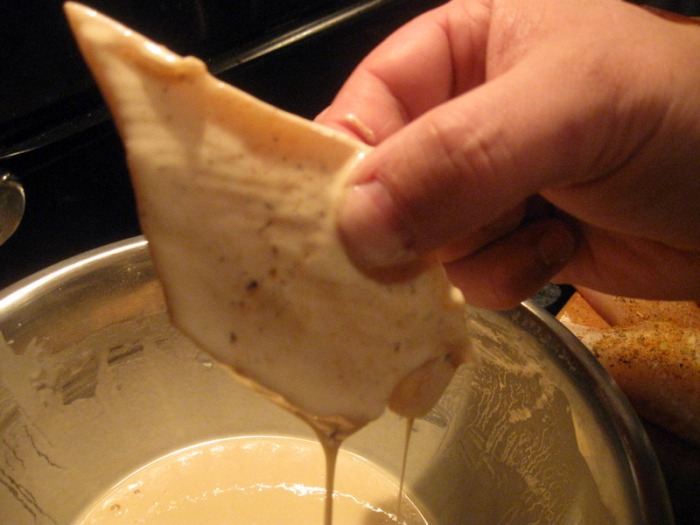
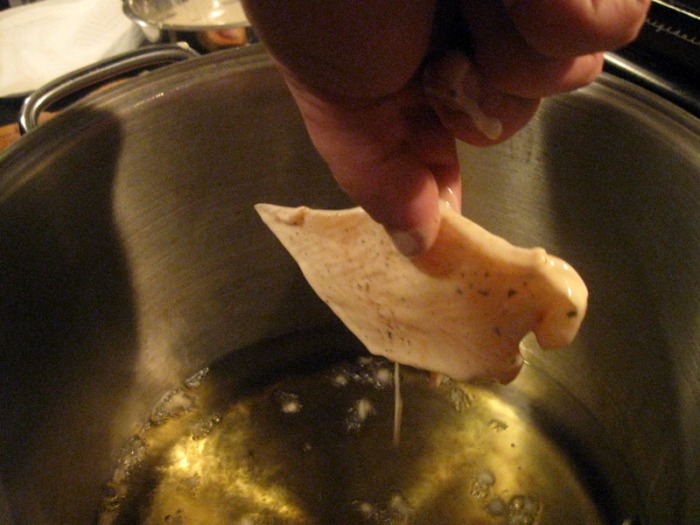
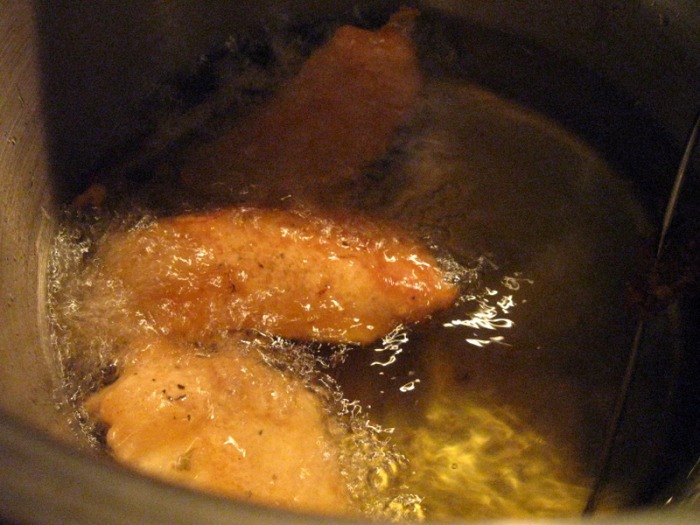
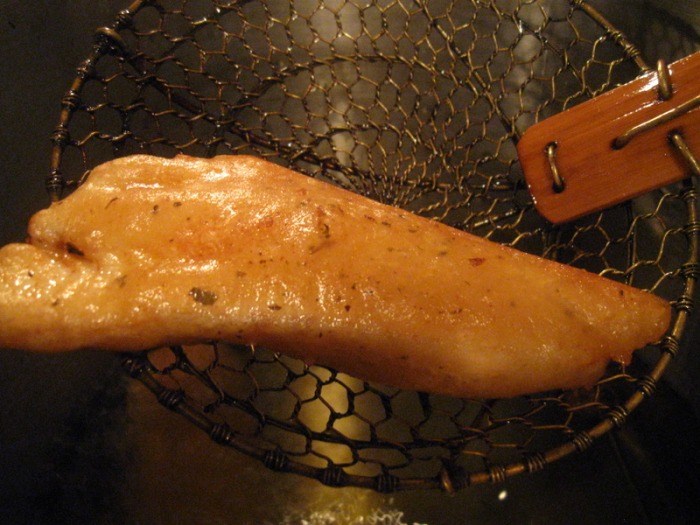
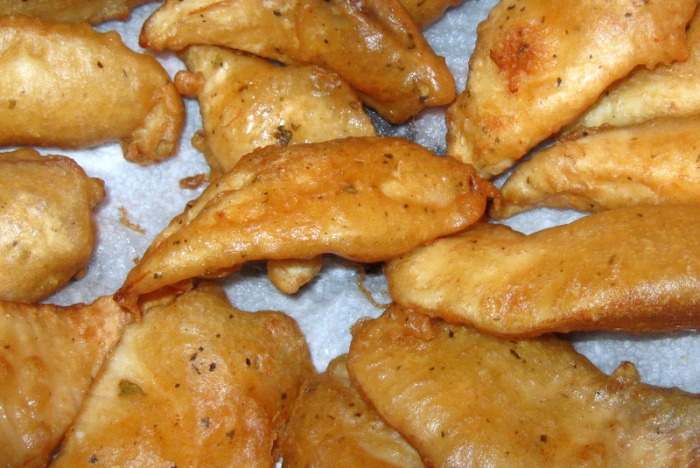
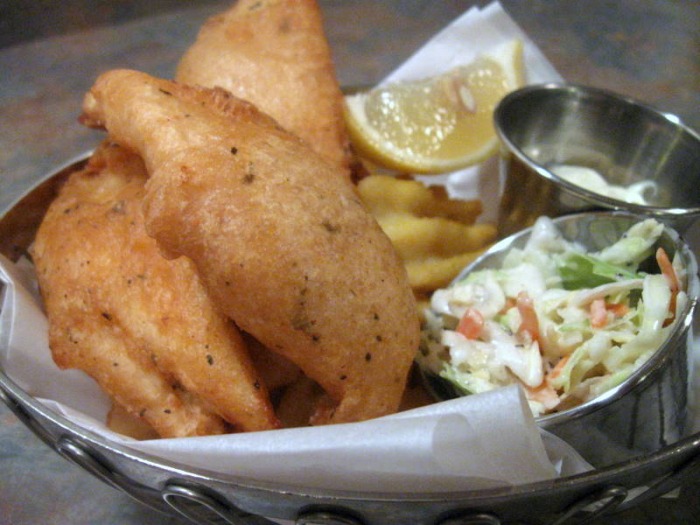
 I'm a huge fan of 'Fish and Chips'. As I've said in previous posts, Friday was our fish day when I was growing up. The only fish my mother ever ate was either fish sticks or the McDonald's fish filet sandwich. Even to this day, my mother doesn't really eat fish. Once I enrolled in Culinary school though I knew I would have to expand my horizons. To make a long story short, I've since tried a ton of fish and found that I pretty much like them all.
The first time I had fish and chips was at an Irish Pub close to where I was living at the time. I had no idea what to expect, but The Baker wanted to go so we went. To this day, that was some of the best fish and chips I've ever had. Practically every table in there was eating the Friday night fish fry. I was totally excited and nervous with anticipation all at the same time.
The waitress finally brought it out. It was beer battered Cod with waffle cut fries, homemade coleslaw and tartar sauce. I ordered my first Black and Tan, and also had my first experience with Malt vinegar. Let me tell you, it goes great with fried fish! The waitress comes by after a little while and asks how we are doing. "Fine," I think I said. She replied, "can I bring you some more?" I just looked at her......."huh?" "It's all you can eat," she said. Well, in that case... I ordered two more pieces of fish and decided not to get any more fries. It was a great meal! The fish was fresh. The batter was light and flaky, but you could totally taste the beer. I left there stuffed, and with a huge smile on my face. I fell in love with fish and chips!
-The Chef
BEER BATTER FOR FISH FRY:- 1/2 cup all purpose flour
- 1/2 cup cornstarch
- 1 tsp baking powder
- 1 tsp kosher salt
- 4 oz beer (your choice, but I used Budweiser American Ale this time)
- Combine dry ingredients in bowl and mix well
- Add beer and mix with a wire whisk until there are no lumps
- Refrigerate 30 minutes
Battering fish: - cut fish into equal sized pieces; season with Cajun seasoning on both sides; (salt and pepper are fine as a substitute)
- dip fish into batter, and shake off excess; gently drop into preheated pot of oil set at 360 degrees
- cook until light golden brown on both sides; remove with a slotted spoon or a spider onto paper towels and immediately season with salt and pepper
- serve immediately or the crust will start to loose it crispness
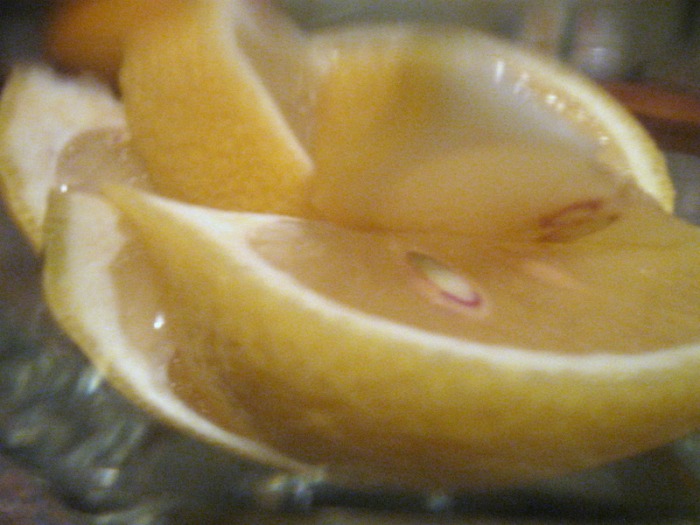
- serve with coleslaw, lemon wedges, fries or chips, tartar sauce and malt vinegar
- oh, and a nice cold beer!
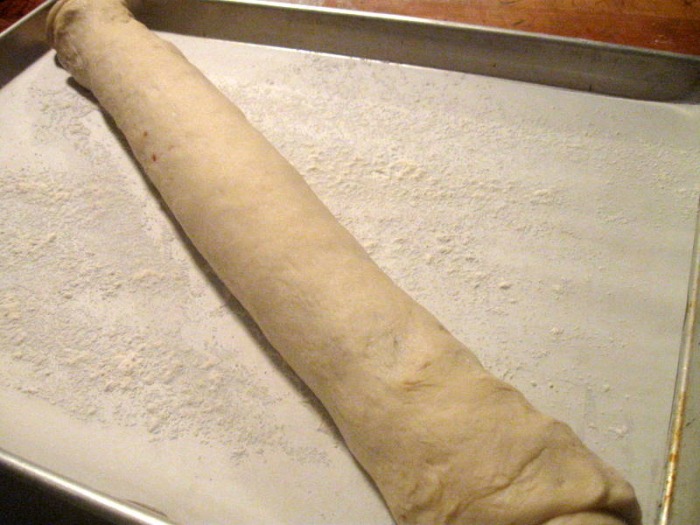
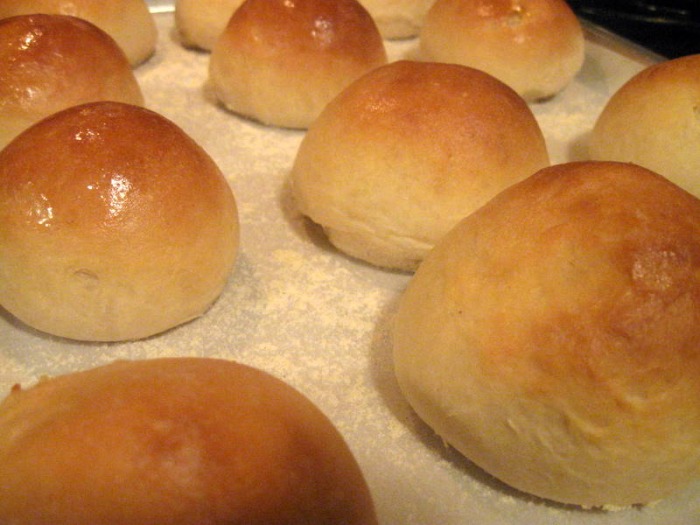
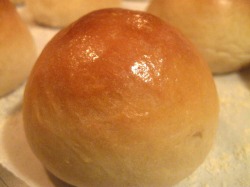 Breads from other countries are very hearty and dense. There are certainly some hearty American breads, but soft rolls I think are very classically American. It's the epitome of comfort food. The house fills with the yeasty smell of rising bread and then as it bakes it your mouth waters from the smell of it freshly baking. They're best piping hot right out of the oven, then carefully torn open while trying to avoid burning your fingers and then smeared with softened butter.
For me soft rolls also remind me of my baking classes in culinary school. We made rolls every class to serve in the dining room with the dinner the food prep students made. Just like a real restaurant one or two people would make a huge batch of dough and when it was ready to be rolled we would all gather round and talk while we shaped the rolls. It was a good way to get to know each other as we worked our way through the dough. At home it's a good way to get your kids into the kitchen and talking to you.
A lot of people are intimidated by bread baking. Unlike most baking it's not exact and precise. Ask any food professional what the difference is between a hot food chef and a baker and they will tell you that a baker is extremely precise. In a lot of ways baking is like chemistry. Every ingredient in your recipe is there in a specific amount to create a chemical reaction. Baking recipes are "balanced". Bread recipes, however, are not. A lot of bread baking is done by feel. That can be intimidating. But, if you practice you will eventually develop the feel for the bread and you will find yourself looking forward to making bread. It's a very sensuous experience.
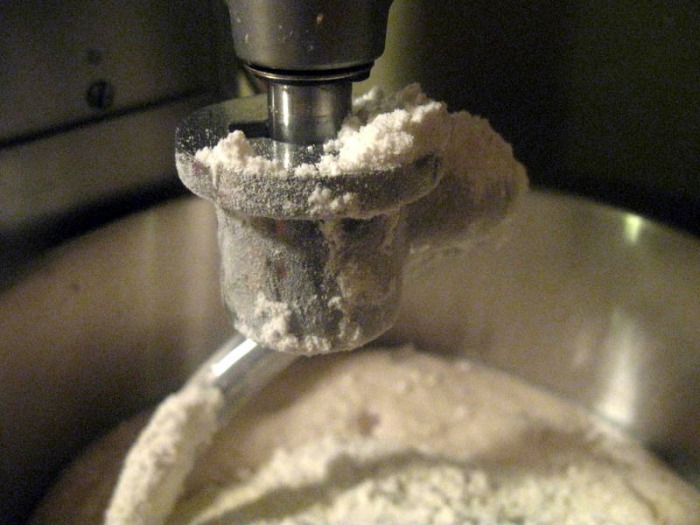
A few key points to follow when bread making: proof your yeast in 110 F water. Water that is much hotter than that will kill the yeast. Remember, yeast is alive. Water much cooler won't sufficiently wake up the yeast. You will still be able to make bread, but it will take quite a bit longer as the yeast will be slow and lazy. Take the time to proof the yeast, even if your recipe doesn't specifically call for you to do so. As I said, yeast is alive, and if your yeast has been sitting around for a while it may have died. You don't want to go through the whole process of preparing the bread dough (or waste all the ingredients) only to discover that your bread didn't rise because the yeast was dead.
Another important concept is the use of salt. Salt is necessary in bread making because it's a flavor enhancer, but it also inhibits the growth of the yeast. Without it your dough would rise like crazy. Dough that's over-risen doesn't just give you multiple loaves, it gives you multiple loaves of bad tasting bread. But, be careful with the salt. If you dump it directly onto the yeast you run the risk of killing it off. Instead, mix in some of the flour with the yeast before you add your salt.
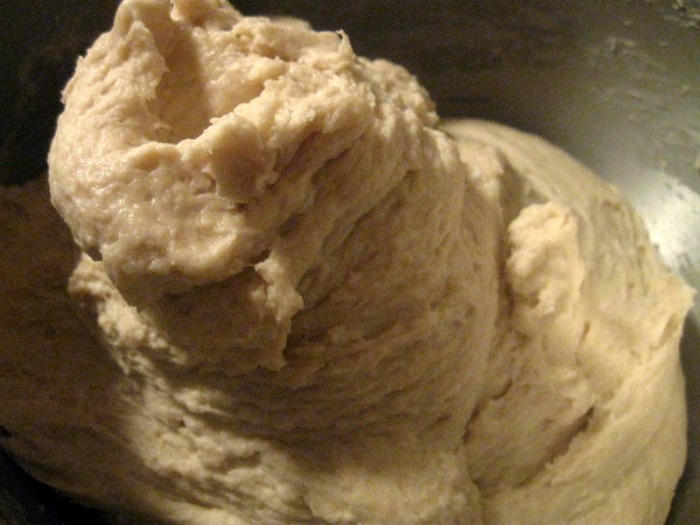
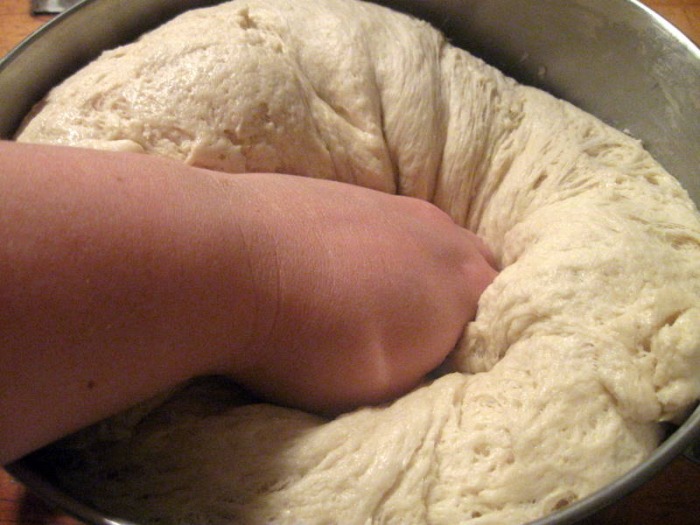
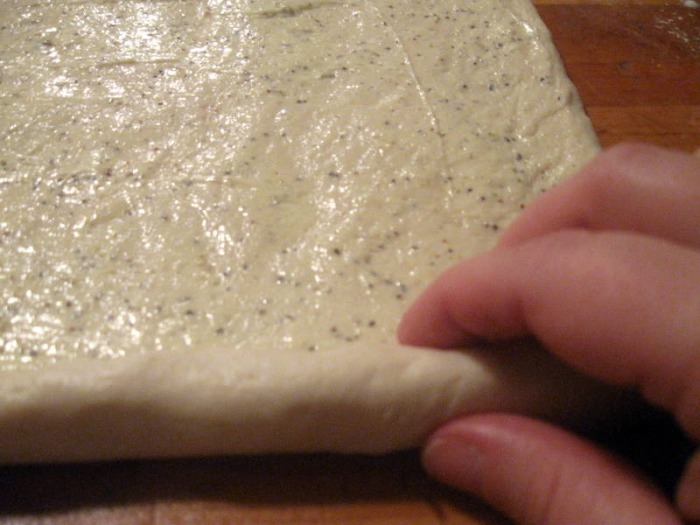
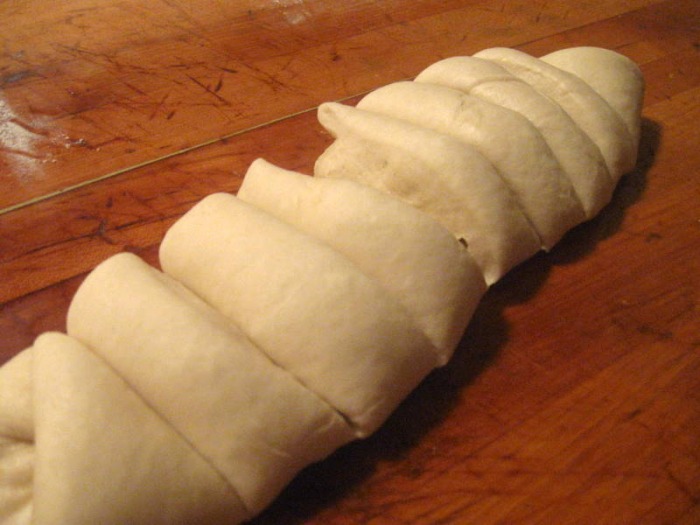
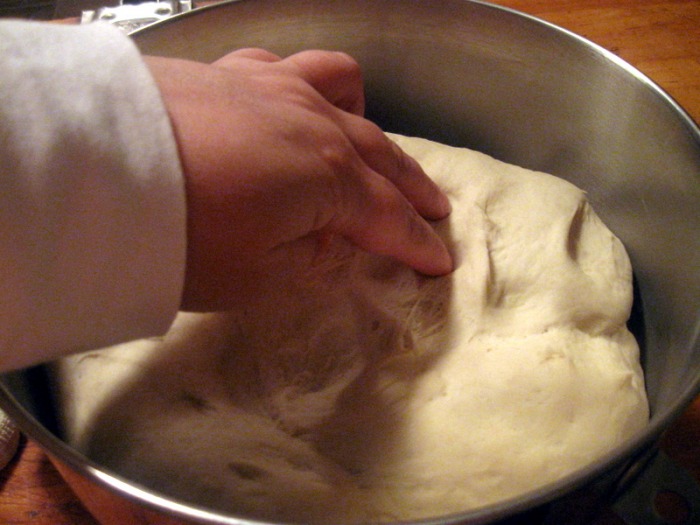
After your dough has risen the first thing you want to do is "punch" it down. On television you often seen a very comedic scene where the character is literally punching the dough. This isn't what you want to do. Bread dough is a living thing, and like all living things, should be treated gently. What you really want to do is gently work the big pockets of air out of the dough that have formed during the rising. You're also redistributing the gases and evening out the temperature of the dough. Stick your fingers in the dough before you punch it down and you will feel that it's warm.
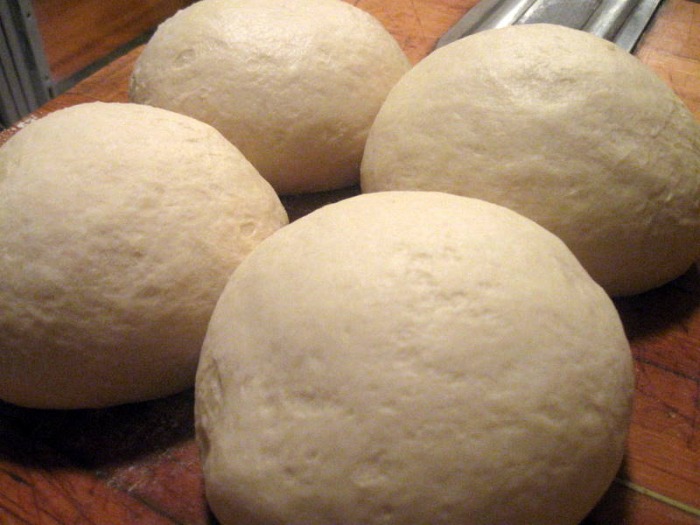
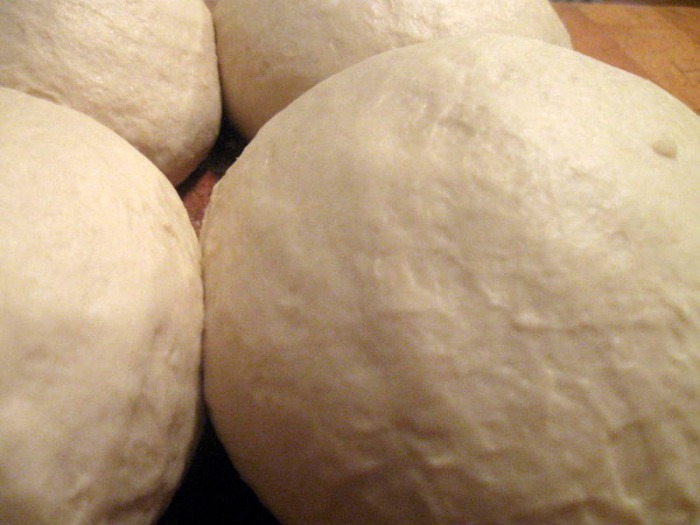
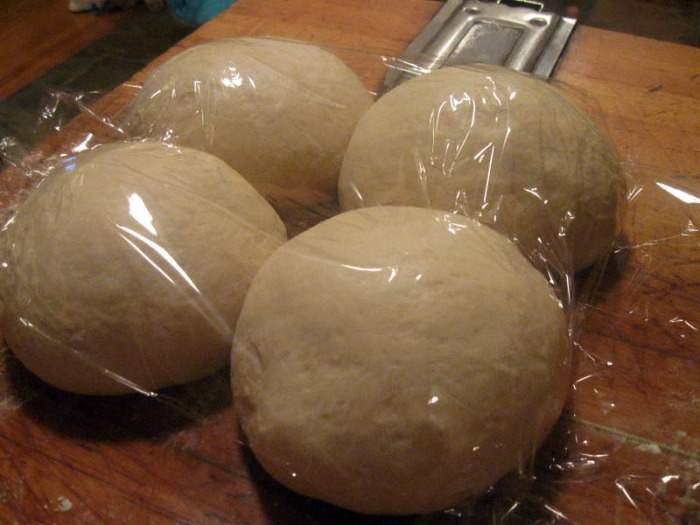
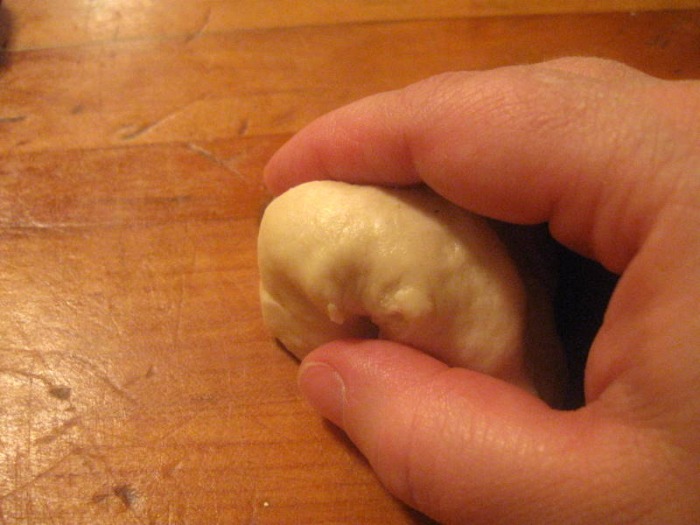
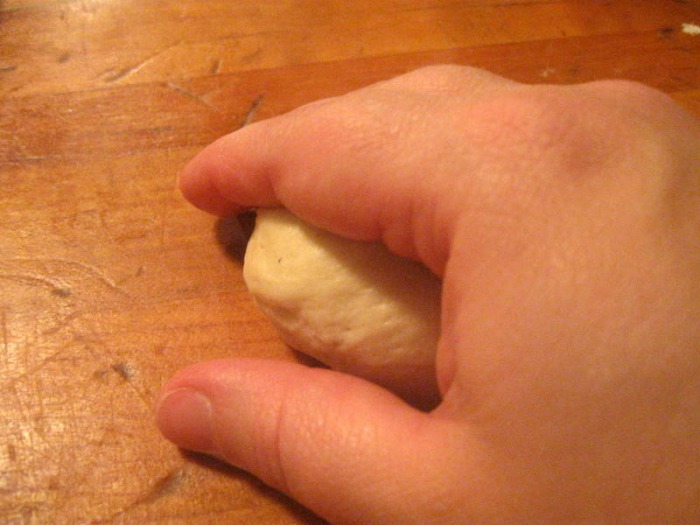
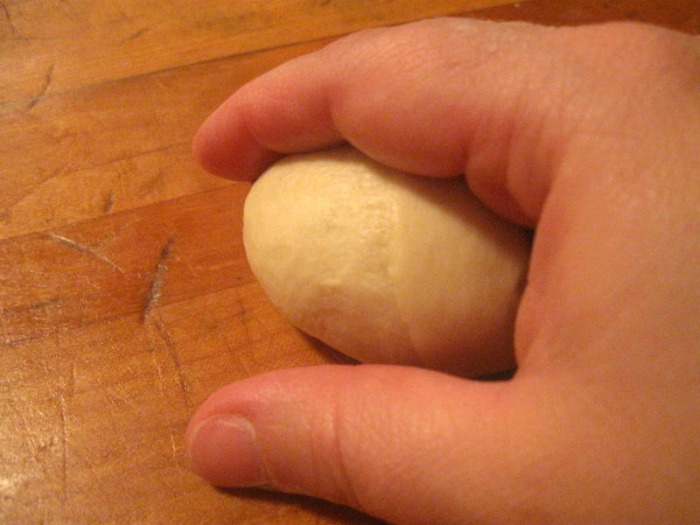
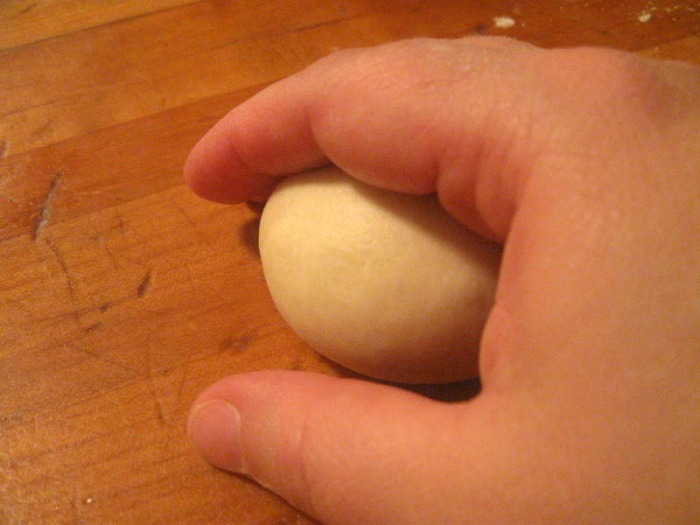
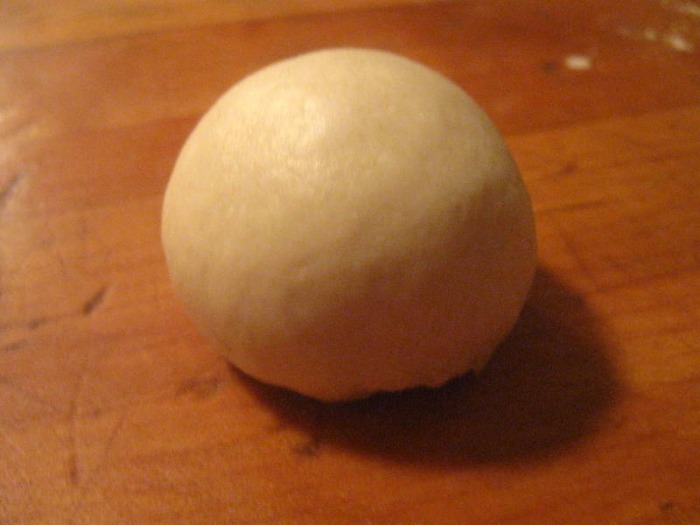
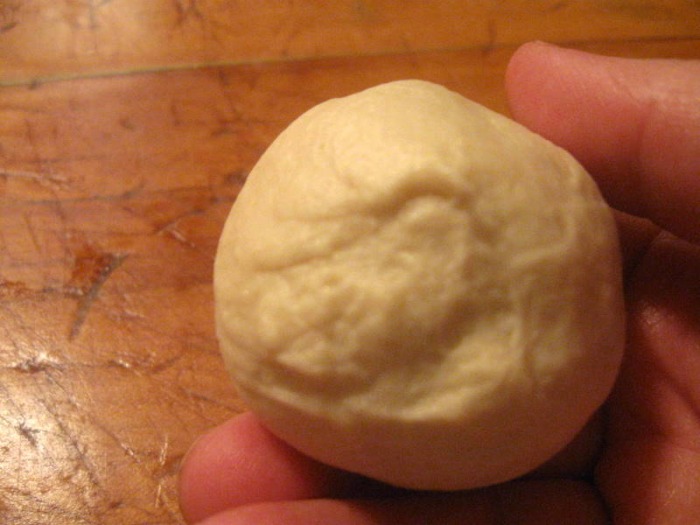
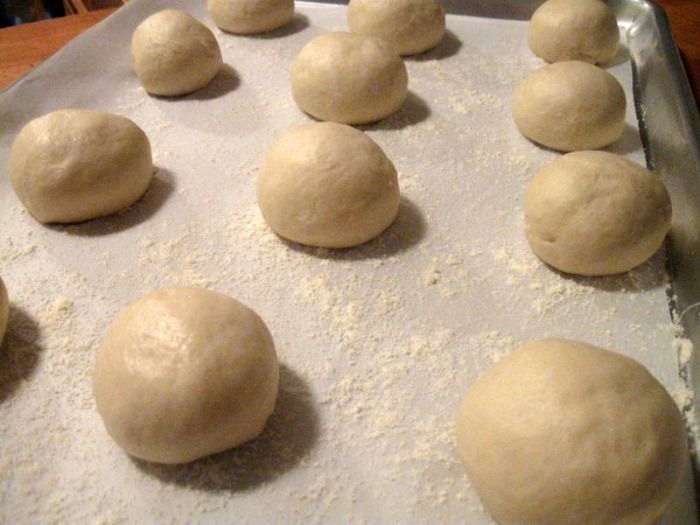
When you've finished punching down the dough divide it into more manageable sizes and roll into rounds (boules) and let it rest, under plastic, on your work table. This allows the strands of protein (gluten) to relax. If you don't allow the proteins to relax your dough will be stiff and hard to work with and will tend to bounce back from whatever shape you're trying to make.
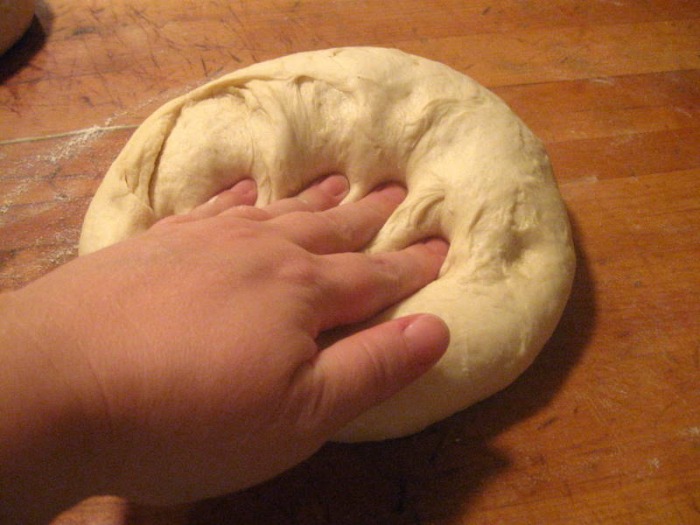
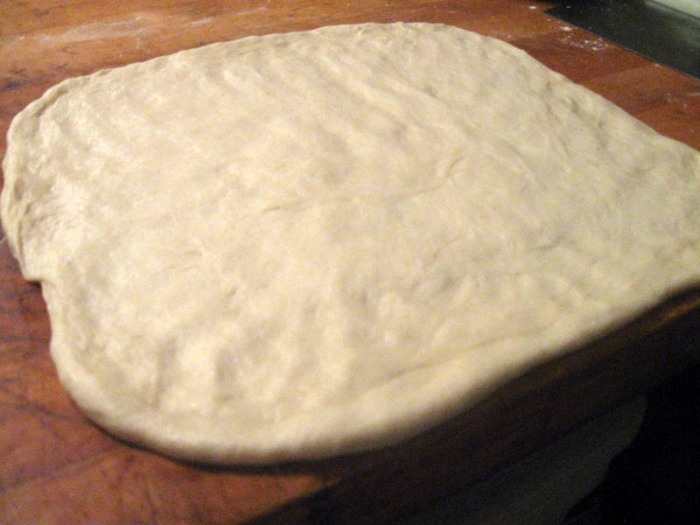
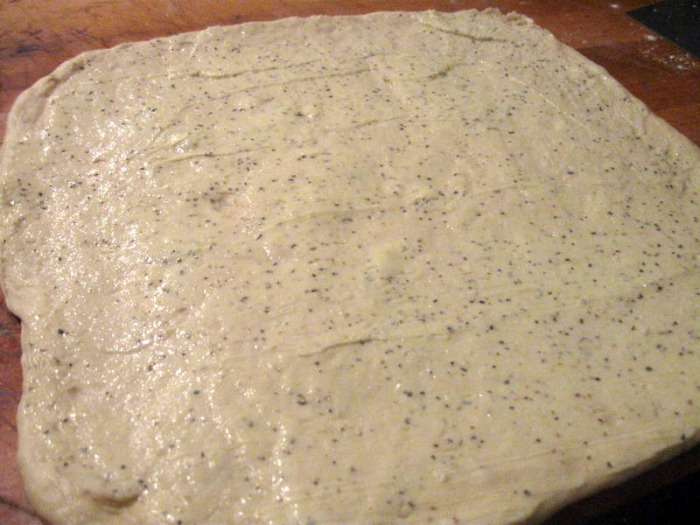
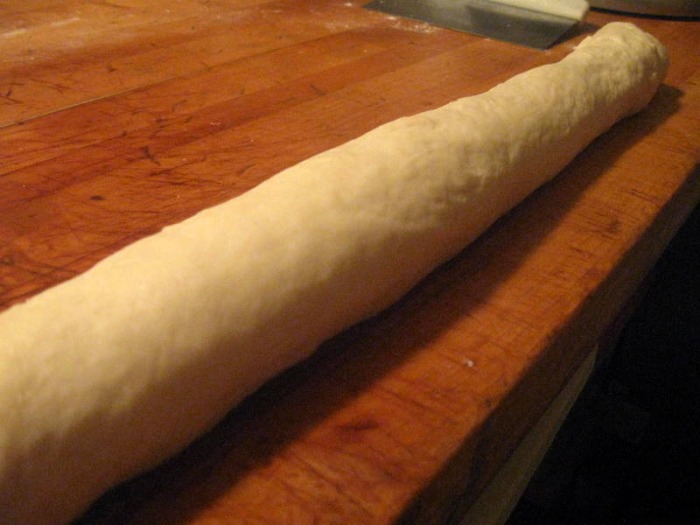
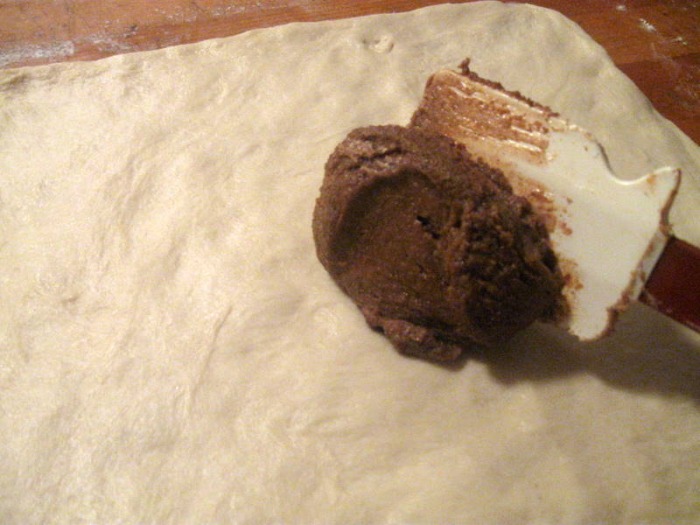
After it's relaxed you can begin shaping it. In this particular recipe I was doing a few things. I wanted to make some cinnamon bread to have for breakfast, and I wanted to make some garlic bread to have with our dinner. I also wanted to make some soft rolls to have with our Thanksgiving turkey. As you can see, the soft roll dough is extremely versatile. I very rarely bake bread in a loaf pan and prefer a more free form loaf, but you can do whatever you prefer. Depending on what type of bread you're making you will dust your pan with flour or cornmeal, or butter it if it's a loaf pan.
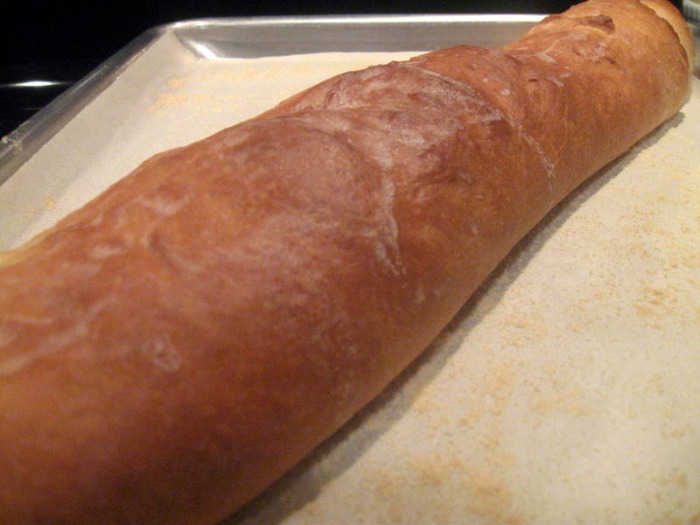
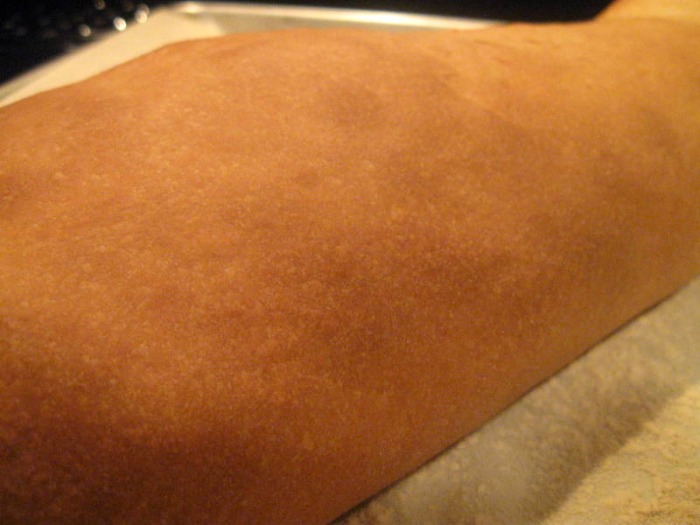
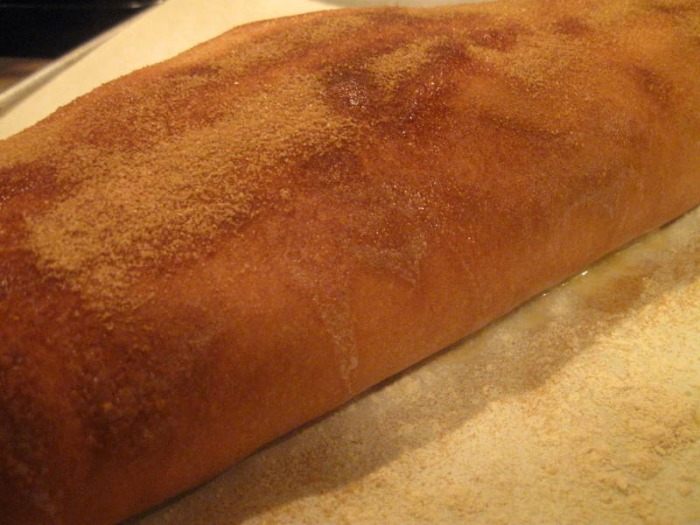
You can also put a wash on the top of your bread. You can use a variety of washes. You can paint the top with milk to get a golden brown top, or you can paint it with an egg wash (an egg mixed with a little water) for a shiny golden brown finish. You can use water, or nothing at all. You can also top the rolls with a variety of seeds (like poppy or sesame) or with cinnamon sugar, pretty much anything that sounds good to you. It's an easy way to make one dough but end up with a variety of finished rolls for an interesting bread basket.
After you've shaped your bread allow it to rest again. If you don't allow for this resting period the bread will shrink when you put it into the oven. After it's done resting put the bread into a hot 400 F oven and bake. How long the bread takes to finish will depend on whether you're making small rolls or large loaves. The way to test the bread for doneness is to wait for it to be a nice golden color and for it to be fairly sturdy. Gently flip the bread over (be careful because it will be hot) and thump the bottom side. If the thumping makes a hollow sound the bread is done. If it sounds dull then the bread needs more time.
When the bread is finished baking you can use it right away or you can freeze it and use it later. If you do decide to freeze it do not wrap it until it's completely cool. If you wrap it before it's cool the heat from the bread will create steam in the wrapping and make your bread soggy. It's best to leave the wrapped bread out on the counter or freeze it, but don't stick it in the refrigerator. Refrigeration actually speeds up staling and your bread won't last as long. But, remember, if you do end up with stale loaves you can always make french toast (pain perdu)!
SOFT ROLLS: yield: 5 lbs raw dough - 24 oz (720 g) Water, 110 F
- 1 1/2 oz (44 g) Yeast
- 1 lb 10 oz (1250 g) Bread Flour
- 4 t (24 g) Salt
- 4 oz (120 g) Sugar
- 2 oz (60 g) Powdered Milk
- 2 oz (60 g) Shortening
- 2 oz (60 g) Butter
- proof the yeast in the warm water
- while the yeast is proofing, scale half of the bread flour, the salt, sugar, powdered milk, shortening and butter into a bowl
- combine the scaled ingredients with the proofed yeast and begin mixing with a dough hook
- slowly begin adding the remaining bread flour, adding only as much as necessary (and sometime you may need more)
- mix for approximately 10-12 mins on low
- loosely cover the bowl with plastic and rise in the bowl until doubled in size (approximately 60-90 mins)
- after the dough has risen punch down the dough and shape into four rounds (or boules) and allow to rest on the work table for approximately 10 mins
- after resting, shape the bread into loaves or divide them into rolls and all put on a flour or cornmeal dusted pan; allow to rest again for 10 mins
- bake in a 400 F oven until the underside of the bread sounds hollow when thumped; an exact time cannot be given because it will depend on what size loaf or roll you're baking
The captions stopped working (again) as I was writing them. Now when I go in and try to edit the captions I get a message basically telling me I can't edit them. I'm not sure what the problem is, but I'm working on it. If you have any questions please ask, I'll gladly answer!
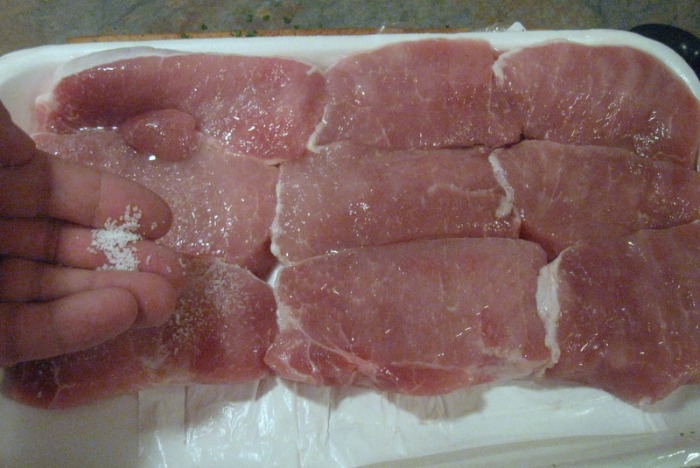
 I grew up in a single parent household. My mom would make dinner every night. Every once in a while we would get Arby's sandwiches when they were 5 for $5. During Lent, we would either have fish sticks or Mc Donald's fish filet sandwiches on Fridays. And we would sometimes order pizza from the Little Caesar that was just down the street. But for the most part she would cook dinner from scratch. I can remember eating a fair amount of pork chops. Mom like to crust them with that Shake-n-Bake stuff you find in the supermarket. Essentially they amounted to seasoned bread crumbs, but I guess it was convenient to make because they provided you with the bag to shake it up in.
Back then it was faux pas to cook pork to any temperature other than well done. We all know where that road leads to. A dried out, chewy mess. Well, things have changed over the last few years. The FDA now says that it is OK to eat pork at 'medium' temperature. I swear most chefs in this country can probably tell you the exact day this happened. It was like the best news anyone could have given out. Bigger than the Bears winning the Super Bowl, bigger than a senate seat scandal, bigger than just about anything. America would finally be able to enjoy a piece of pork.
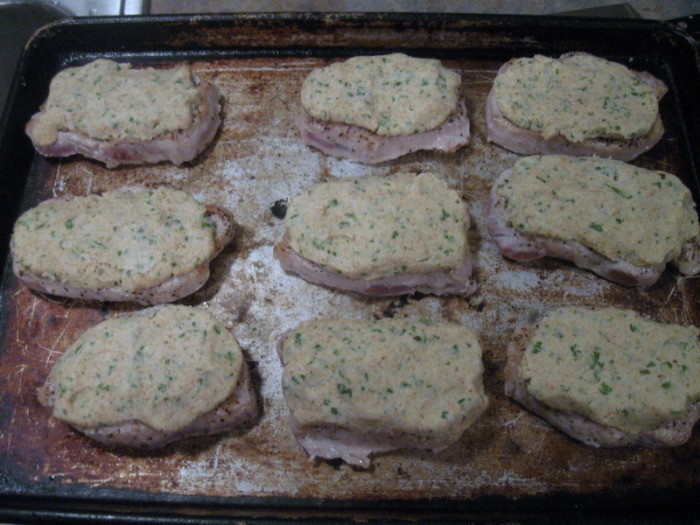
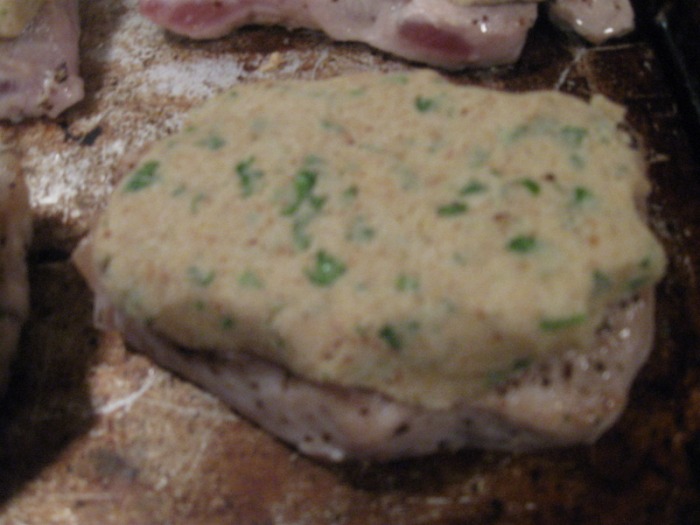
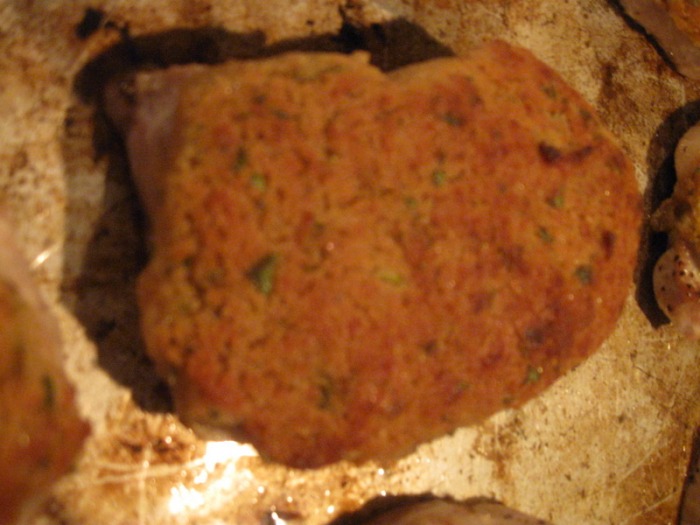
This recipe is a grown-up, modernized version of those pork chops mom used to make. No Shake-n-Bake was used this time though. What you will have are nicely seasoned pork chops that are full of flavor and as juicy as can be. The horseradish crust provides texture as well as flavor and makes them look like they just came out of a steakhouse. Try these at your next family dinner or holiday party.
-The Chef
HORSERADISH CRUST: - 4oz butter, softened
- 3Tbsp parsley, chopped
- 1/2 cup prepared horseradish
- 1tsp Dijon mustard
- 1Tbsp mayo
- 1/8 cup Parmesan cheese
- 1 cup bread crumbs
- Combine the butter, parsley, horseradish, mayo, and mustard in a mixing bowl and mix well.
- Stir in the Parmesan cheese.
- Fold in the bread crumbs.
- Refrigerate for 30 minutes.
For Making Pork Chops: - Pre-heat oven to 350 degrees.
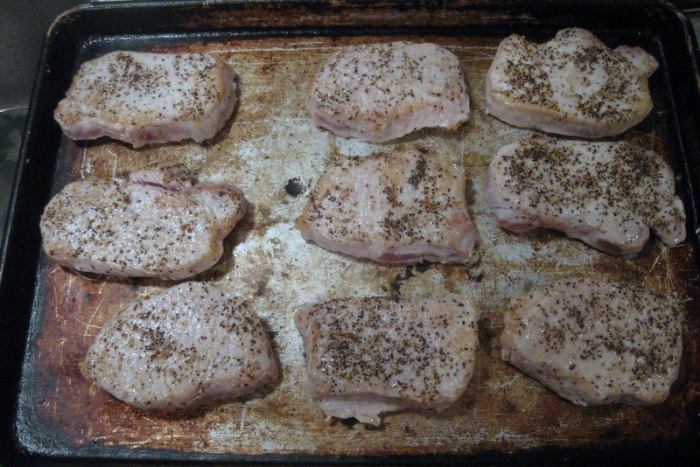
- Season pork chops with salt and pepper. In a saute pan over med-high heat, add 2 tbsp of oil, and begin to saute pork chops. Cook 1 minute on each side, then remove to a sheet pan.
- Remove horseradish crust from fridge. Make the crust by forming it in the palm of your hands. Try to replicate the size of the chop. Place on top of pork chop and gently press into place.
- Cook pork with crust in oven for approximately 12 minutes. Remove and place under the broiler and cook until crust is golden brown.
- Remove from broiler and let rest 5 minutes. This allows the natural juices to absorb back into the meat so they don't run out because they were cut immediately.
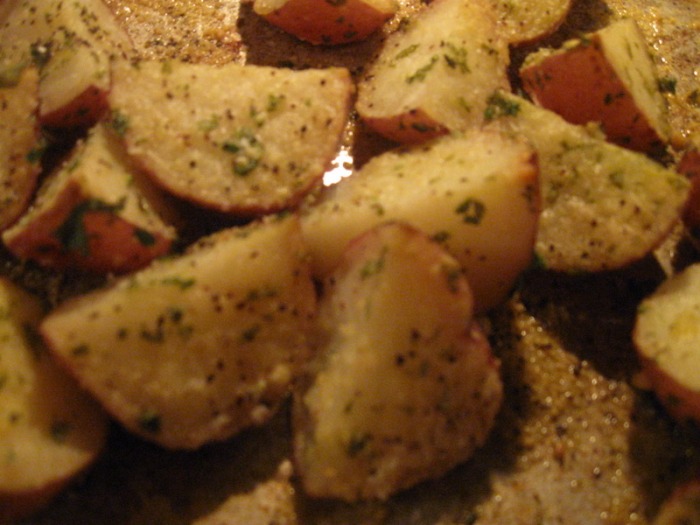
- Serve with your favorite potato and vegetable.
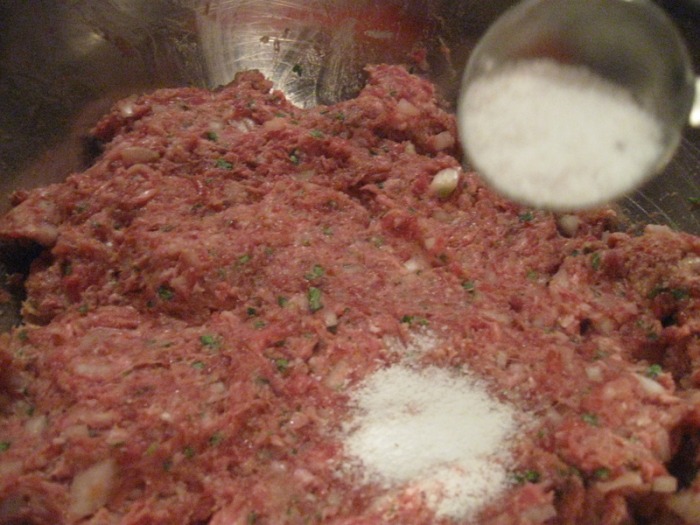
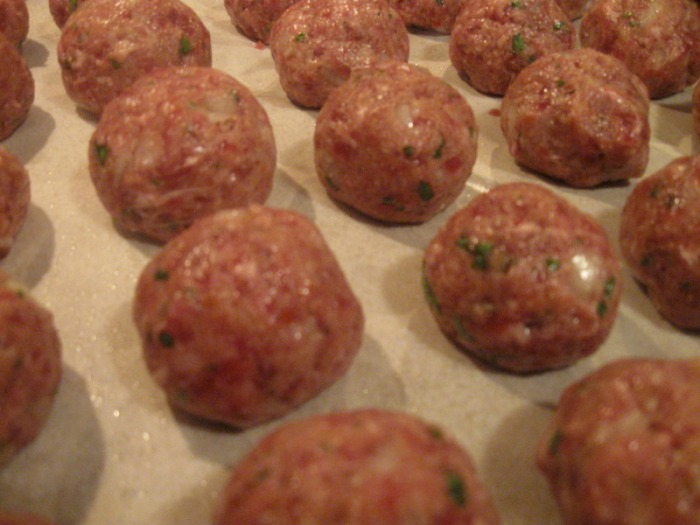
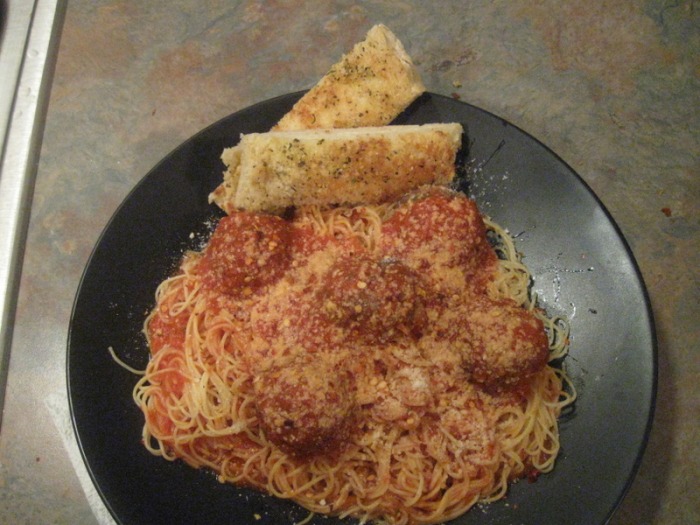
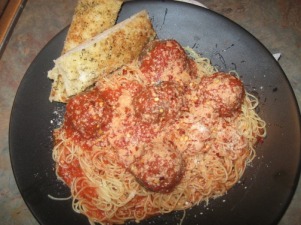 I don't think I was ever a fussy eater as a child. I ate pretty much anything my mother made me. Okay, maybe I wasn't the best at eating my veggies, but what kid is? Spaghetti was a household favorite though. Spaghetti with butter and Parmesan. Spaghetti with oil and garlic. Spaghetti with meat sauce. I loved them all. I'm sure my mother would love to tell you how many white shirts I ruined over the years with all the spaghetti sauce stains that just wouldn't come out. My favorite has always been Spaghetti and Meatballs. As a child I would spend a weekend here and there with my grandmother. I'd go there on a Saturday, and she would have already been to the store and stocked up on all my favorites. We'd have dinner on Saturday night, and breakfast on Sunday before going to church. Saturday for dinner she'd make me a frozen spaghetti dinner and broil off some garlic toast. I'd sit with her in the living room and we'd watch some TV (she loved the Golden Girls), and I felt like a king. Hey when you're young, a Stouffer's dinner will do that to ya.
Everyone has a way of making their own meatballs. It's usually taught to us by our mothers or grandmothers and, for sentimental reasons, rarely changes over the years. I mean, you don't want to be the one in the family who breaks tradition, right? Well fortunately for me, there is no family meatball recipe. I guess that means it is up to me to start one.
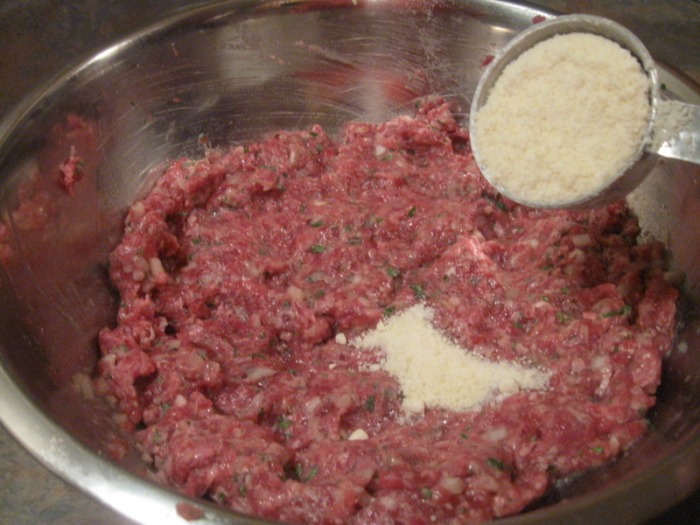
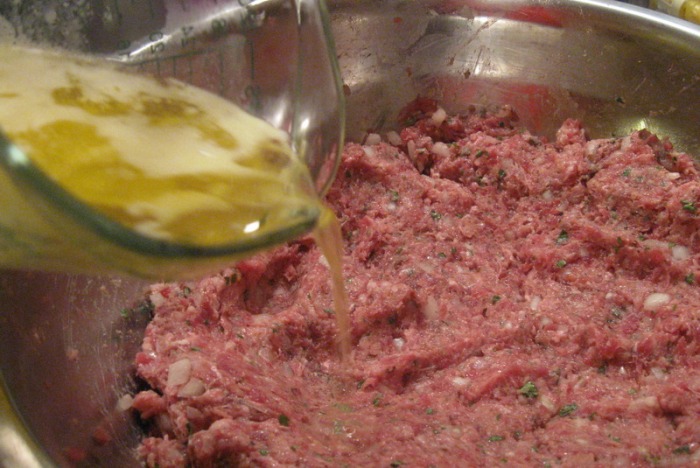
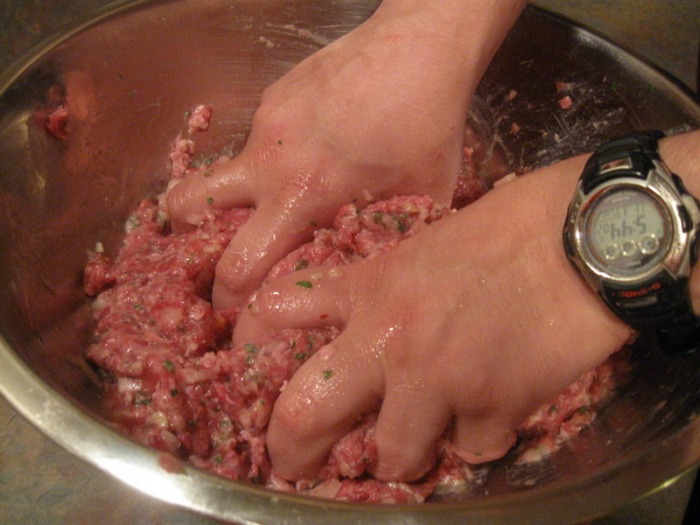
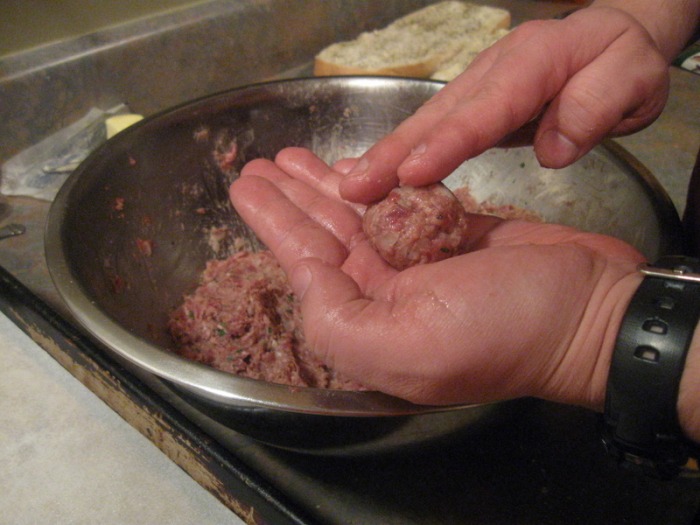
Here is a recipe I came up with on the fly, which I have to say, is pretty darn good. The key to a good meatball is two-fold. First, it has to have some moisture. If you add too many bread crumbs, it will be dry and dense. The second part is the rolling of the meatballs. You don't want to over-work the mix. Roll the meatballs in your hands and try not to pack them too much. You want it to be moist, light and tender enough to be cut with a fork. It is your choice whether or not you want to simmer them in the sauce or not, but if you have the time, I would recommend it. This is a pretty large recipe, but I like to use the leftovers to make meatball sandwiches!
-The Chef
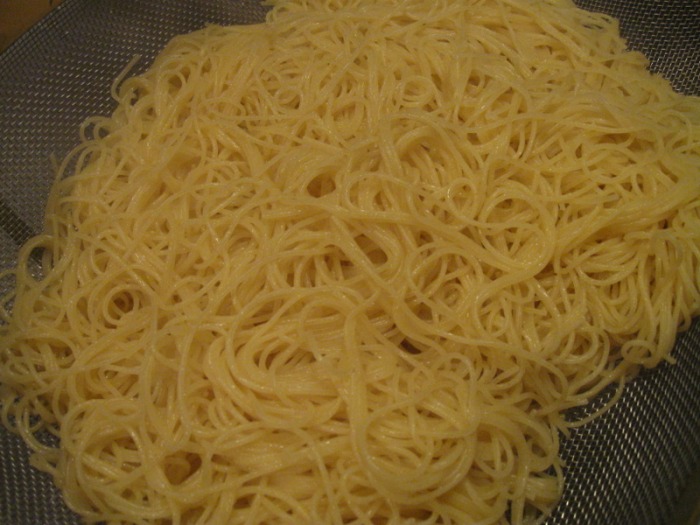
SPAGHETTI AND MEATBALLS WITH HOMEMADE GARLIC BREAD- 2 lbs ground beef
- 1 lb ground mild Italian sausage
- 4 cloves garlic, minced
- 1 onion, finely minced
- 1/4 cup chopped fresh Parsley
- 3 eggs, beaten
- 4 oz milk
- 4 oz unsalted butter, melted
- 1/2 cup Parmesan/Romano Cheese
- 1 3/4 cup bread crumbs
- 1 Tbsp kosher salt
- 1 tsp ground black pepper
- Mix the beef, sausage, chopped garlic, minced onions, and chopped parsley in a mixing bowl until thoroughly mixed
- Add the eggs, milk, and melted butter; mix; mixture should be very loose
- Add the cheese, bread crumbs, salt and pepper; mix
- Refrigerate 30 min-1 hour
- Preheat oven to 350 degrees
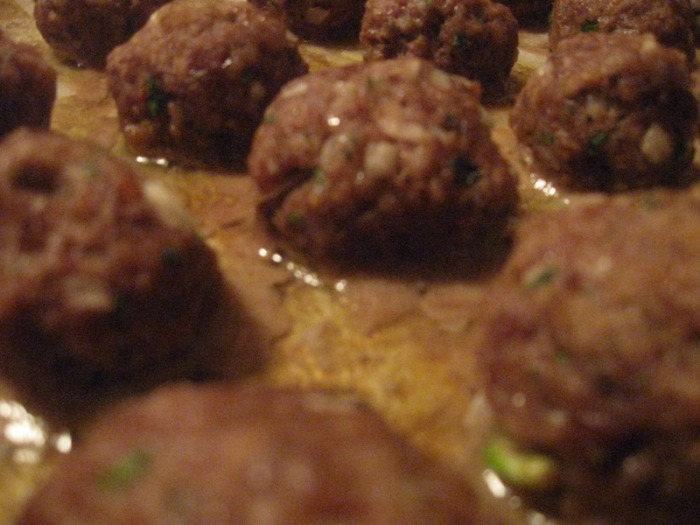
- Roll meatballs the size of large golf balls; place on parchment lined sheet pan sprayed with non-stick cooking spray; bake meatballs at 350F for approx 15 minutes, or until center is 155 degrees
- Remove from oven; place cooked meatballs in a Marinara sauce of your choice and simmer for 15 minutes
- Serve over cooked spaghetti, or your choice of pasta
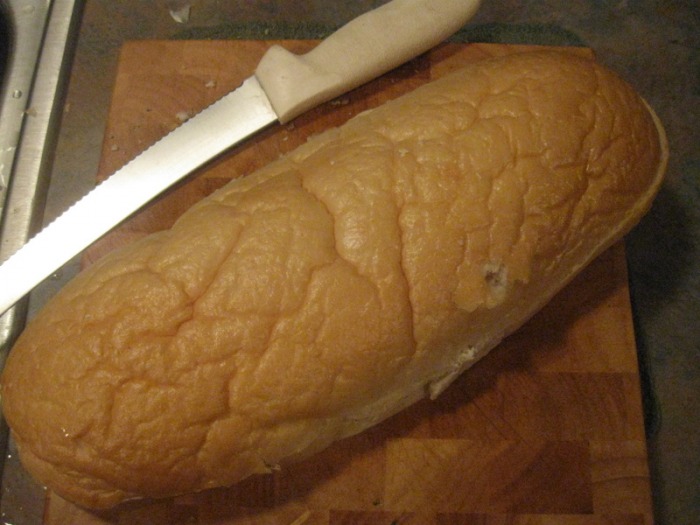
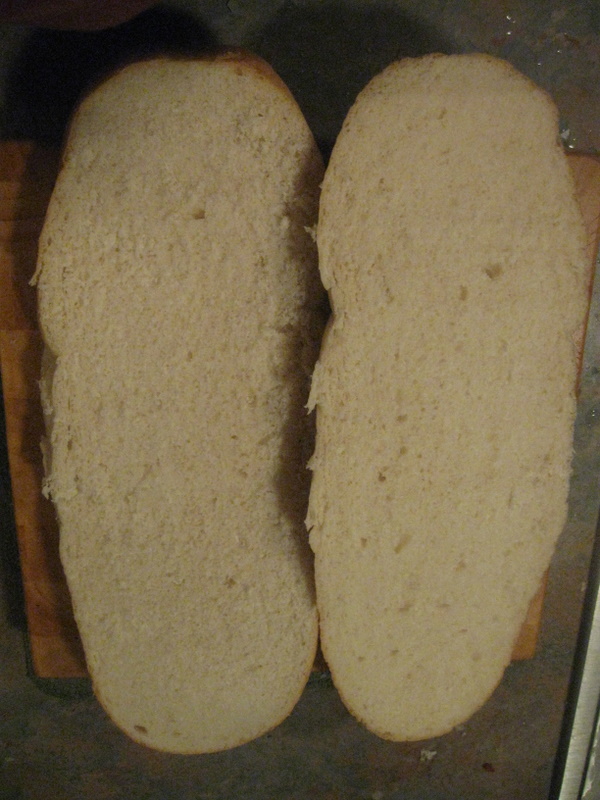
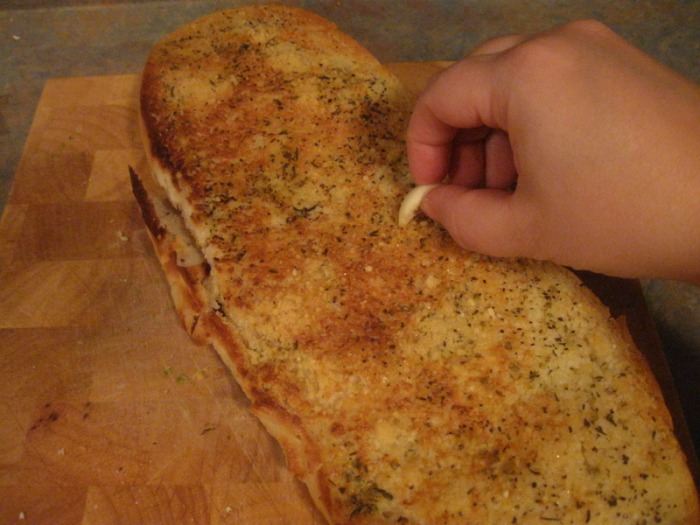
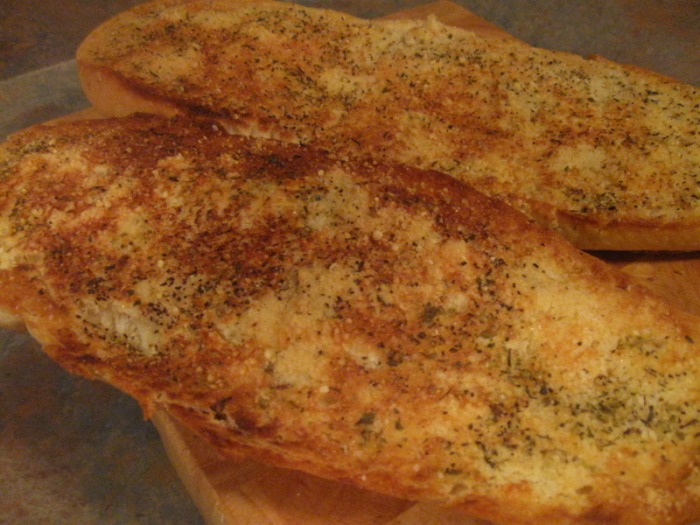
HOMEMADE GARLIC BREAD:- 1 loaf French bread, or other baguette style bread
- 4 oz butter, room temperature
- 1/2 tsp dried Italian seasoning
- 1/4 tsp salt and pepper
- 2 Tbsp Parmesan/Romano cheese
- 2 cloves peeled garlic, whole
- Split bread in half horizontally
- Spread with butter and sprinkle with Italian seasoning, salt, pepper and cheese
- Place in 350 F degree oven for 12 minutes; remove and bake under broiler additional 1-2 minutes to get top golden brown
- Remove from broiler and immediately rub peeled garlic cloves all over surface of the garlic bread
- Slice and enjoy
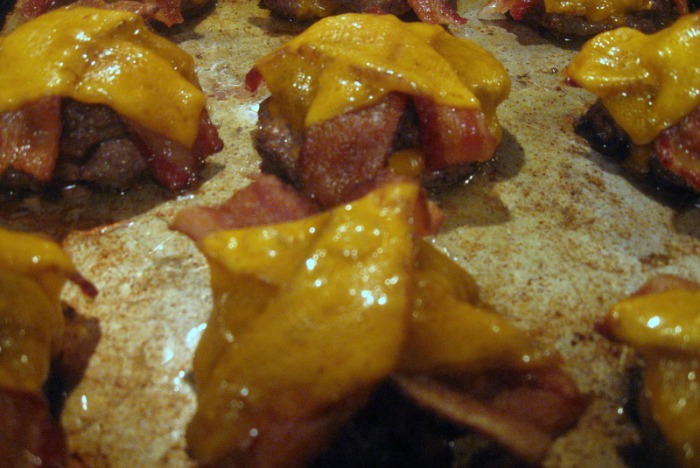
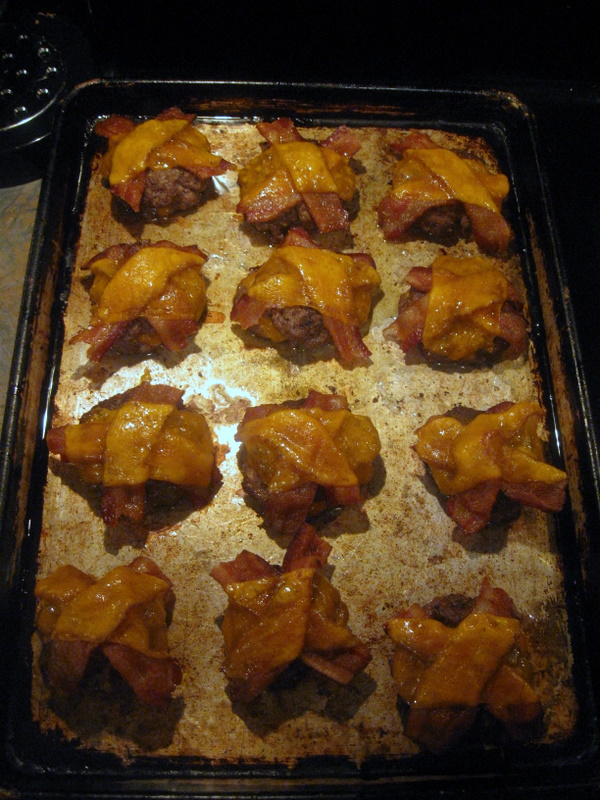
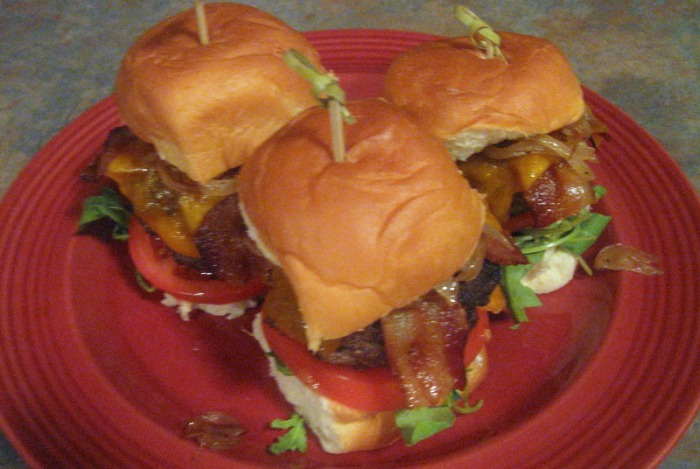
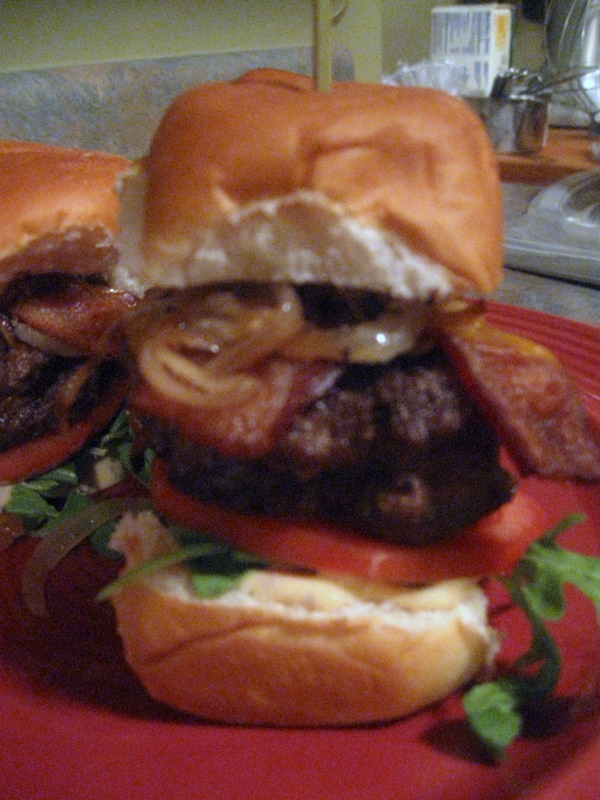
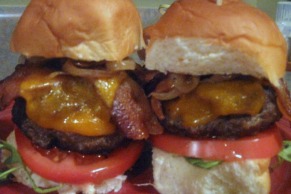 I miss Summer. It's only early November, but I already miss it. My absolute favorite thing to do is have a barbecue. But whether I'm cooking for a crowd or my family, I always look for a way to use the grill. And where there is a grill, you'll surely find hamburgers of some kind. Burgers are the quintessential American food. I guess because you can top them any way you want so everybody has their chance to, dare I say, "Have it their way".
I suppose you could say they are one of my vices. I don't think I've ever made the same burger twice. No joke. There is always something I change up. I've never written down a burger recipe. And I've made them hundreds of times. To this day, that is probably my biggest challenge as a chef. I tend to cook with what I have on hand. Maybe that will be my New Year's resolution?!
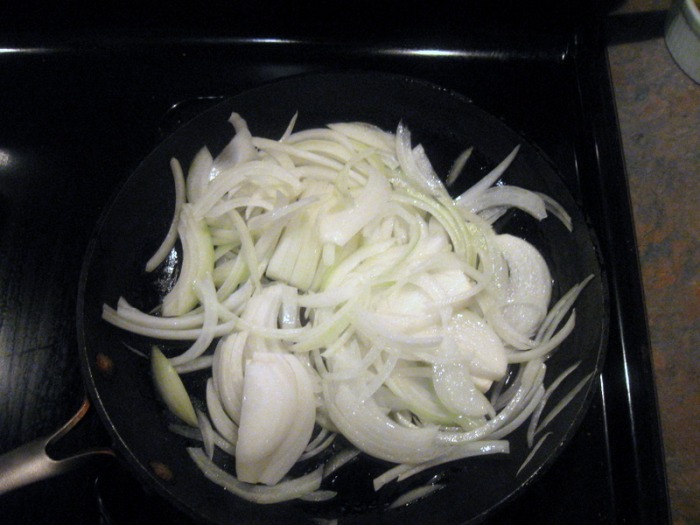
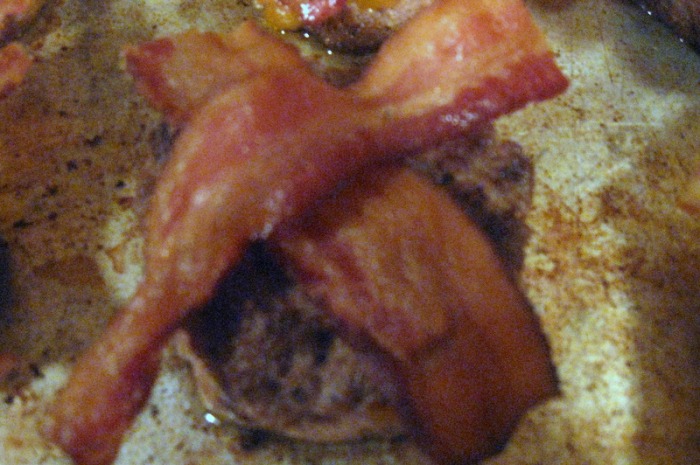
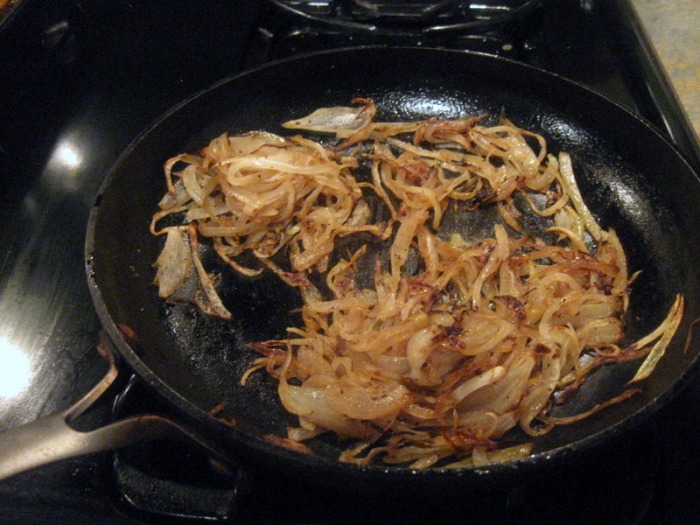
So that being said, use what you have on hand. Change it up a bit as you see fit. One thing that I have been partial to lately, though, is the "mini-burger". In this recipe, I use mini Hawaiian bread for buns. Yum! The chipotle mayo gives it some kick, and the arugula adds a nice peppery element that iceberg lettuce just doesn't have. The bacon give it smokey-ness, the cheddar adds some sharpness, and the caramelized onions impart a little sweetness. I'll admit, I had more than "my fair share" of these burgers. Maybe that's why I like mini burgers so much...................
Enjoy!
-The Chef
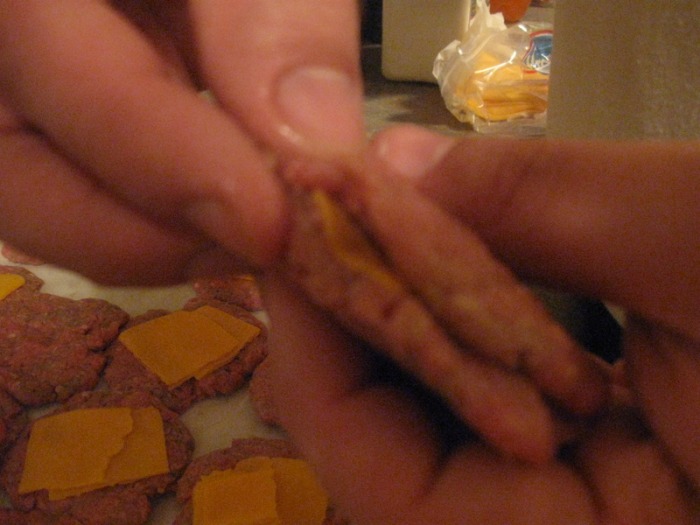
BURGERS- 2 1/2 lbs ground beef
- 1 Tbsp A-1 steak sauce
- 1 tsp onion powder
- 1 tsp garlic powder
- 2 tsp salt
- 1 tsp black pepper
- 1/4 - 1/2 lb. sharp cheddar cheese
- 12 slices thick cut applewood smoked bacon
- 6 oz baby arugula
- 2 tomatoes, sliced 3/8" thick
- Mix beef, A-1, onion powder, garlic powder, salt, and pepper in mixing bowl until well mixed. Form into 24 equally sized patties.
- Pre-heat oven to 350F. Cook bacon for approx 30 minutes in oven on a parchment lined sheet tray. Drain on paper towels. Reserve.
- Fold sliced cheddar into a square and place on top of 12 burger patties. Lay the remaining patties over the cheese and seal edges by pinching with your fingertips.
- For best results, use grill and cook approx 1-2 minutes on each side, or until desired doneness is achieved.
- Top with cooked bacon and more cheddar cheese. Melt cheese and assemble. From bottom to top, layer: mayo, arugula, tomato, burger, caramelized onions.
CHIPOTLE MAYO:- 6 Tbsp mayo
- 1 Tbsp Dijon mustard
- 1 tsp adobo sauce
- 1 can chipotle peppers in adobo sauce
- 1/4 tsp chopped parsley
- pinch of salt and pepper
- Remove one individual chipotle pepper from can and finely chop. (the rest can be stored in plastic bag or container in the fridge for up to 1 week).
- Place in mixing bowl. Add remaining ingredients.
- Stir. Taste. Cover and refrigerate for up to 1 week.
Note: Chipotle peppers in adobo sauce are available at most local supermarkets. Look for them in the ethnic food section by the Mexican ingredients.
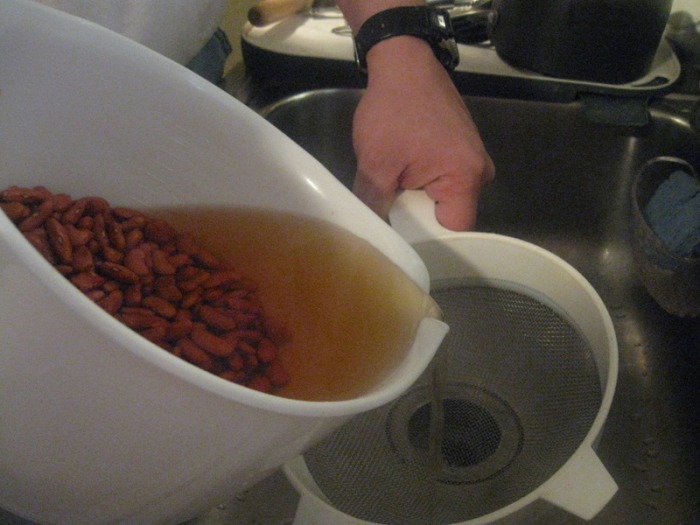
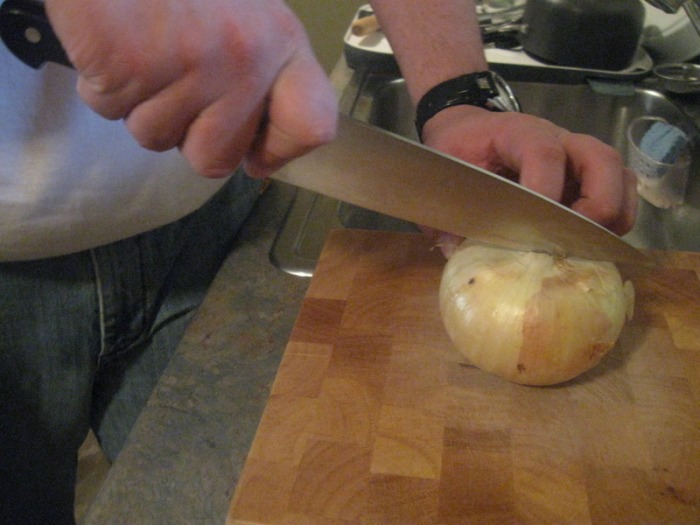
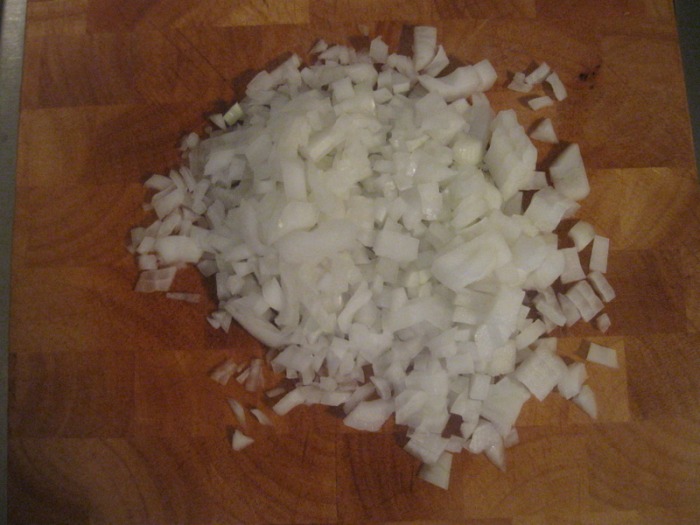
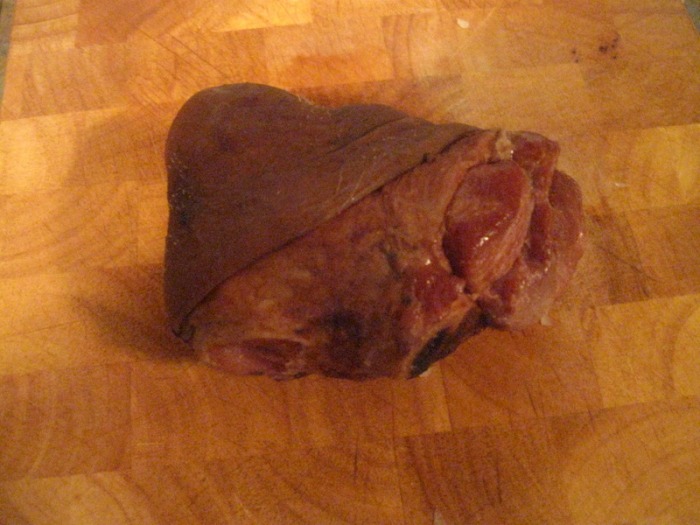
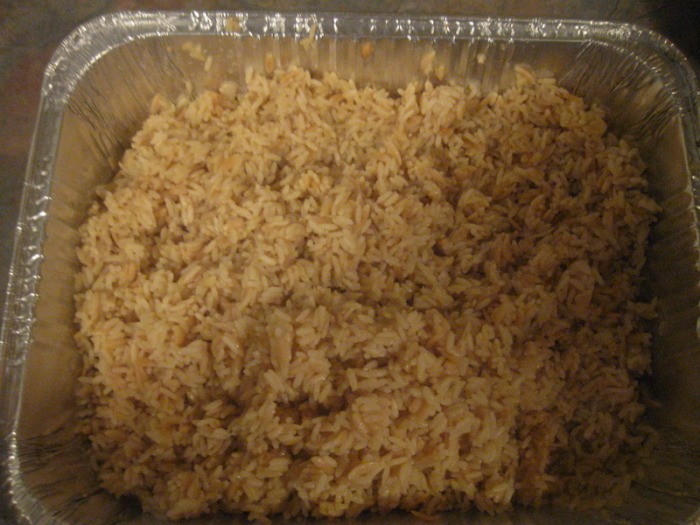
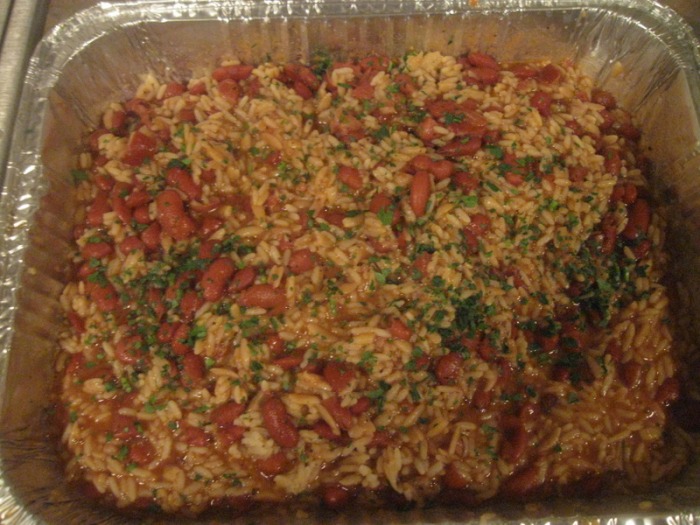
 I think about food, seriously, 24 hours a day. It's my job. I'm always thinking about how I can improve on a dish at the restaurant, or create something new and exciting, or make something my family loves. So, the other day my GM starts talking to me about the dinner he made a few nights earlier. Hey, that's what we do in the restaurant world. Other people talk about TV shows, or Hollywood gossip, we talk about food. Constantly! The dish he made was Red Beans and Rice. He didn't have the time to use dried beans so in his version he used canned beans. Hey, do what you can with the time you've got, right? My first encounter with Red Beans and Rice was actually at Popeye's Chicken. Say what you will about fast food places, I know I do, but I think they have a fairly decent Red Beans and Rice. And so, for the rest of that day at work all I could think about was making Red Beans and Rice. When made right, they have a delicious smokey-ness, nice spice, and rich gravy that should make for a yummy meal. Feel free to adjust the amount of spice to your own level. If you cannot find ham hock at your grocery store, you can substitute diced ham steak, or andouille sausage. Enjoy!
-The Chef
Spicy Red Beans and Rice Ingredients: - 1 lb dried red beans
- 1 med size onion, diced
- 2 Tbsp vegetable oil
- 1 ham hock
- 16 cups water, divided
- 1 tsp cayenne pepper
- 2Tbsp black pepper
- 1 Tbsp salt
- 1 tsp oregano
- 1/2 tsp garlic powder
- 1/2 tsp onion powder
- 8oz tomato sauce
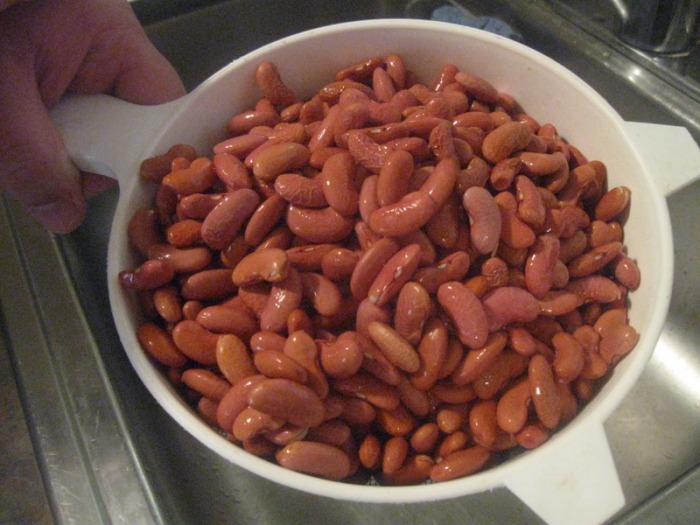
Procedure: - Pick through beans, discarding any stones, gravel or dirt that may be present. Rinse thoroughly. Soak beans with 8 cups of water for a minimum of 4 hours, overnight is best, at room temperature.
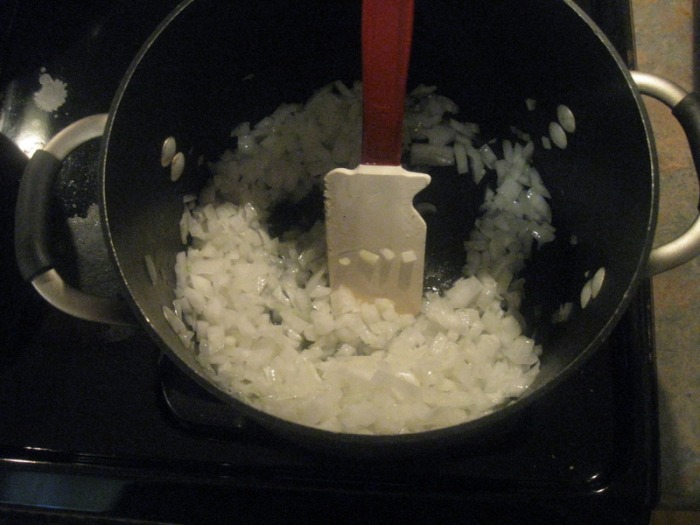
- Drain beans. In a medium sized stock pot, heat oil over medium heat and saute onions until tender, about 4 minutes.
- Add drained beans, ham hock, and cover with 8 cups of water.
- Bring to a boil, then simmer, covered, for about 3-4 hours, or until beans are soft and liquid has begun to reduce and thicken.
- Add remaining ingredients, stir well, and continue simmering for 10 minutes.
- Taste. Adjust seasoning as needed.
- Serve over cooked white rice.
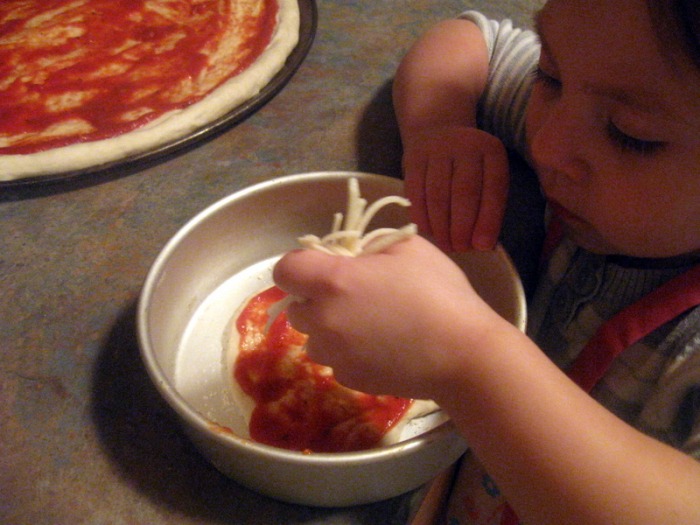
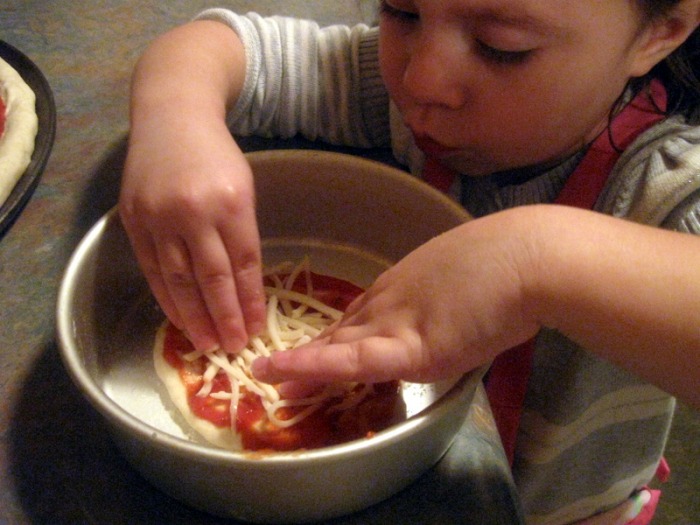
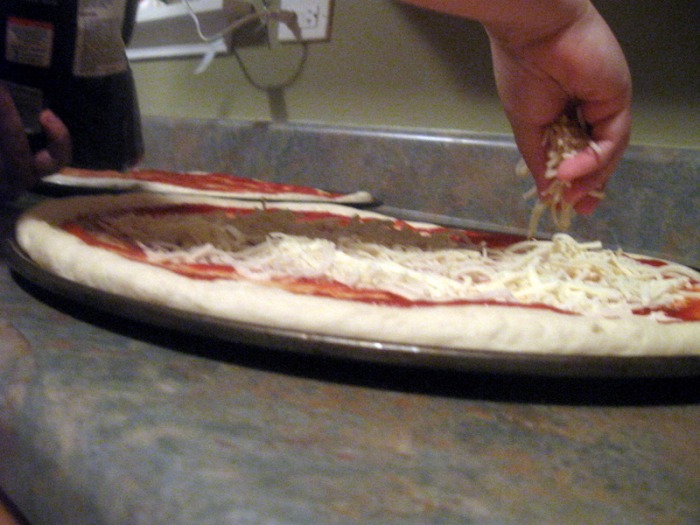
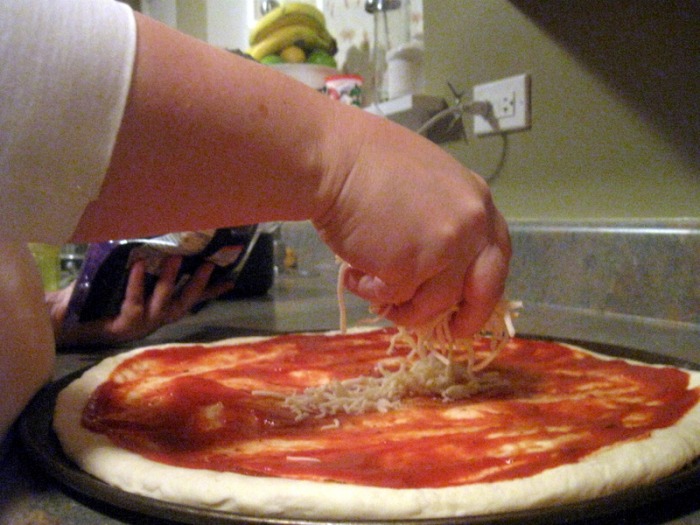
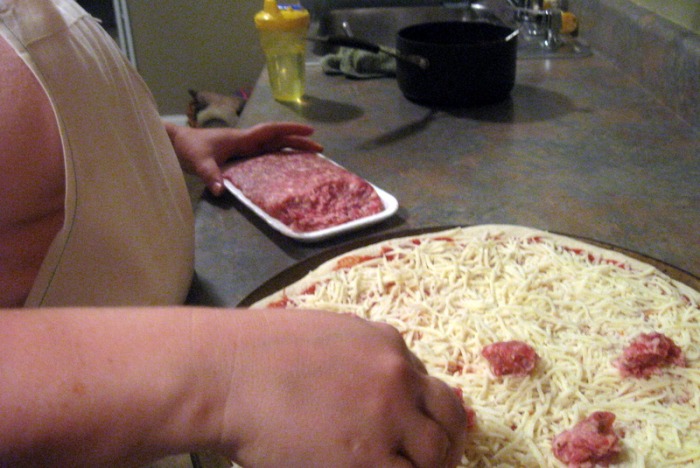
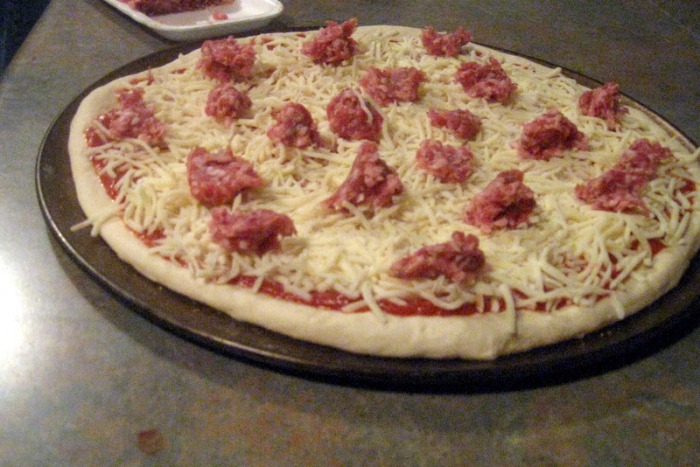
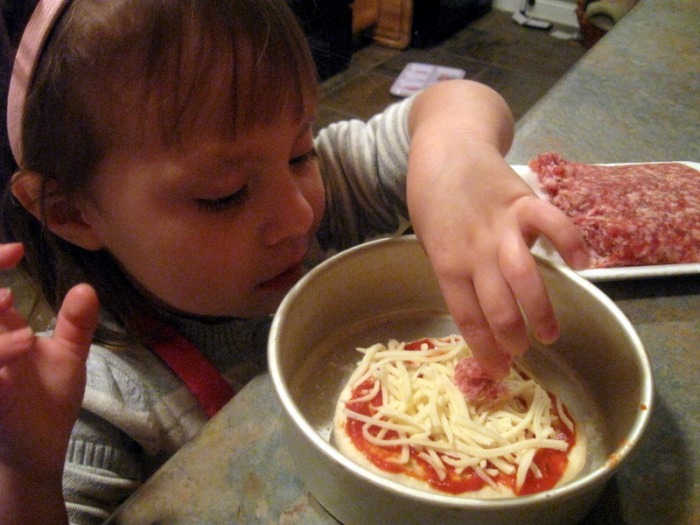
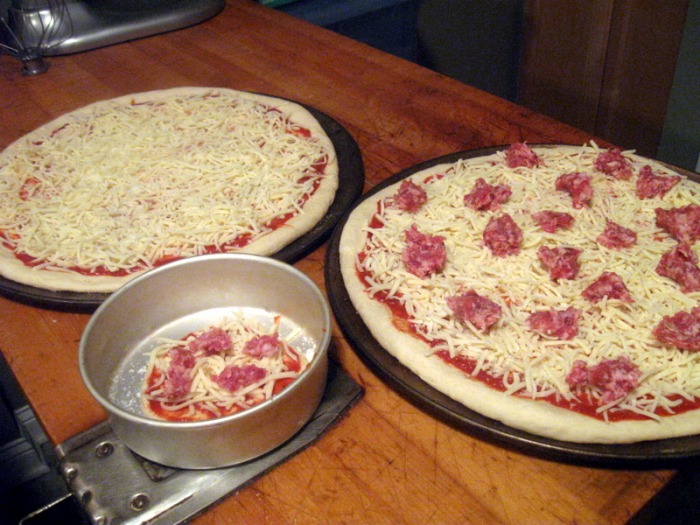
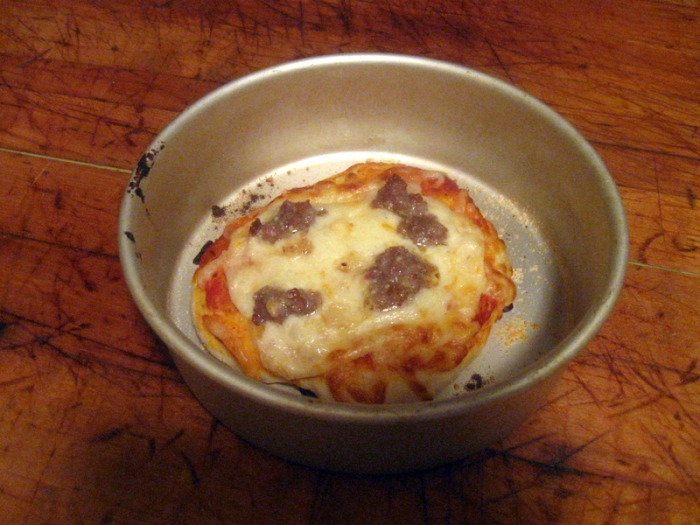
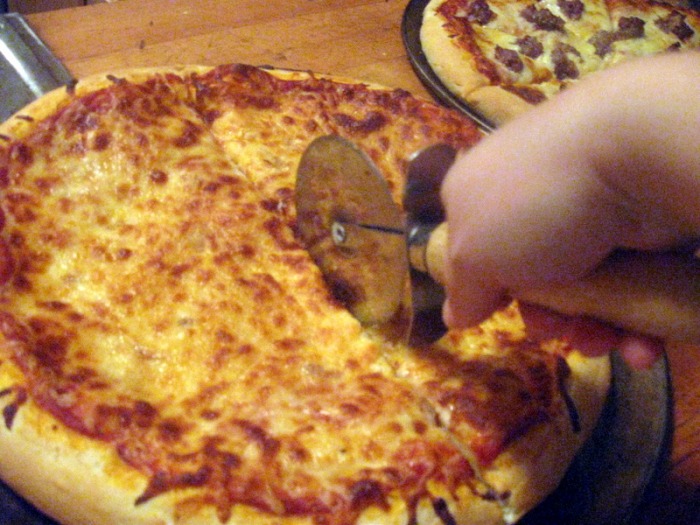
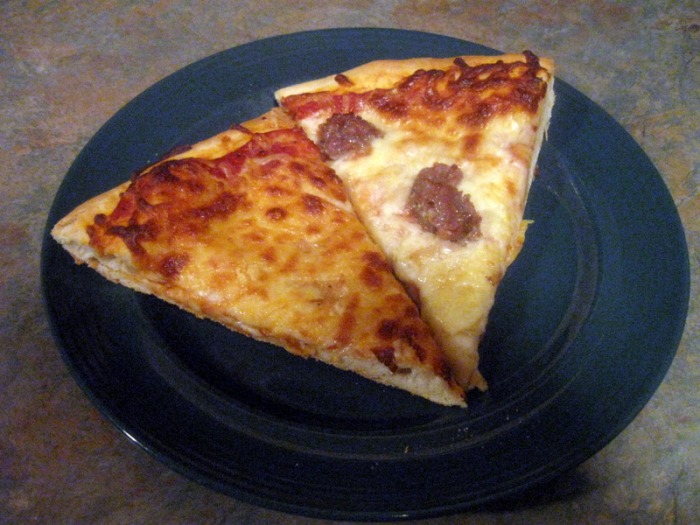
 Who doesn't love a nice hot fresh pizza? I remember when I was a kid and my mom was pregnant with my younger sister, she craved pizza constantly. I honestly think we ordered from River Pizza at least two times a week, if not three. It was a small neighborhood place with real Italian food, and their pizza was to die for. You would think after nine months of non-stop pizza eating we would all hate pizza, but I still think about that place.
I didn't know how good the pizza was until I moved away and ordered what turned out to be the first of many years of bad pizza. Every pizza I've had since then gets compared to that pizza and none measure up. Periodically I get the urge to make my own pizza thinking that I would somehow match the taste of their pizza, but they never turn out as good. It's not difficult to make pizza, but it is time consuming and who wants to spend a good chunk of their day making what they know will be so-so pizza when you could just pick up the phone and order one?
Until now. I finally found the right combination of ingredients. Actually, I was motivated by the economy. Dropping $35 on a couple of pizzas just didn't seem smart. I'll admit, I've become the queen of the bargain hunt. I don't think it should matter how much money you have, if you can pay less for something why wouldn't you? So I got re-motivated to make good homemade pizzas.
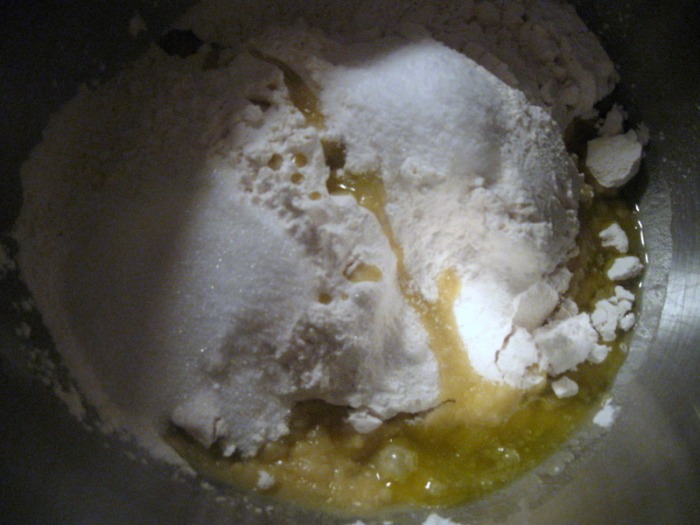
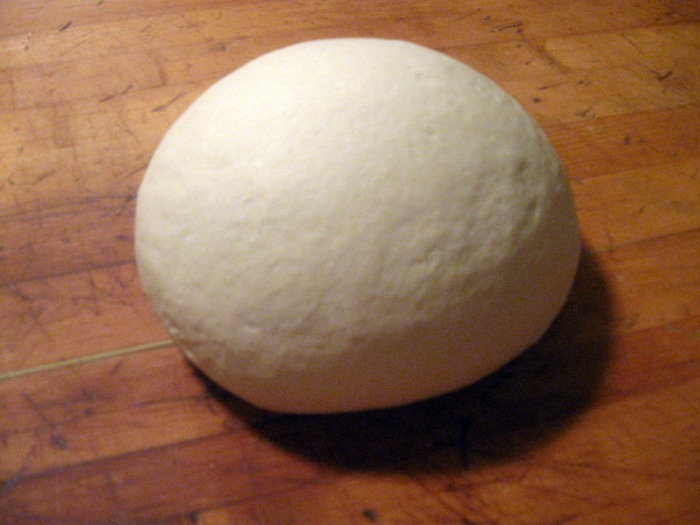
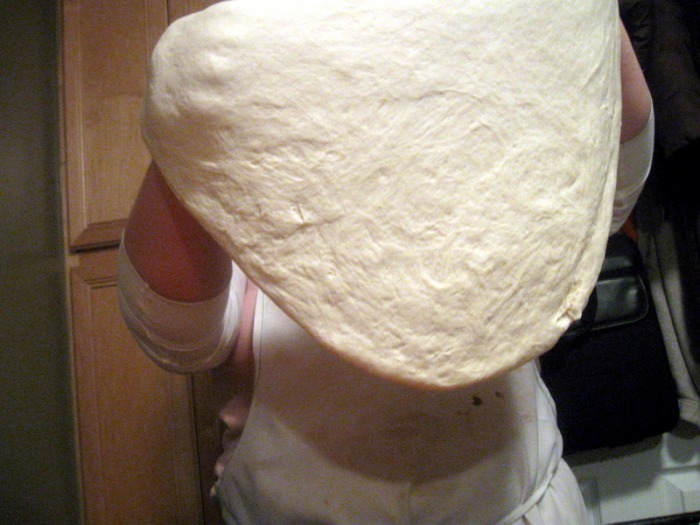
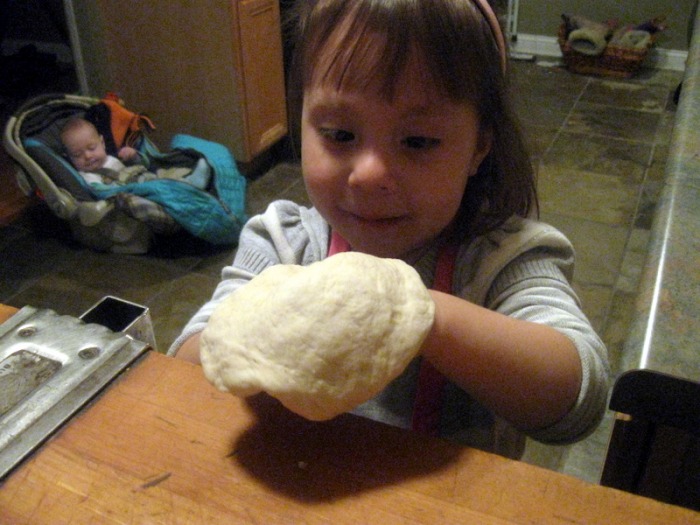
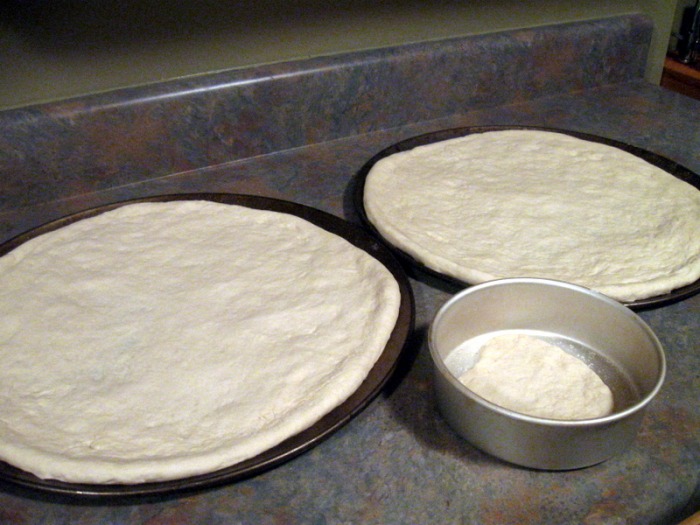
We started out making our own pizza using dough that The Chef would bring home from the restaurant. I can admit that's kind of cheating. The taste of the crust is so important and I just didn't want to waste a good pizza craving on a boring crust. Finally fate intervened. I wanted to make barbecue chicken pizza and The Chef was at work and wouldn't be home until late. I started researching through my books and on the internet and through my cabinets to see what I ingredients I had available and I came up with this dough recipe. It's fantastic! I couldn't believe it. After all the bad pizza dough I've made over the years, this dough was great!
It was so good, in fact, that when The Chef came home that night and warmed some up for himself he said, "You know, we're considering changing our pizza dough recipe at the restaurant. This is really good, could you give me the recipe so I can test it out?"
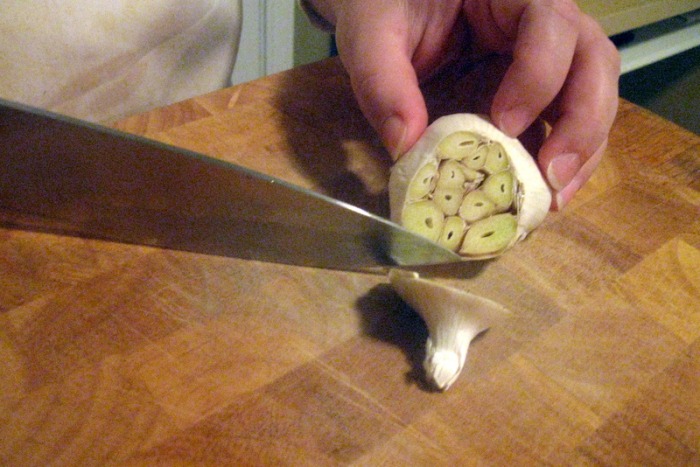
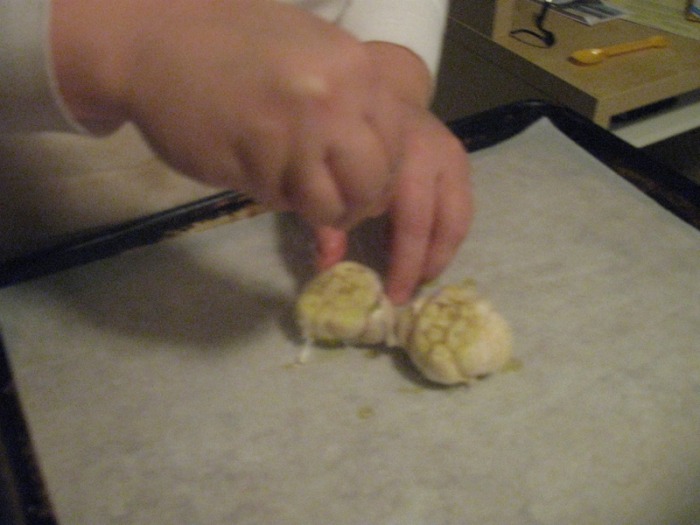
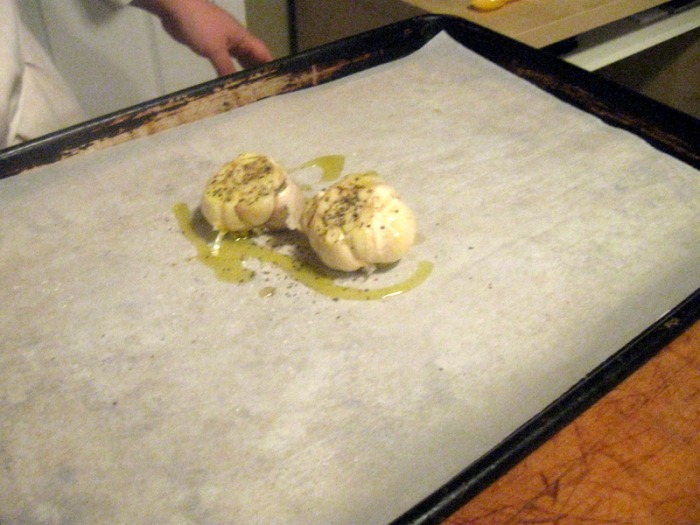
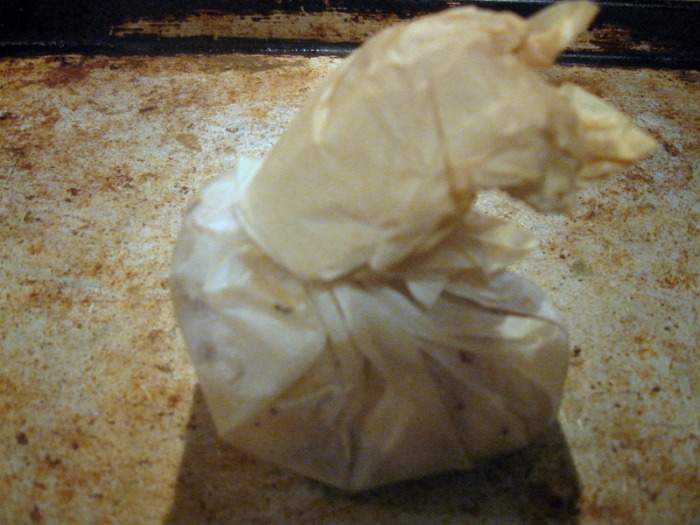
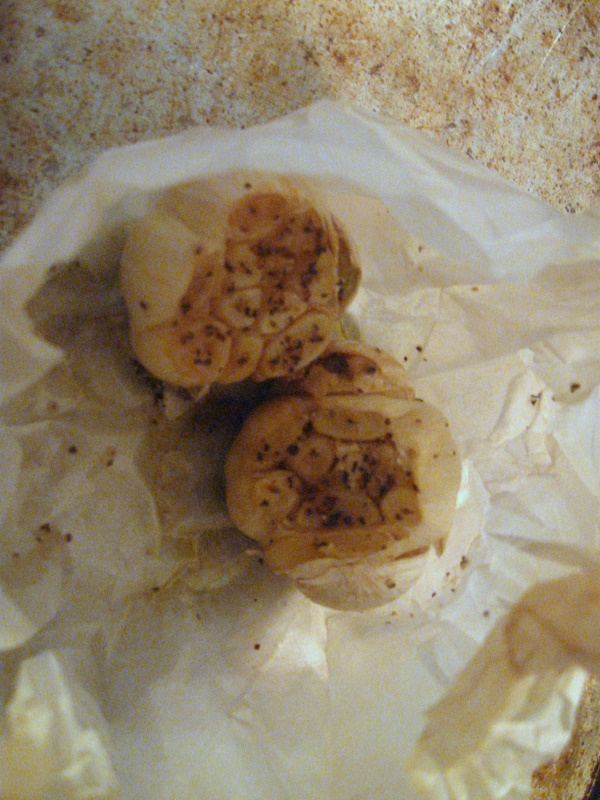
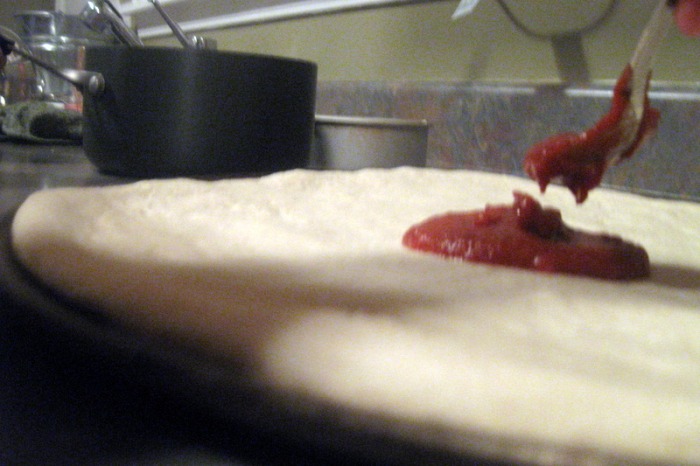
I'm really picky when it comes to pizza sauce. I'll be honest, I'm not much of a fan, and when you look at the pictures you'll see I don't put much on. I always order my pizza with easy sauce, which drives the rest of my family crazy, but too much sauce makes me gag. To me, the sauce was never the highlight of the pizza but I decided to make some that even I would like. I decided to roast some garlic and add it to the sauce and it was delicious!
So the next time you crave pizza skip the phone and try this out. It's so good you'll be glad you kept your $35!
PIZZA DOUGH
yield 2 - 16" thin crust pizzas - 1/2 oz Active Dry Yeast
- 2 C Water, warm (110 ° F)
- 4 C Bread Flour
- 2 C AP Flour
- 1/4 C Olive Oil
- 2 t Sea Salt
- 1 T + 1 t Sugar (separated)
- Dissolve yeast in warm water; whisk together to activate yeast; let stand until frothy (about 10 mins)
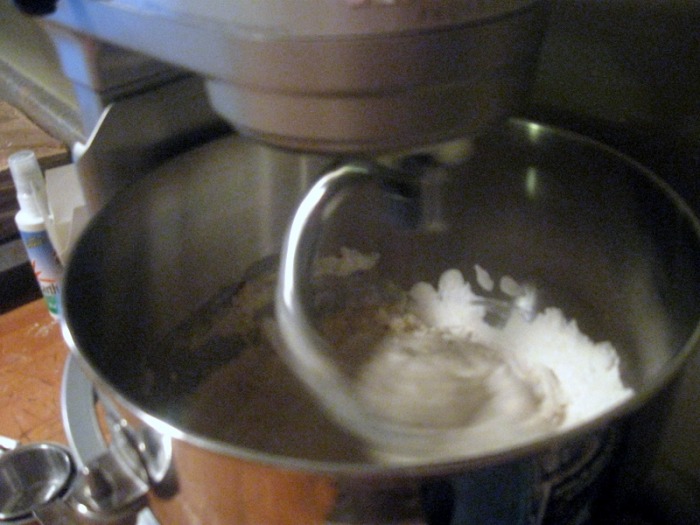
- In large mixing bowl combine bread flour, olive oil, sea salt and sugar; add yeast mixture; stir well to combine
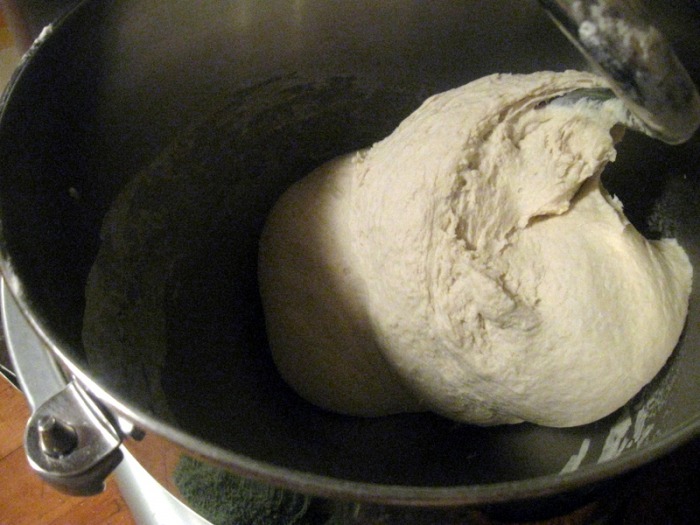
- Using a dough hook, knead dough; as the dough kneads begin adding AP Flour (about 1/2 C at a time) until the dough is no longer liquid and is smooth and stretchy; you may not need all of the AP Flour, and sometimes you may need more than the 2 C called for, you have to use your judgment to know how much to use
- Cover bowl and let dough rise until doubled
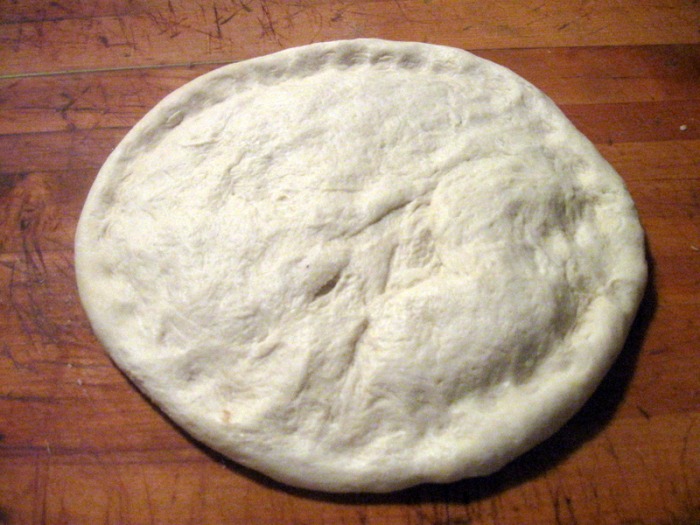
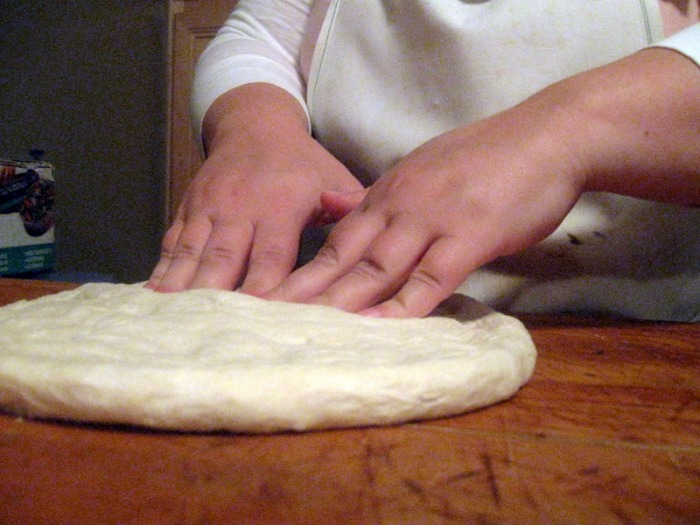
- After rising, punch down dough; divide into boules, cover with plastic and allow to rest on bench
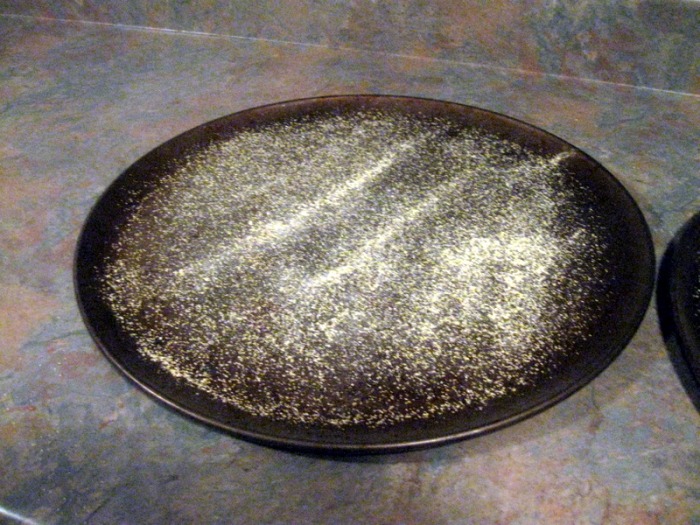
- On a floured board punch down boules and shape into pizzas; top with ingredients
- Bake at 500 for 16 mins
ROASTED GARLIC PIZZA SAUCEyield approximately 2 1/2 Cups - 16 oz Tomato Sauce
- 6 oz Tomato Paste
- 4 oz Water
- 1 t Italian Herbs
- 1/4 t Cayenne Pepper
- 1/2 t Sugar, granulated
- 1/2 t Onion powder
- 1/2 t Salt
- 1/2 t Black Pepper, ground
- 3 cloves Garlic, roasted
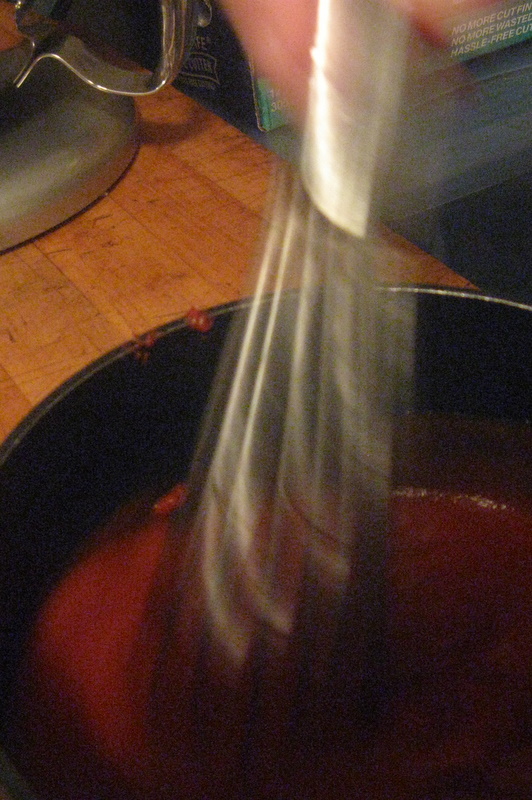
- pour tomato sauce, tomato paste and water into saucepan; whisk together
- add Italian herbs, cayenne pepper, sugar, salt and pepper; whisk together
- squeeze the bulbs of roasted garlic into sauce and whisk together
- place over a low flame and just let it warm to allow flavors to marry, for as long as you like
Hints: All of the flavorings can be increased or reduced according to your tastes. If you don't have time to heat the sauce it can be used right after mixing, it just won't develop as much flavor. -The Baker
|


 RSS Feed
