 I've known my entire life that I wanted to work with food. I had no idea how to go about making that dream a reality, and in fact, I thought that it wasn't even a possibility. I thought that to become a chef you had to have been born in France and begin an internship with a French chef when you were like nine years old. All of the chef biographies start like that... "I grew up in France and at nine years old my first job was as a pot washer in a Michelin Star restaurant. I slept on a small cot near the back door so that I could keep the fires stoked all night."
At the time time I was growing up American cuisine was made fun of by the rest of the culinary powerhouses, like France and Italy. There were no famous American chefs. We did have Julia Child, but even she went to France to learn to cook! Going to France was not an option for me. What to do, what to do?
Well, I obviously did a lot of cooking and baking on my own for my friends and family, so I had a little bit of a background. The more I did it though the more I realized that what I really liked to do was bake. Where could I get the experience I needed to bake professionally? At a bakery, of course! So, I applied at a bakery, and the first thing they asked was, "Have you ever baked professionally?" Um, no. Well, they had no jobs for inexperienced bakers. It was the same story pretty much everywhere I went. The good old catch-22... they won't hire you without experience, but you can't get experience if they don't hire you... ugh!
I needed a job because life isn't free, so eventually I accepted a job as a counter worker at a bakery. I got to watch all the professional bakers while I stood at the counter and helped customers. I knew I could do what they did if only I could get the chance. Well, one day I got that chance. The muffins we served weren't baked in house. We brought them in fresh baked from another bakery and the head baker decided there was no reason why we couldn't bake them ourselves. In order to do that she needed to hire another baker... and I knew just the person!
I went to her and applied for the job. All right, I begged for the job. I pleaded for the job. I reluctantly admitted that I had no experience or qualifications to do the job, but I had heart and I was a hard worker. She gave me the job! I have no idea why, but looking back it was probably because I was willing to work for next to nothing.
It was a hard job and I spent very long hours there mixing endless batches of muffins... baking endless muffins... washing endless dishes. But I loved it. The best part of the job was coming up with new recipes and trying them out on the customers to see what worked and what didn't. After about a year of baking there I knew that baking was what I wanted to do with my life and so when I heard about a local culinary school I enrolled the next day.
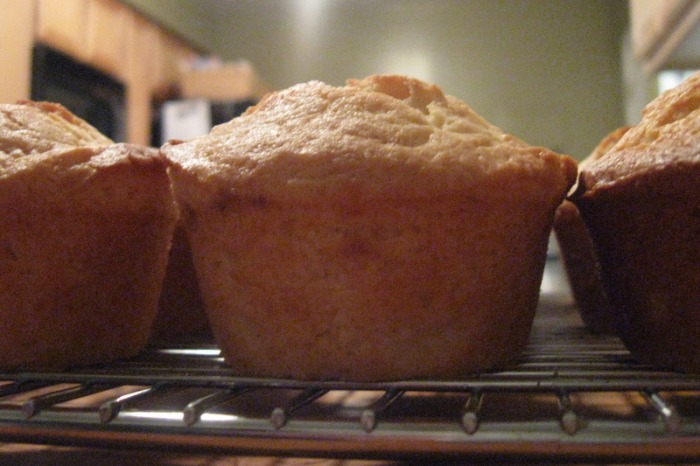
This recipe was one of my favorites. It's more of a dessert muffin than a breakfast muffin, but I won't lie, I've eaten plenty of them as breakfast! We always made them with cinnamon chips (that's where my cinnamon chip obsession started), but you can leave them plain, put Streusel on the top, add a different type of chip or eat them with a sweet spread, which is what I've done today.
-The Baker
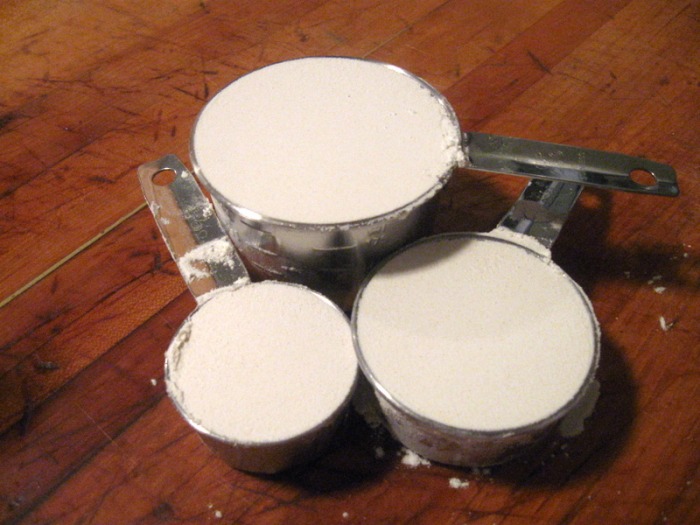
SOUR CREAM MUFFINS: (yield 9 standard muffins) - 1 3/4 C AP Flour
- 1/2 t Salt
- 1/4 t Baking Soda
- 1 C Sugar, granulated
- 4 oz Butter
- 1/2 C Sour Cream
- 1 t Vanilla Extract
- 2 Eggs, whole
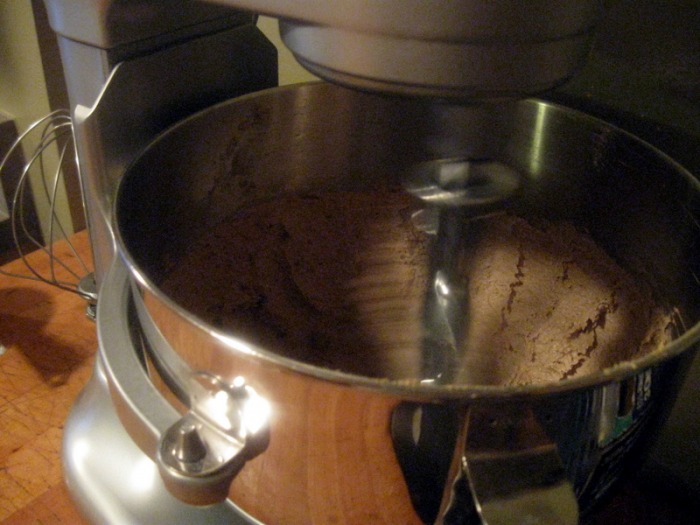
- Preheat the oven to 400 F; spray a muffin pan or line the pan with paper liners and spray the liners
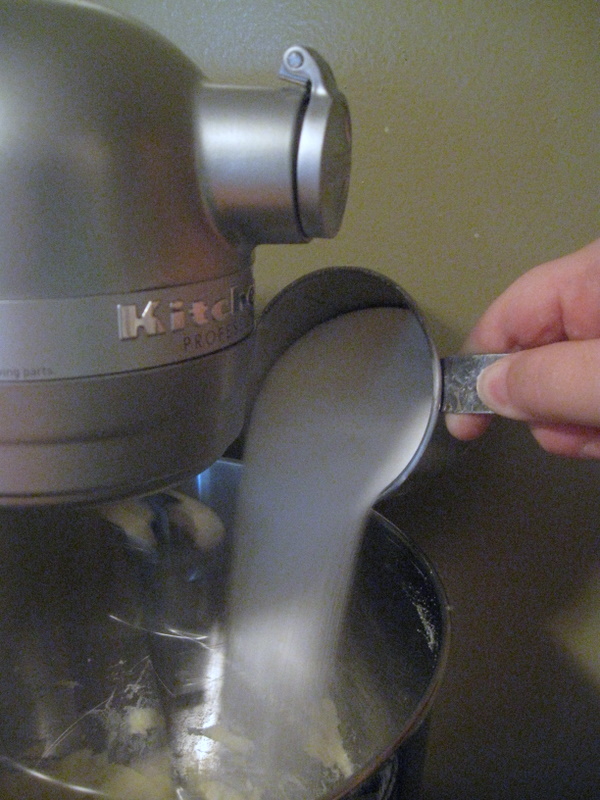
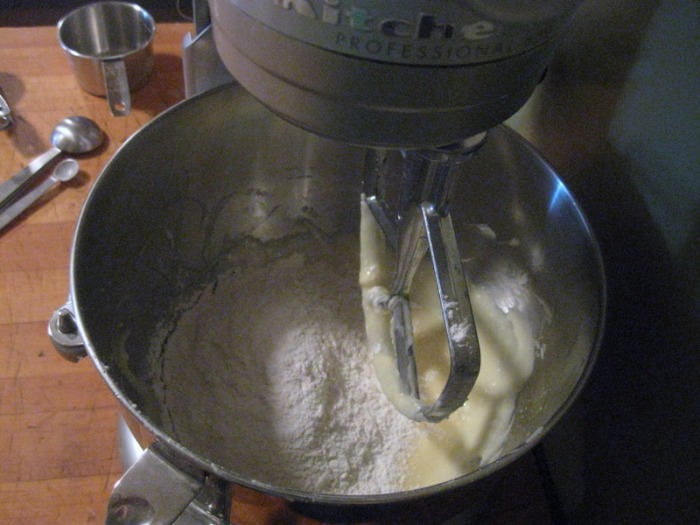
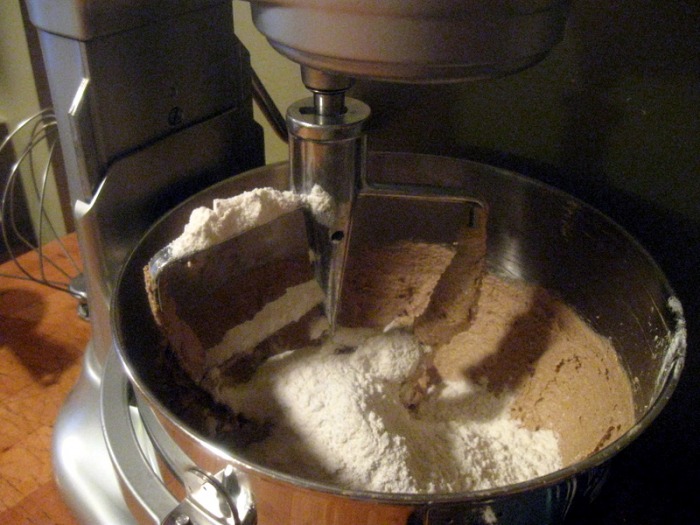
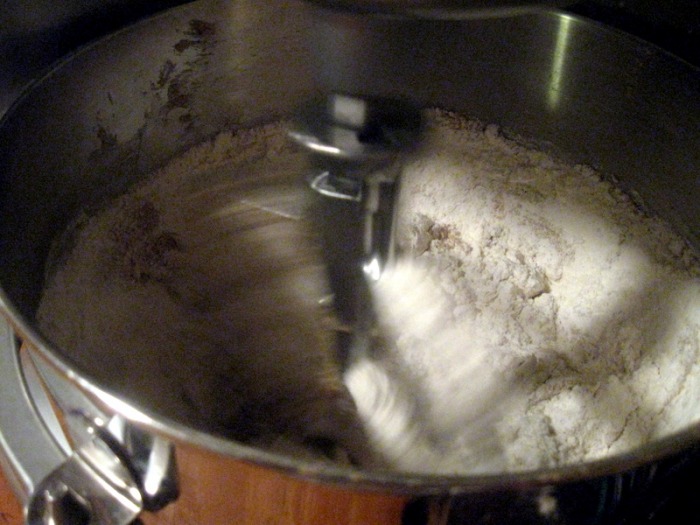
- In a small bowl, sift together flour, salt and baking soda
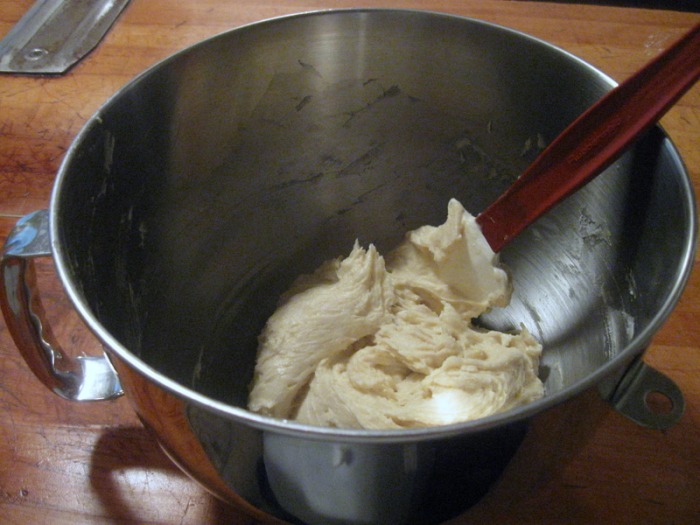
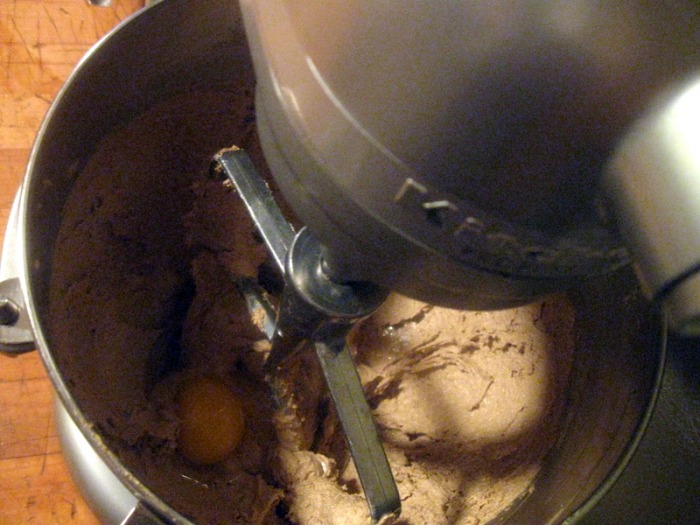
- In mixing bowl cream the butter and the sugar; beat in sour cream and vanilla, until well blended
- Add eggs, one at a time
- Stir in the dry ingredients, just until combined-do not over-mix
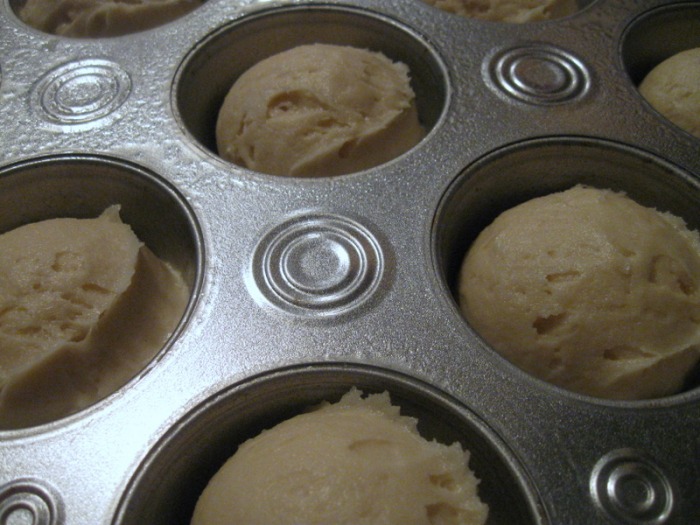
- Scoop into a pan and bake 20 - 25 minutes (a toothpick should come out clean)
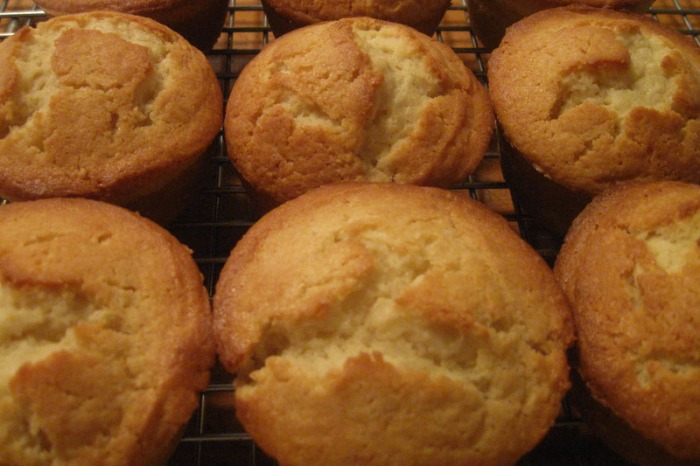
- Cool in the pan for 5 minutes; then finish cooling on a rack
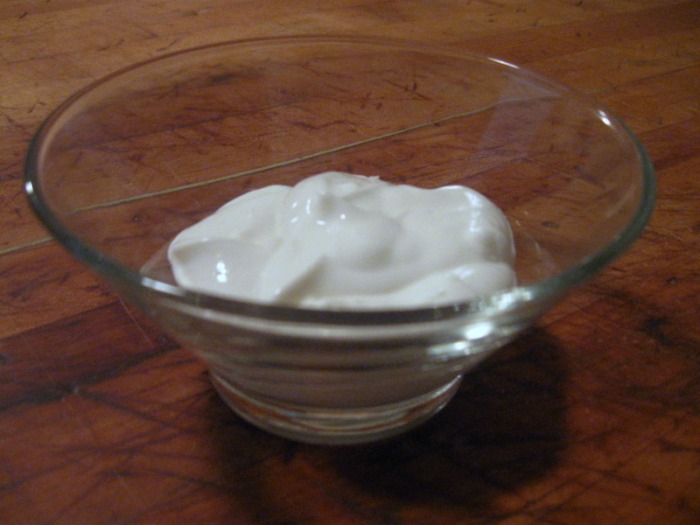
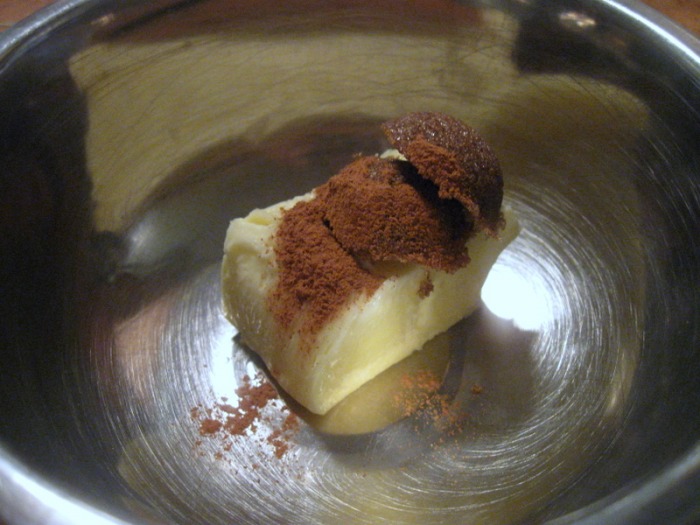
Notes: These muffins freeze really well. Add chocolate or cinnamon chips to the batter for variety. Or serve with a sweet spread. BROWN SUGAR CINNAMON SPREAD: (yield 1/4 C) - 4 T Butter, softened
- 2 t Dark Brown Sugar
- 1/8 t Cinnamon, ground
- In a small bowl mix together the butter, brown sugar and cinnamon until thoroughly combined
- Serve immediately or put in a covered container and refrigerate
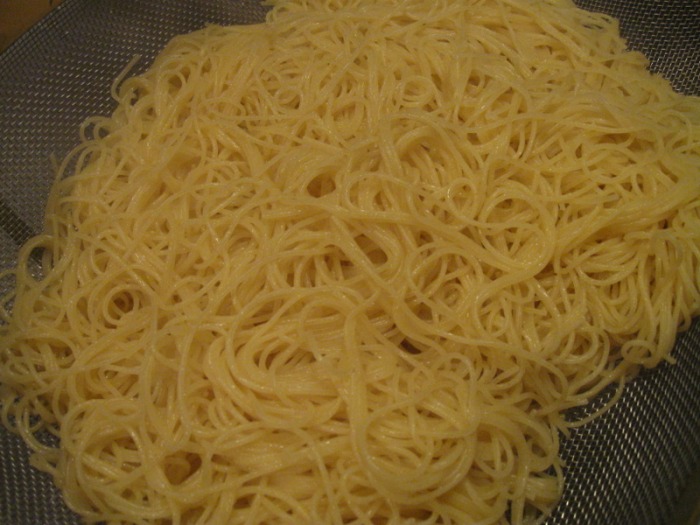
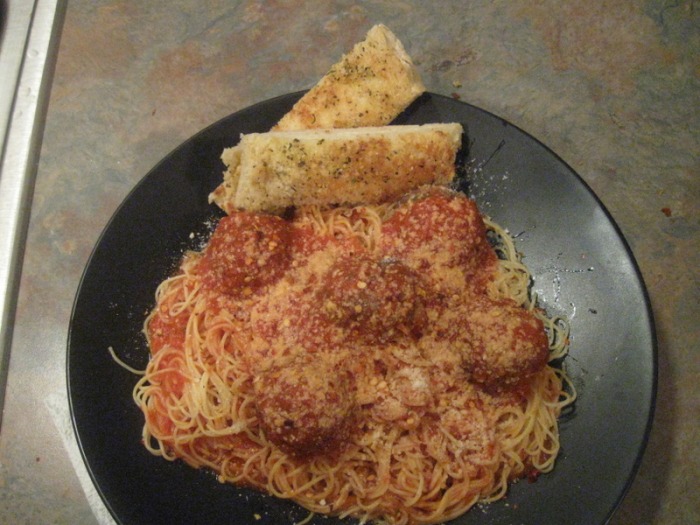
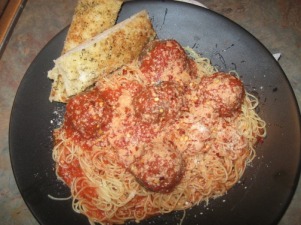 I don't think I was ever a fussy eater as a child. I ate pretty much anything my mother made me. Okay, maybe I wasn't the best at eating my veggies, but what kid is? Spaghetti was a household favorite though. Spaghetti with butter and Parmesan. Spaghetti with oil and garlic. Spaghetti with meat sauce. I loved them all. I'm sure my mother would love to tell you how many white shirts I ruined over the years with all the spaghetti sauce stains that just wouldn't come out. My favorite has always been Spaghetti and Meatballs. As a child I would spend a weekend here and there with my grandmother. I'd go there on a Saturday, and she would have already been to the store and stocked up on all my favorites. We'd have dinner on Saturday night, and breakfast on Sunday before going to church. Saturday for dinner she'd make me a frozen spaghetti dinner and broil off some garlic toast. I'd sit with her in the living room and we'd watch some TV (she loved the Golden Girls), and I felt like a king. Hey when you're young, a Stouffer's dinner will do that to ya.
Everyone has a way of making their own meatballs. It's usually taught to us by our mothers or grandmothers and, for sentimental reasons, rarely changes over the years. I mean, you don't want to be the one in the family who breaks tradition, right? Well fortunately for me, there is no family meatball recipe. I guess that means it is up to me to start one.
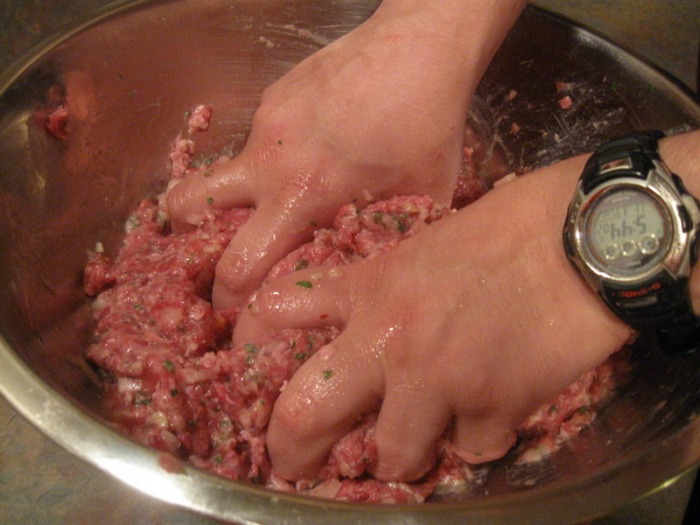
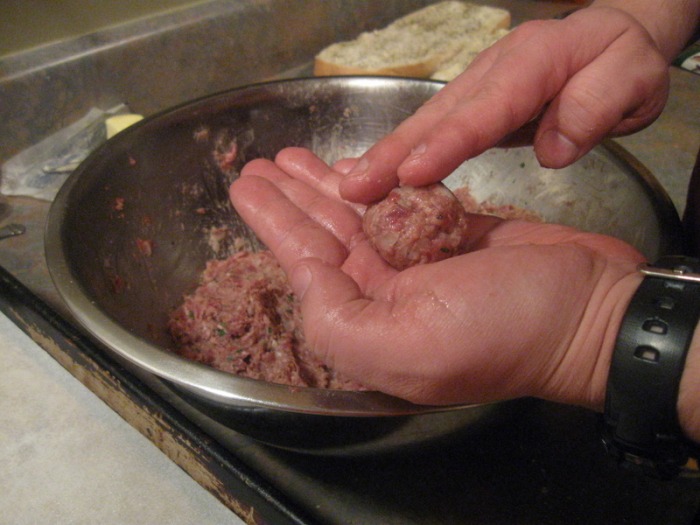
Here is a recipe I came up with on the fly, which I have to say, is pretty darn good. The key to a good meatball is two-fold. First, it has to have some moisture. If you add too many bread crumbs, it will be dry and dense. The second part is the rolling of the meatballs. You don't want to over-work the mix. Roll the meatballs in your hands and try not to pack them too much. You want it to be moist, light and tender enough to be cut with a fork. It is your choice whether or not you want to simmer them in the sauce or not, but if you have the time, I would recommend it. This is a pretty large recipe, but I like to use the leftovers to make meatball sandwiches!
-The Chef
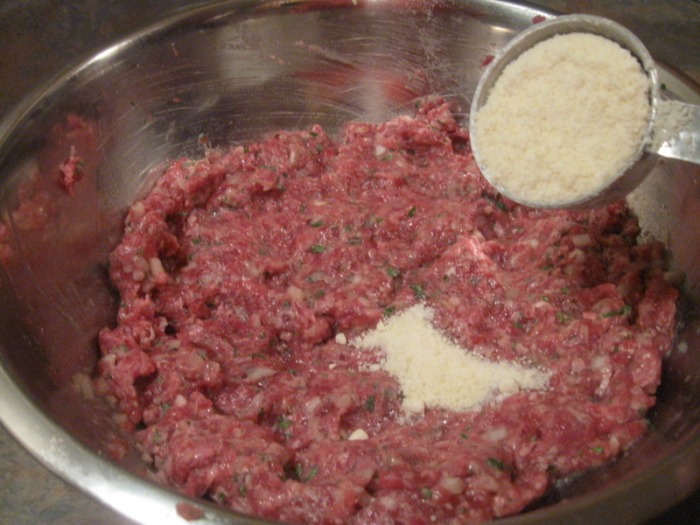
SPAGHETTI AND MEATBALLS WITH HOMEMADE GARLIC BREAD- 2 lbs ground beef
- 1 lb ground mild Italian sausage
- 4 cloves garlic, minced
- 1 onion, finely minced
- 1/4 cup chopped fresh Parsley
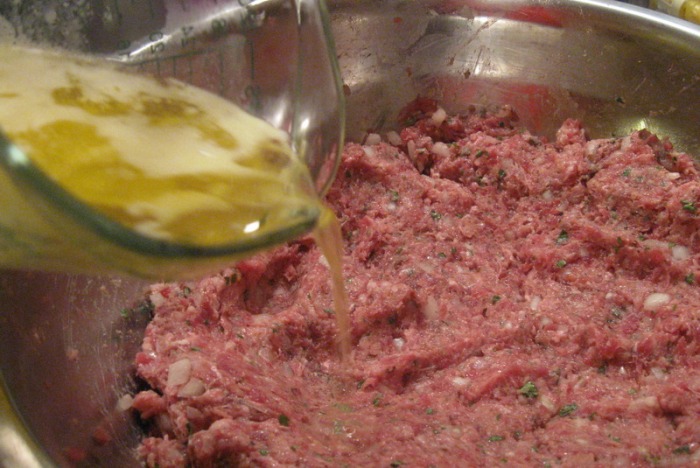
- 3 eggs, beaten
- 4 oz milk
- 4 oz unsalted butter, melted
- 1/2 cup Parmesan/Romano Cheese
- 1 3/4 cup bread crumbs
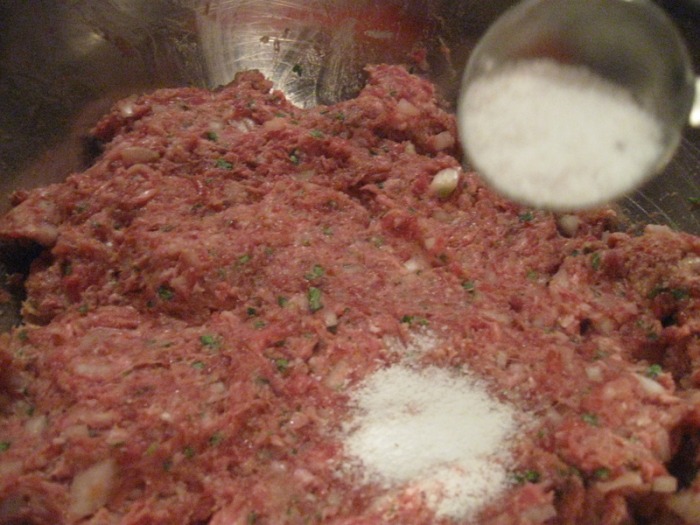
- 1 Tbsp kosher salt
- 1 tsp ground black pepper
- Mix the beef, sausage, chopped garlic, minced onions, and chopped parsley in a mixing bowl until thoroughly mixed
- Add the eggs, milk, and melted butter; mix; mixture should be very loose
- Add the cheese, bread crumbs, salt and pepper; mix
- Refrigerate 30 min-1 hour
- Preheat oven to 350 degrees
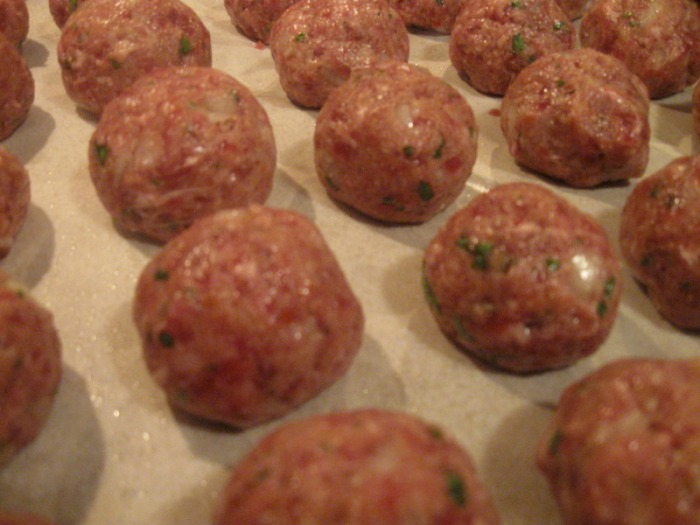
- Roll meatballs the size of large golf balls; place on parchment lined sheet pan sprayed with non-stick cooking spray; bake meatballs at 350F for approx 15 minutes, or until center is 155 degrees
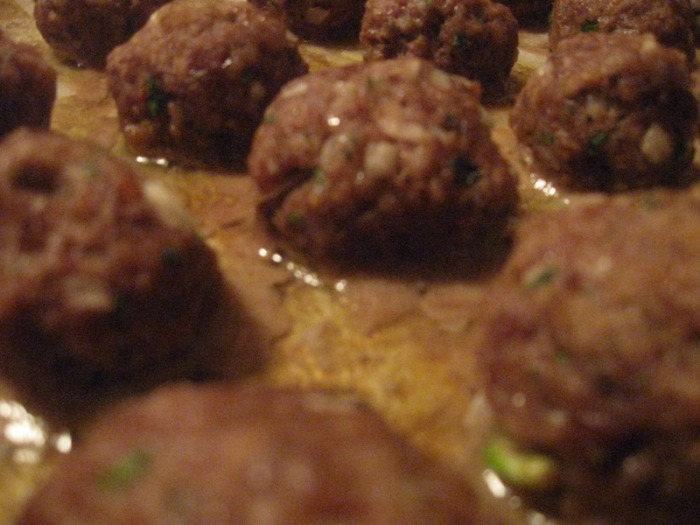
- Remove from oven; place cooked meatballs in a Marinara sauce of your choice and simmer for 15 minutes
- Serve over cooked spaghetti, or your choice of pasta
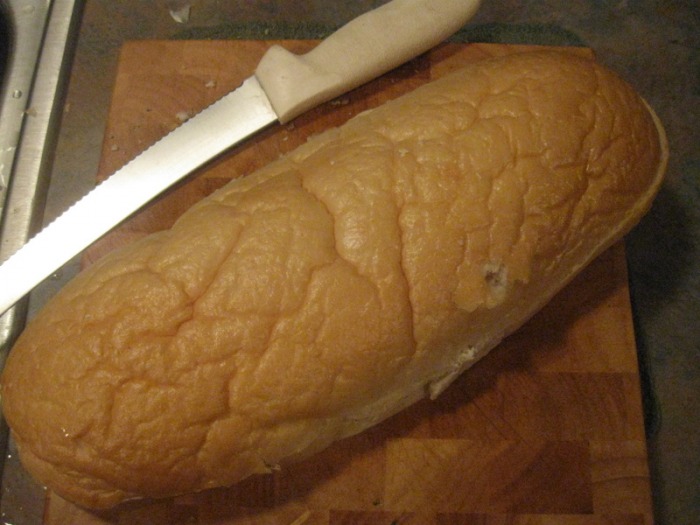
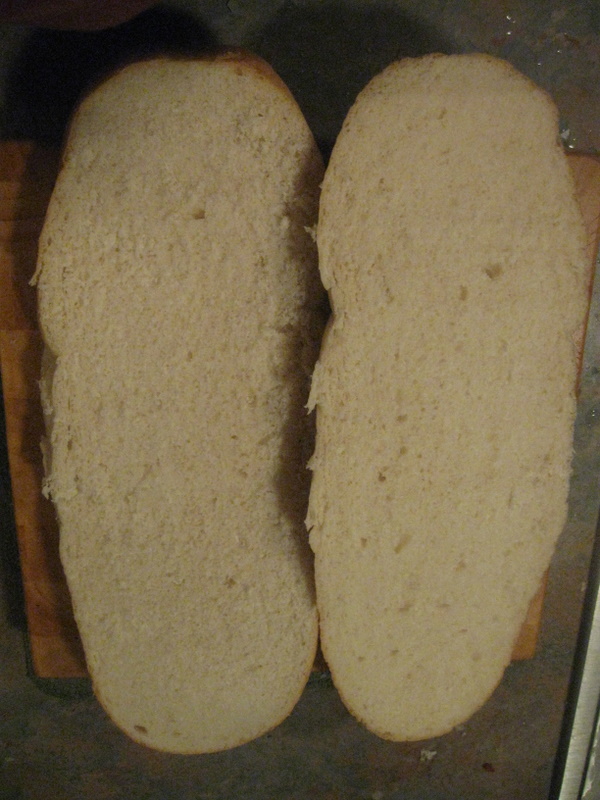
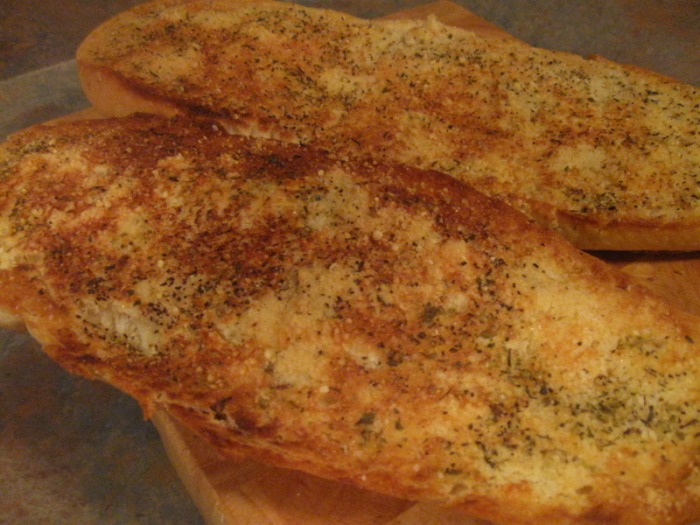
HOMEMADE GARLIC BREAD:- 1 loaf French bread, or other baguette style bread
- 4 oz butter, room temperature
- 1/2 tsp dried Italian seasoning
- 1/4 tsp salt and pepper
- 2 Tbsp Parmesan/Romano cheese
- 2 cloves peeled garlic, whole
- Split bread in half horizontally
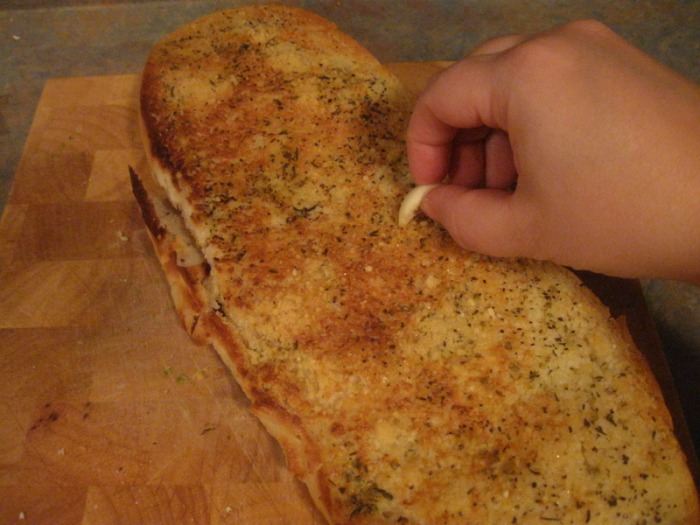
- Spread with butter and sprinkle with Italian seasoning, salt, pepper and cheese
- Place in 350 F degree oven for 12 minutes; remove and bake under broiler additional 1-2 minutes to get top golden brown
- Remove from broiler and immediately rub peeled garlic cloves all over surface of the garlic bread
- Slice and enjoy
 I know this will sound really dumb, and I debated whether or not to even admit it, but there are some things that would never occur to me to make. I'll see something in a bakery and buy a piece and later if I want another I either make another bakery run or I kick myself for not having bought more. Then it dawns on me that I can make pretty much anything I want.
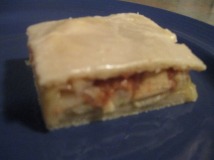
I love those apple squares you get at the bakery. It's a pastry crust loaded with apples and a nice sweet glaze. Nothing fancy, but that's what makes it so good. You don't always need fancy.
A couple of days ago The Chef came home with a bunch of apples and asked me to make some baked apples. I wasn't very inspired by that and pretty much just let the apples sit while I tried to get motivated to bake them. After a couple of days I came to terms with the fact I was never going to bake them. So, what could I do with them? Finally it came to me... I could make the Apple Squares I love so much!
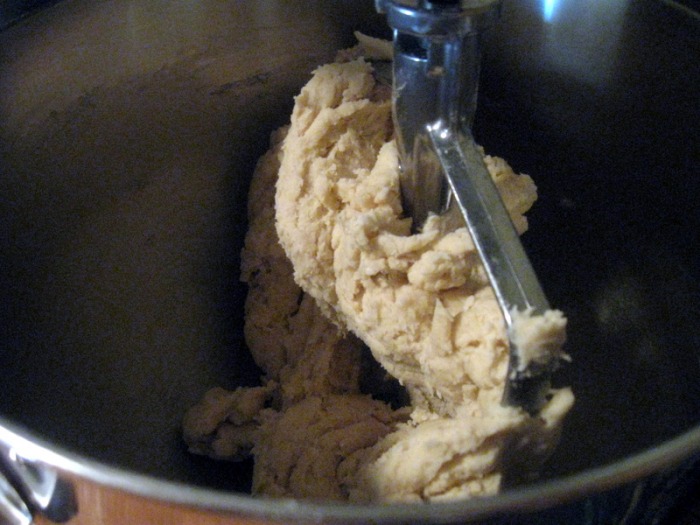
It's been so long since I had one that I couldn't really remember what exactly went into it so I got on the Internet to start researching. Good thing I did because the pastry crust is a pretty unique one. I would have just made a traditional sweet pastry crust, but it would've been off the mark and I probably wouldn't have been able to figure out why. The crust is in fact a yeast raised dough. Once I tasted it I was thrilled because it was dead on!
Like so many baked goods there are a million recipes floating around, but the one that seemed to keep coming up was from the King Arthur Flour catalogue. I read over several different blogs that all referenced that particular recipe, so I decided not to reinvent the wheel and used that one, with just a few minor changes. I assumed I would make it once and see where it was wrong and then correct it and make it again. Not so... it was spot on! It really tasted just like the squares I've gotten at the bakery, but as an added bonus, not only did I get to eat a tasty pastry, but my house smelled wonderful!
The key to making this successfully is to be really organized. There are a lot of steps and you need to prepare the different components. Once you've got all your components ready it's a snap to put it together. Making the whole thing start to finish took me about two hours of pretty consistent work, so you do need a chunk of time to get it finished.
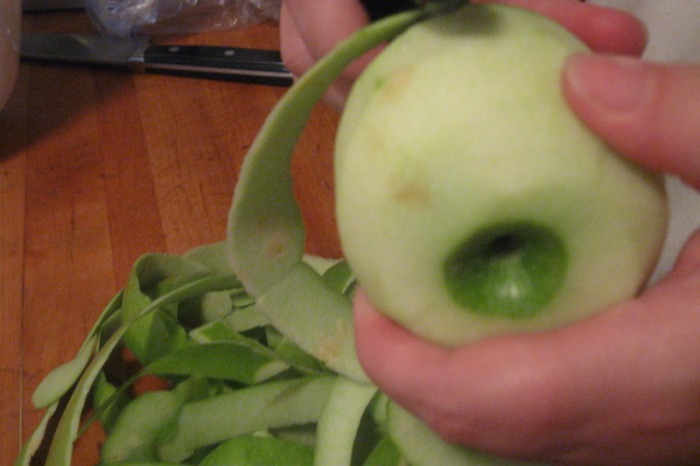
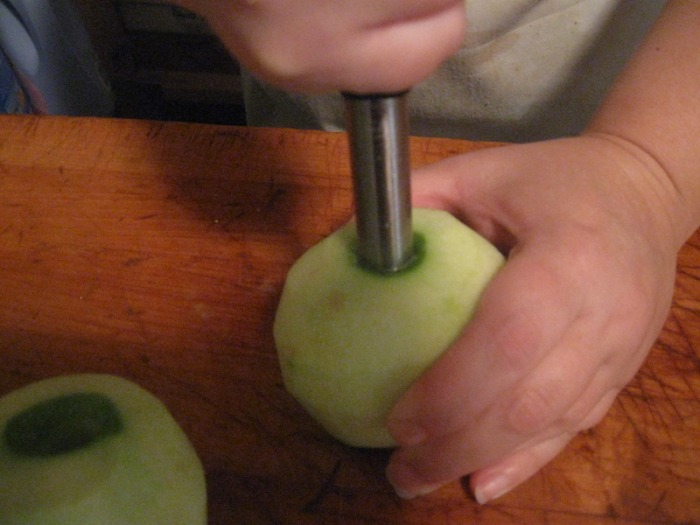
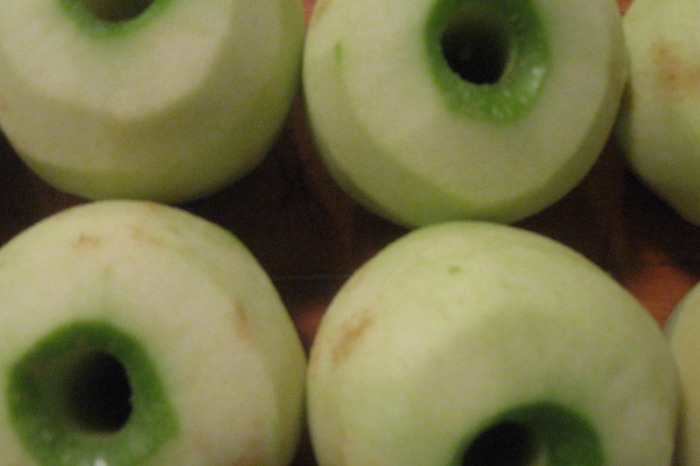
I used eight medium sized Granny Smith apples, but you could easily increase the quantity of apples if you want the square to be really loaded. Other good additions would be some raisins, craisins or dried cherries. You could probably cheat and save yourself some time by using prepared apple pie filling, but keep in mind that those apples tend to be a little mushier and one of the things that makes the Apple Squares so good is that the apples stay fairly crisp. I've never tried with the canned apples, so I can't give them a thumbs up or thumbs down.
-The Baker
GLAZED APPLE SQUARESyield: 18" x 13" pan Pastry: - 1/2 C Milk, warm
- 2 Eggs
- 2 t Yeast, instant
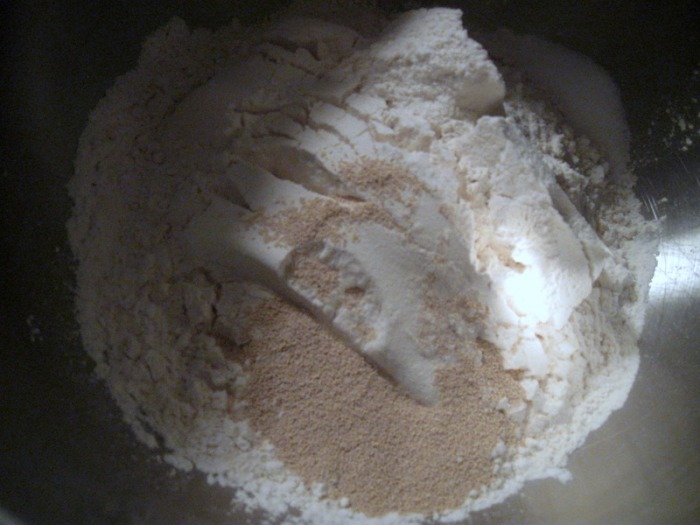
- 4 C All-purpose Flour
- 1 t Salt
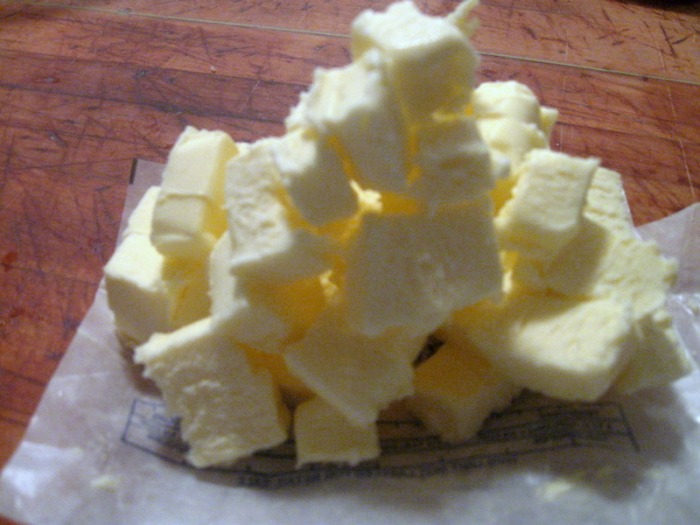
- 8 oz Butter, cold, cut into pieces
- In a small bowl, beat the eggs and milk together, and set aside
- In a large bowl, combine the yeast, flour, and salt
- Cut in the butter with a mixer (or you could use a pastry blender or two knives) until the mixture resembles coarse crumbs
- Add the egg/milk mixture, stirring until a soft dough forms
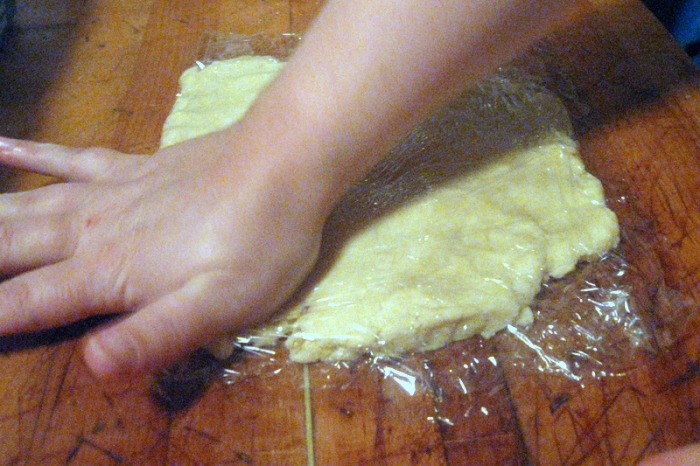
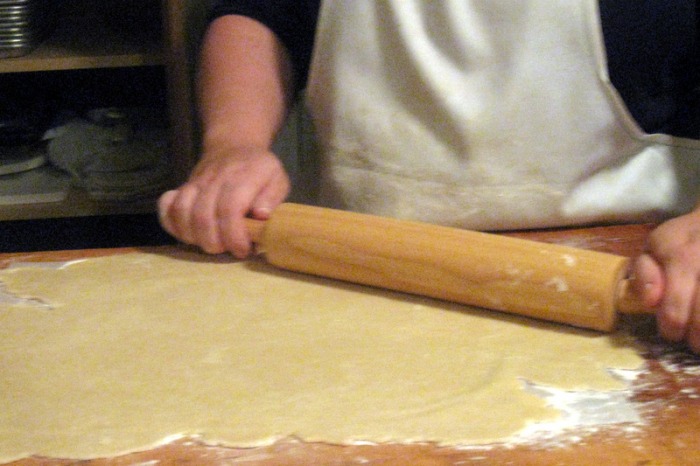
- Divide the dough in half, form into thin rectangles, wrap in plastic wrap, and refrigerate for about 30 minutes
Apple Filling: - 3/4 C Sugar, granulated
- 1/2 C All-purpose flour
- 1/4 t Salt
- 2 t Cinnamon, ground
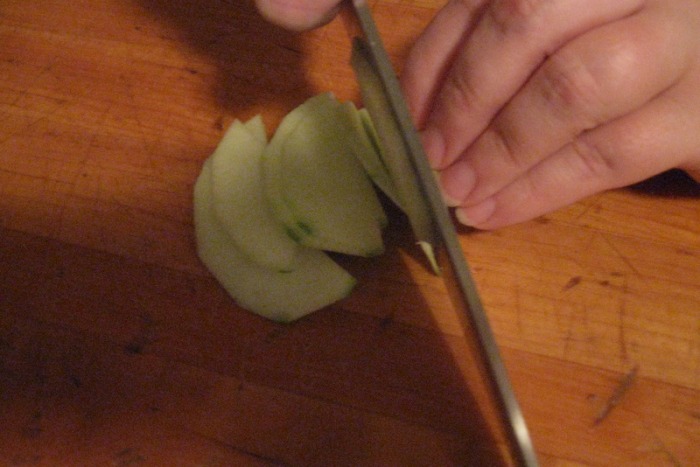
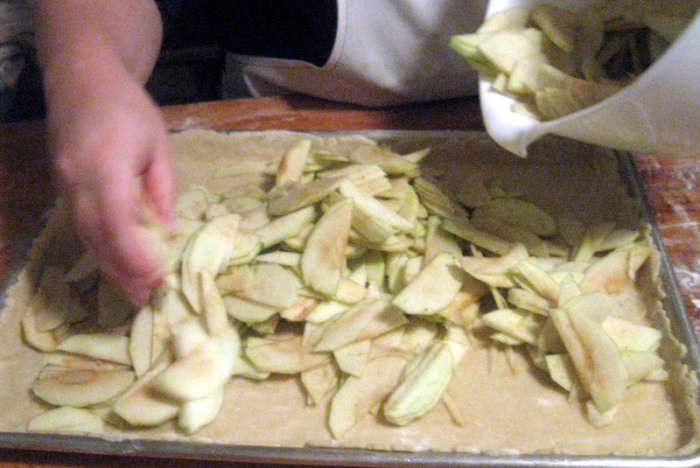
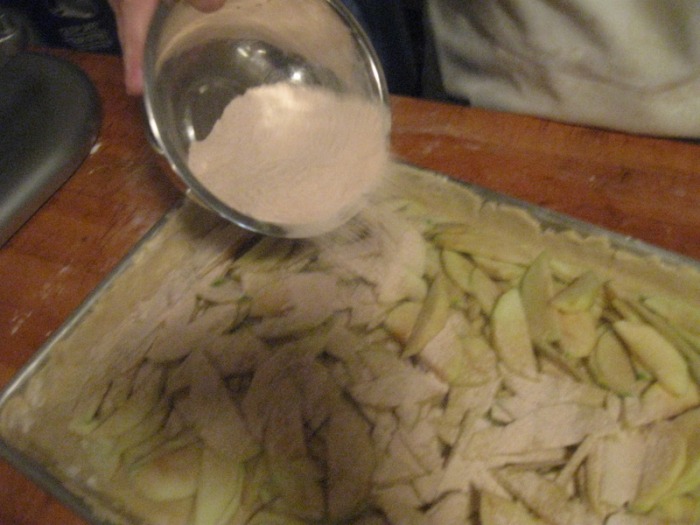
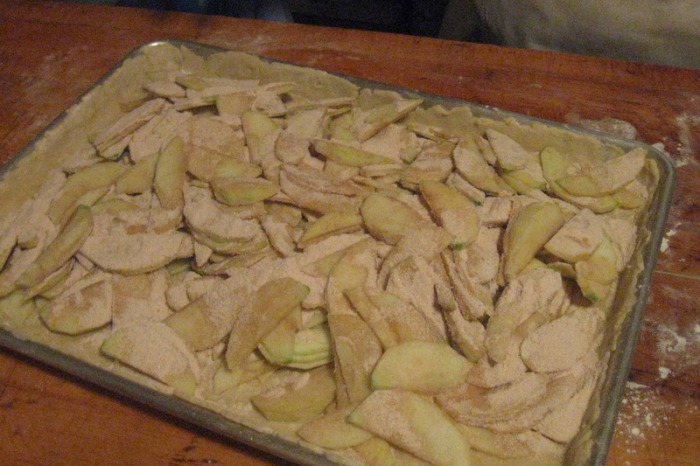
- 10 C (about 3 lbs before peeling) Tart cooking apples; peeled, cored & very thinly sliced
- In a small bowl, combine together the sugar, flour, salt, and cinnamon; set aside
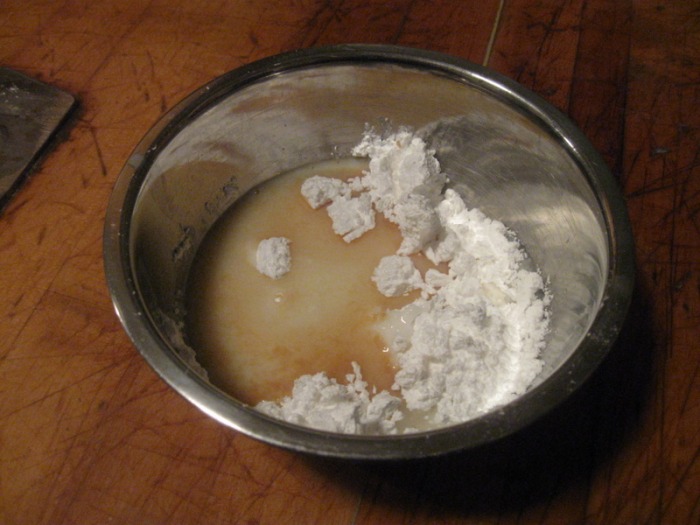
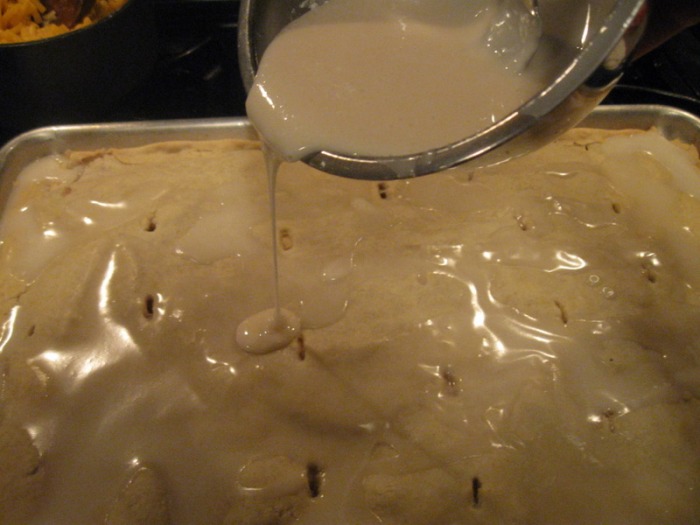
Glaze: - 3 C Powdered sugar
- 6 T Milk
- 2 t Vanilla Extract
- In a bowl, combine the sugar, milk, and vanilla until smooth; set aside
Putting it all together: - Lightly grease a 13 x 18-inch baking pan
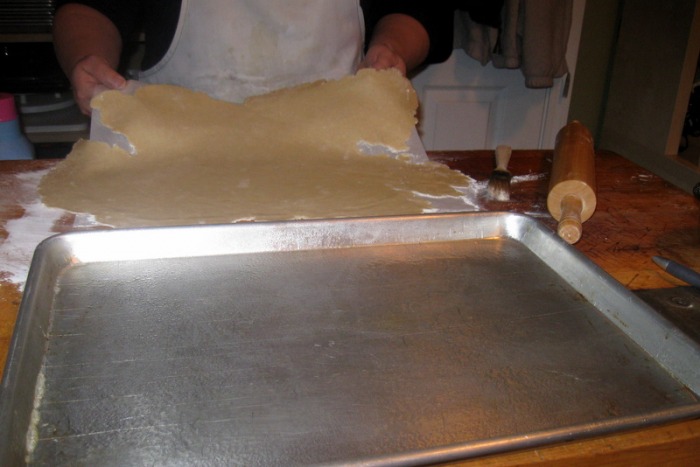
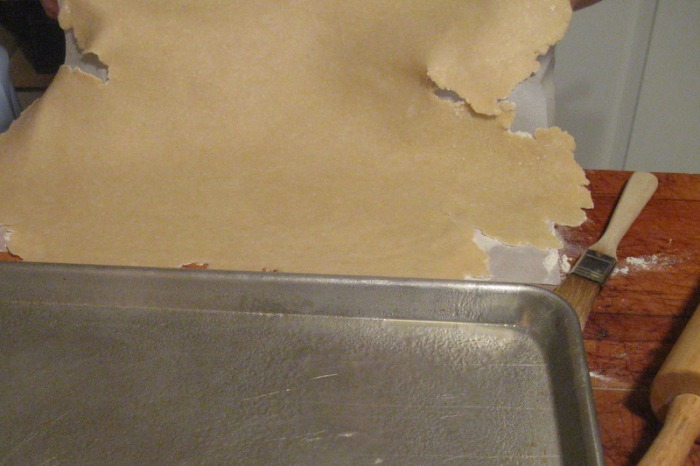
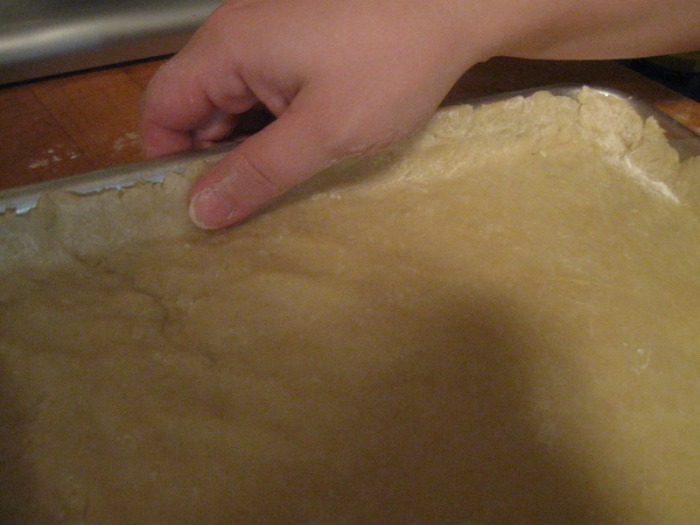
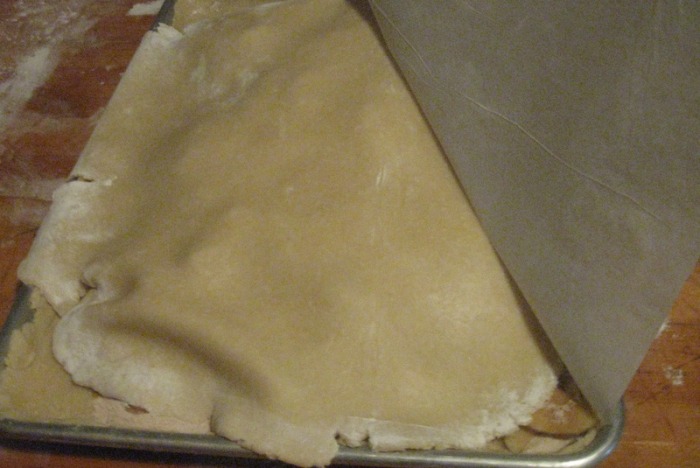
- Cut a piece of parchment paper the size of the 1/2 sheet pan; remove one portion of the refrigerated dough and roll it over the parchment paper into a rectangle (the dough will be fairly thin); transfer the dough to the prepared baking pan by flipping it over into the pan and gently peeling the parchment off, then smoothing the dough where it needs it and working the dough up the sides of the pan
- Spread the apples over the dough being sure they are level and not domed, then sprinkle with the sugar mixture
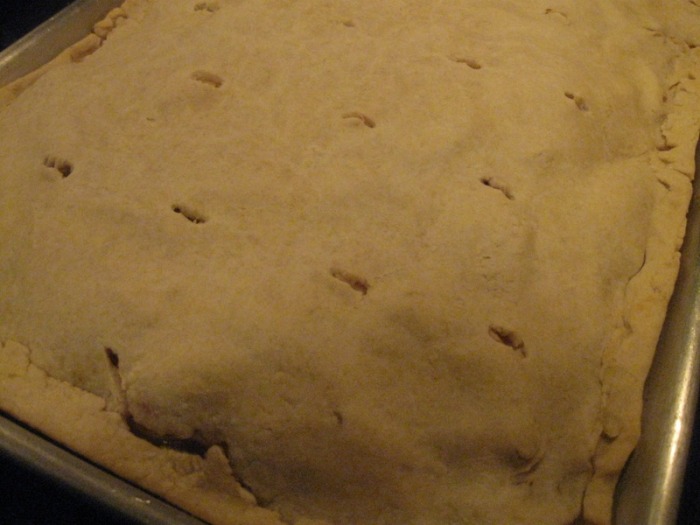
- Roll out the remaining dough and place it over the top of the apples; pinch the edges together; cut steam vents in the top
- Gently brush the top with melted butter and cover with plastic wrap lightly, and let rise in a cool place for about 1 hour
- Towards the end of the rise, preheat the oven to 350 F
- Bake the pastry for approximately 25 to 30 minutes, until it’s golden brown; remove from the oven and cool on a rack for 20 minutes
- Drizzle glaze over the cooled bars; let cool completely; cut into squares
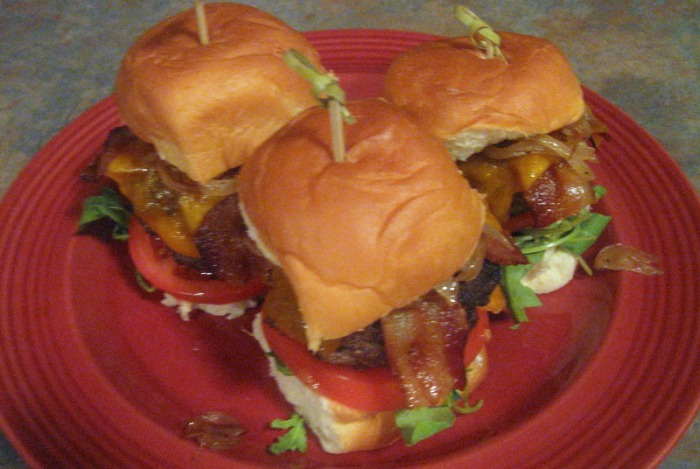
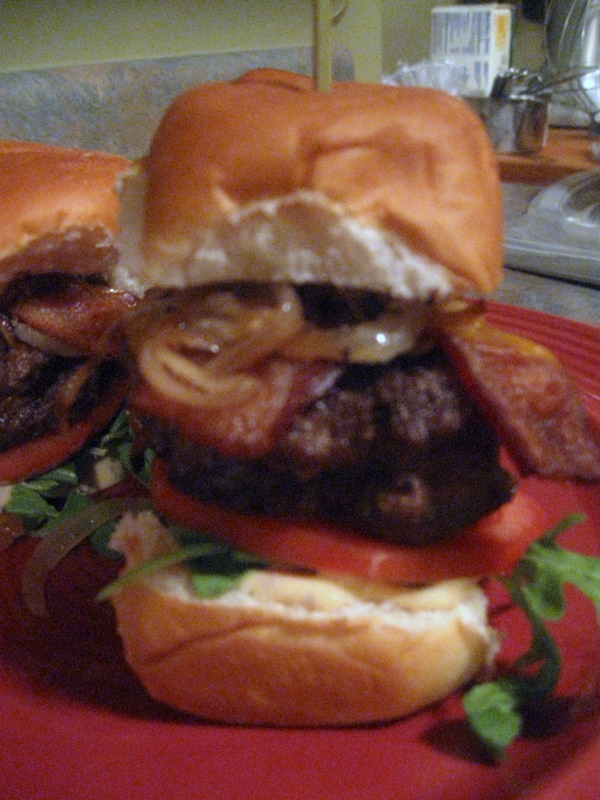
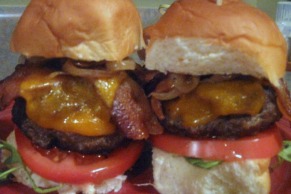 I miss Summer. It's only early November, but I already miss it. My absolute favorite thing to do is have a barbecue. But whether I'm cooking for a crowd or my family, I always look for a way to use the grill. And where there is a grill, you'll surely find hamburgers of some kind. Burgers are the quintessential American food. I guess because you can top them any way you want so everybody has their chance to, dare I say, "Have it their way".
I suppose you could say they are one of my vices. I don't think I've ever made the same burger twice. No joke. There is always something I change up. I've never written down a burger recipe. And I've made them hundreds of times. To this day, that is probably my biggest challenge as a chef. I tend to cook with what I have on hand. Maybe that will be my New Year's resolution?!
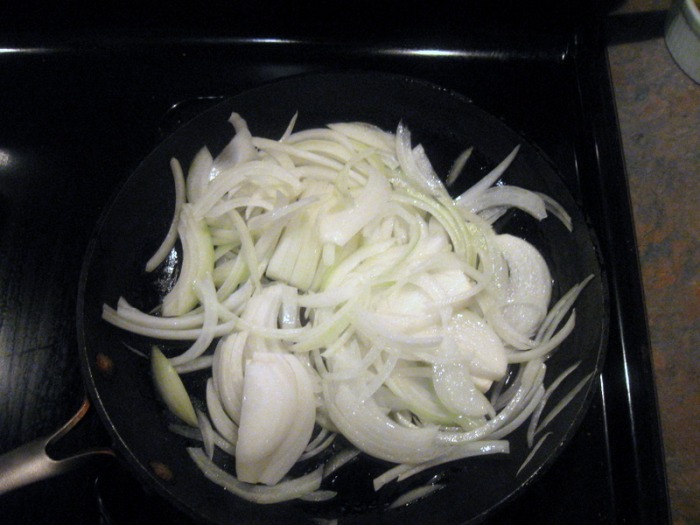
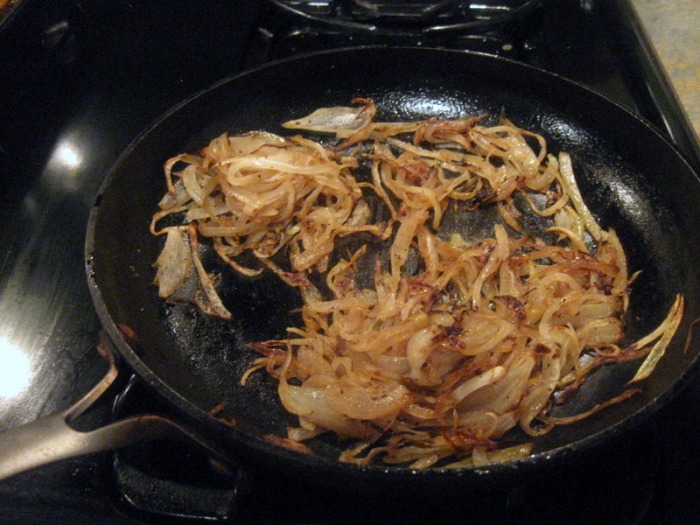
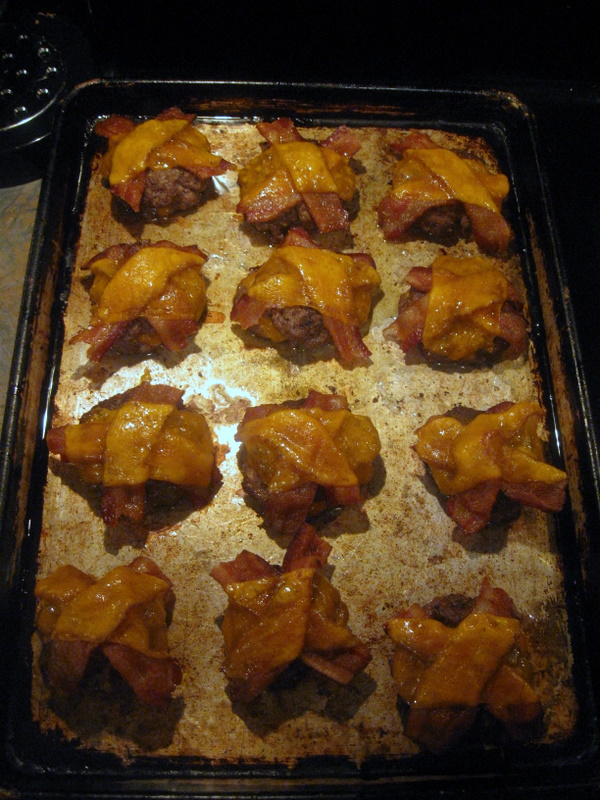
So that being said, use what you have on hand. Change it up a bit as you see fit. One thing that I have been partial to lately, though, is the "mini-burger". In this recipe, I use mini Hawaiian bread for buns. Yum! The chipotle mayo gives it some kick, and the arugula adds a nice peppery element that iceberg lettuce just doesn't have. The bacon give it smokey-ness, the cheddar adds some sharpness, and the caramelized onions impart a little sweetness. I'll admit, I had more than "my fair share" of these burgers. Maybe that's why I like mini burgers so much...................
Enjoy!
-The Chef
BURGERS- 2 1/2 lbs ground beef
- 1 Tbsp A-1 steak sauce
- 1 tsp onion powder
- 1 tsp garlic powder
- 2 tsp salt
- 1 tsp black pepper
- 1/4 - 1/2 lb. sharp cheddar cheese
- 12 slices thick cut applewood smoked bacon
- 6 oz baby arugula
- 2 tomatoes, sliced 3/8" thick
- Mix beef, A-1, onion powder, garlic powder, salt, and pepper in mixing bowl until well mixed. Form into 24 equally sized patties.
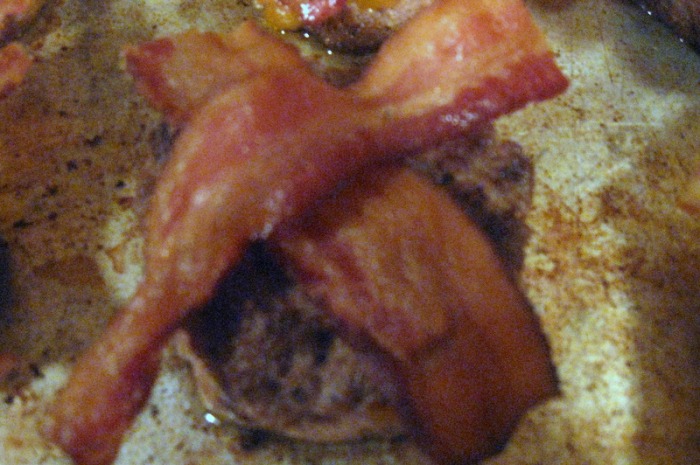
- Pre-heat oven to 350F. Cook bacon for approx 30 minutes in oven on a parchment lined sheet tray. Drain on paper towels. Reserve.
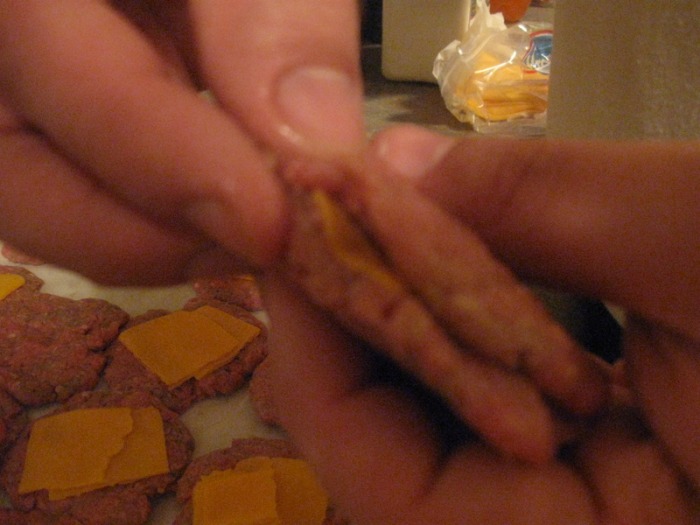
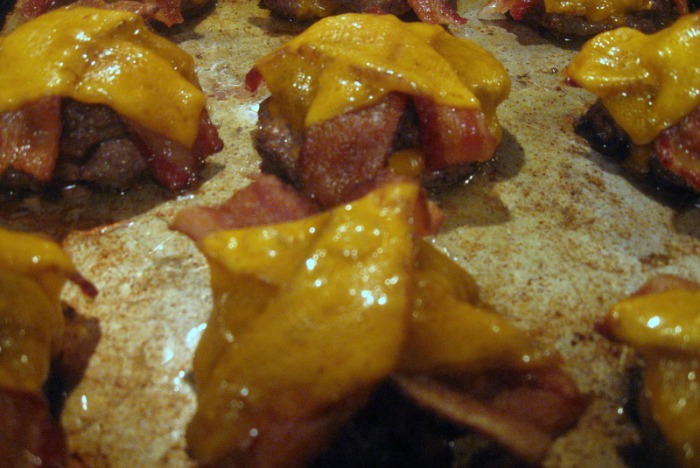
- Fold sliced cheddar into a square and place on top of 12 burger patties. Lay the remaining patties over the cheese and seal edges by pinching with your fingertips.
- For best results, use grill and cook approx 1-2 minutes on each side, or until desired doneness is achieved.
- Top with cooked bacon and more cheddar cheese. Melt cheese and assemble. From bottom to top, layer: mayo, arugula, tomato, burger, caramelized onions.
CHIPOTLE MAYO:- 6 Tbsp mayo
- 1 Tbsp Dijon mustard
- 1 tsp adobo sauce
- 1 can chipotle peppers in adobo sauce
- 1/4 tsp chopped parsley
- pinch of salt and pepper
- Remove one individual chipotle pepper from can and finely chop. (the rest can be stored in plastic bag or container in the fridge for up to 1 week).
- Place in mixing bowl. Add remaining ingredients.
- Stir. Taste. Cover and refrigerate for up to 1 week.
Note: Chipotle peppers in adobo sauce are available at most local supermarkets. Look for them in the ethnic food section by the Mexican ingredients.
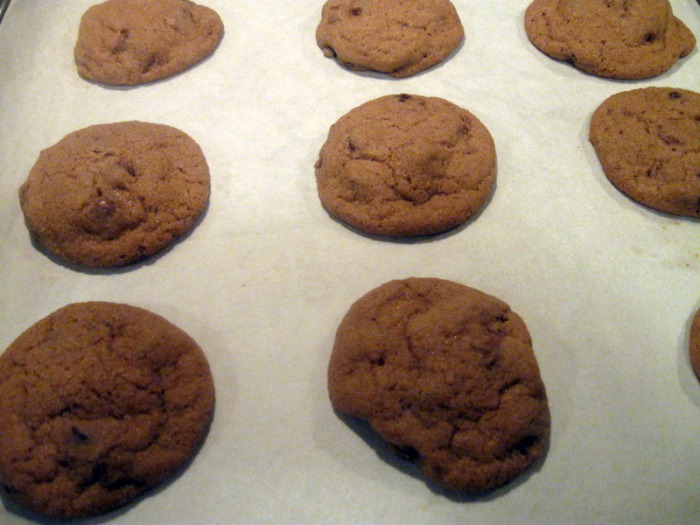
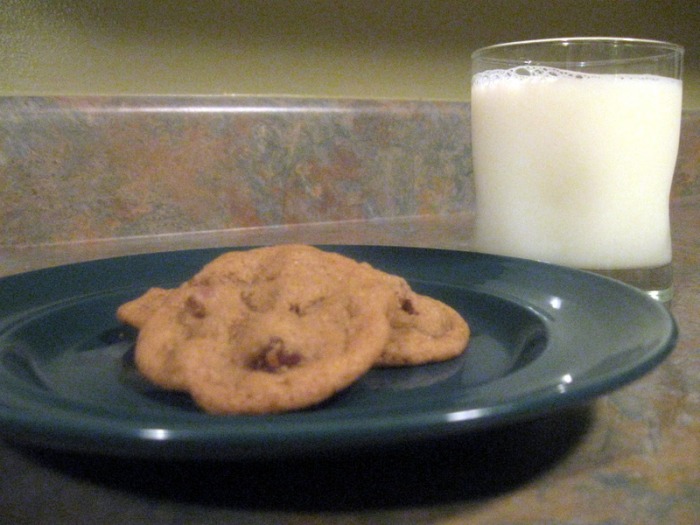
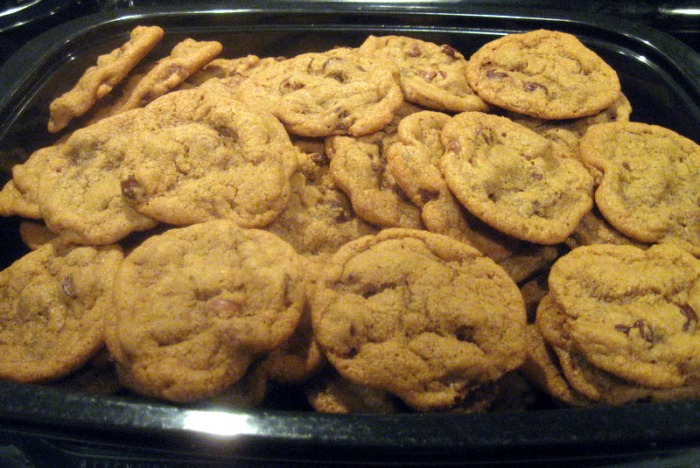
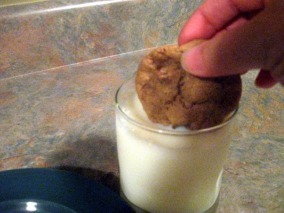 Chocolate Chip cookies may not be the most exciting cookie out there, but at our house when I say I'm going to make cookies, that's what is expected to come out of the oven. If I make something else it's usually greeted with, "you didn't make chocolate chip cookies?" Plus, I personally, have an affinity for chocolate chip cookies. I survived my entire high school career by eating two chocolate chip cookies and a pint of chocolate milk every day from the cafeteria. (How was I so skinny then, and not so much anymore???) They were always fresh out of the oven and still mostly raw. They were served on a couple of napkins and by the time I finished the napkins were soaked with grease... mmmm... The cookies were so good that my older sister and her best friend snuck back into our old school several years after they graduated to go to the cafeteria to buy some!
Needless to say, I've had a lot of experience making chocolate chip cookies. As a kid, during the holidays, we always made a variety of cookies to be given as gifts and I was always in charge of making the chocolate chips. Sometimes they would turn out fantastic and other times they were so-so and I never knew why. Many years (and many batches) later, I've learned some important points about cookie making.
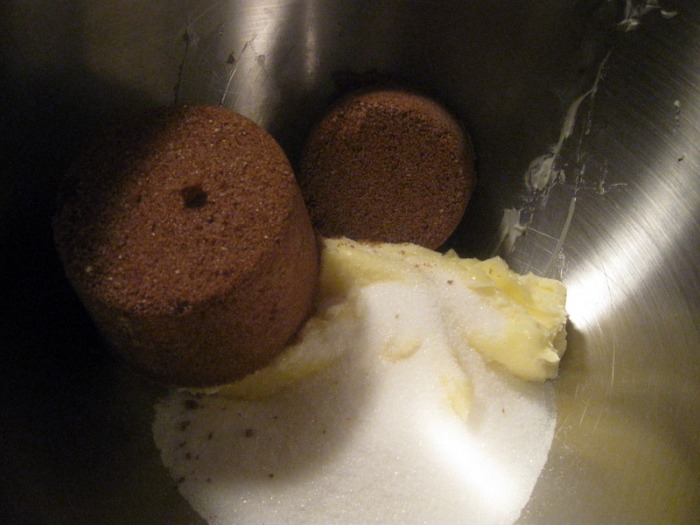
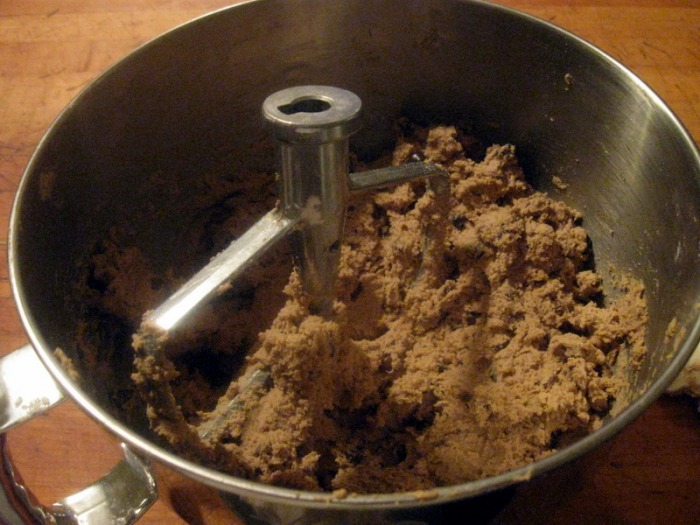
The number one thing I've learned is the importance of creaming. That's the single most important thing you can do to ensure you end up with good cookies. If you don't thoroughly cream your butter you won't introduce the tiny air bubbles that are essential for the structure of your cookie.
Start with your ingredients at room temperature. If you decide at the last minute to make cookies and all of your butter is in the fridge just pop it in the microwave for a few seconds until it softens up, but isn't melted. Then put your butter in the mixer and let it start mixing, which is introducing air into the butter. Then add your sugars. Let the butter and sugars cream at high speed until they've become a lighter color and it looks to be about double in volume. WALK AWAY IF YOU HAVE TO! Seriously, it's that important.
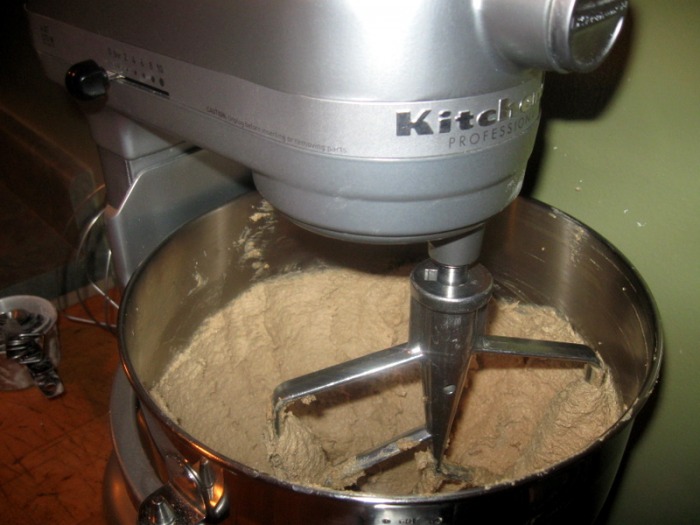
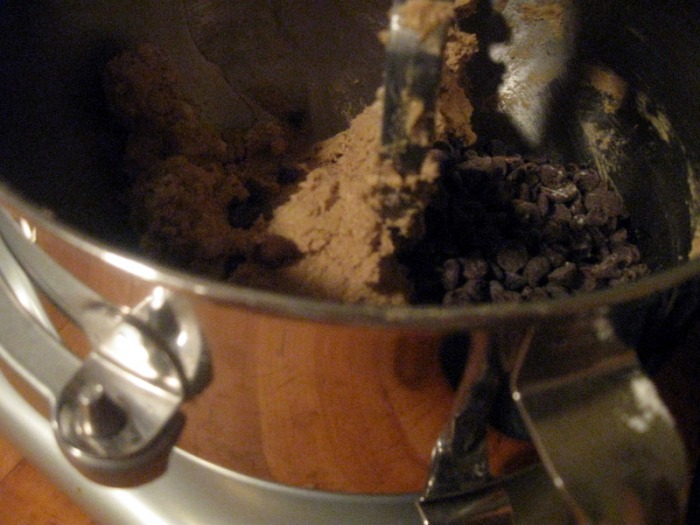
The next very important step to keep in mind is to add all of your dry ingredients ALL AT THE SAME TIME. Don't add a little of the flour, then mix, then add a little more, then mix... by doing this you're developing the gluten (a protein in the flour). If you develop the gluten too much you will have very heavy bread-like cookies and not the tender cookie you're looking for. Very slightly under-mix the flour and then add your chips and nuts (if you're using any). The reason for this is that you'll continue to develop gluten when you mix in your chips, but if you under-mix the flour, by the time the chips are mixed in the dough will be perfectly mixed.
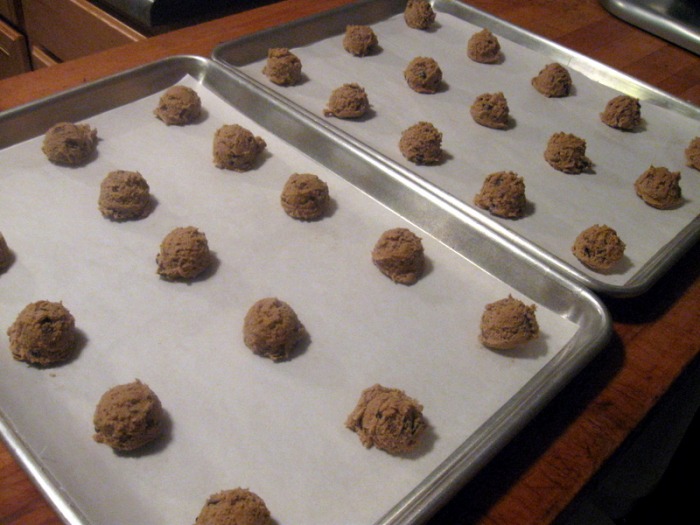
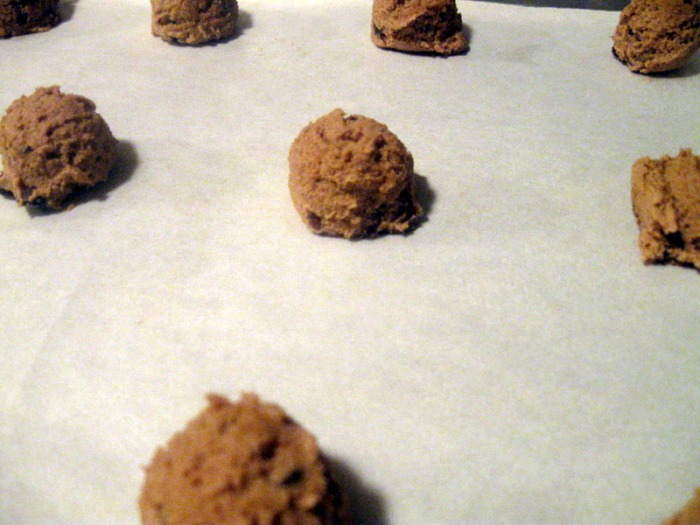
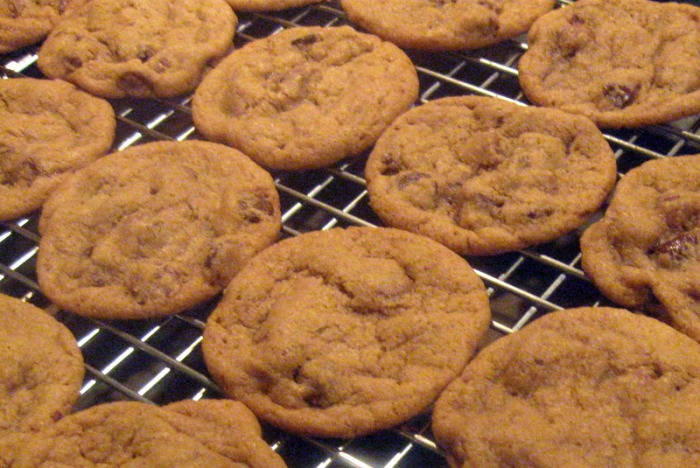
Then scoop and bake! I use a small scooper to keep the cookies all the same size and that way they all bake in the same amount of time. If you don't have a scooper just use two spoons. If you don't want all the cookies you can scoop them into little balls, line them up on a cookie pan (they don't need any space between them), wrap them really well and freeze them. Then you can just pop a few out at a time and bake them fresh for a nice little treat. You can also roll the cookies into a log, wrap in plastic and freeze. Then slice off a few or the whole tube when you're ready to bake. (Neither of those methods have ever been used at our house.)
-The Baker
CHOCOLATE CHIP COOKIES
yield: approximately 6 dozen 2" cookies- 1 C Butter
- ½ C Sugar
- 1 ½ C Dark Brown Sugar
- 2 ea Eggs
- 2 ½ C AP Flour
- ¾ t Salt
- 1 t Baking Powder
- 1 t Baking Soda
- 2 t Vanilla Extract
- 2 C Chocolate Chips (I use a mix of semi-sweet and milk chocolate)
- Cream softened butter; add sugars until light and fluffy.
- Add room temperature eggs, one at a time; just until incorporated.
- Sift together all dry ingredients; add to mixer on low; mix just until incorporated.
- Stir in chocolate chips.
- Scoop onto sheet pans and bake at 350 F for 12 minutes.
|


 RSS Feed
